Thin paper strips are perfect for making greeting cards. In my master class you will learn how to make a quilled cake.
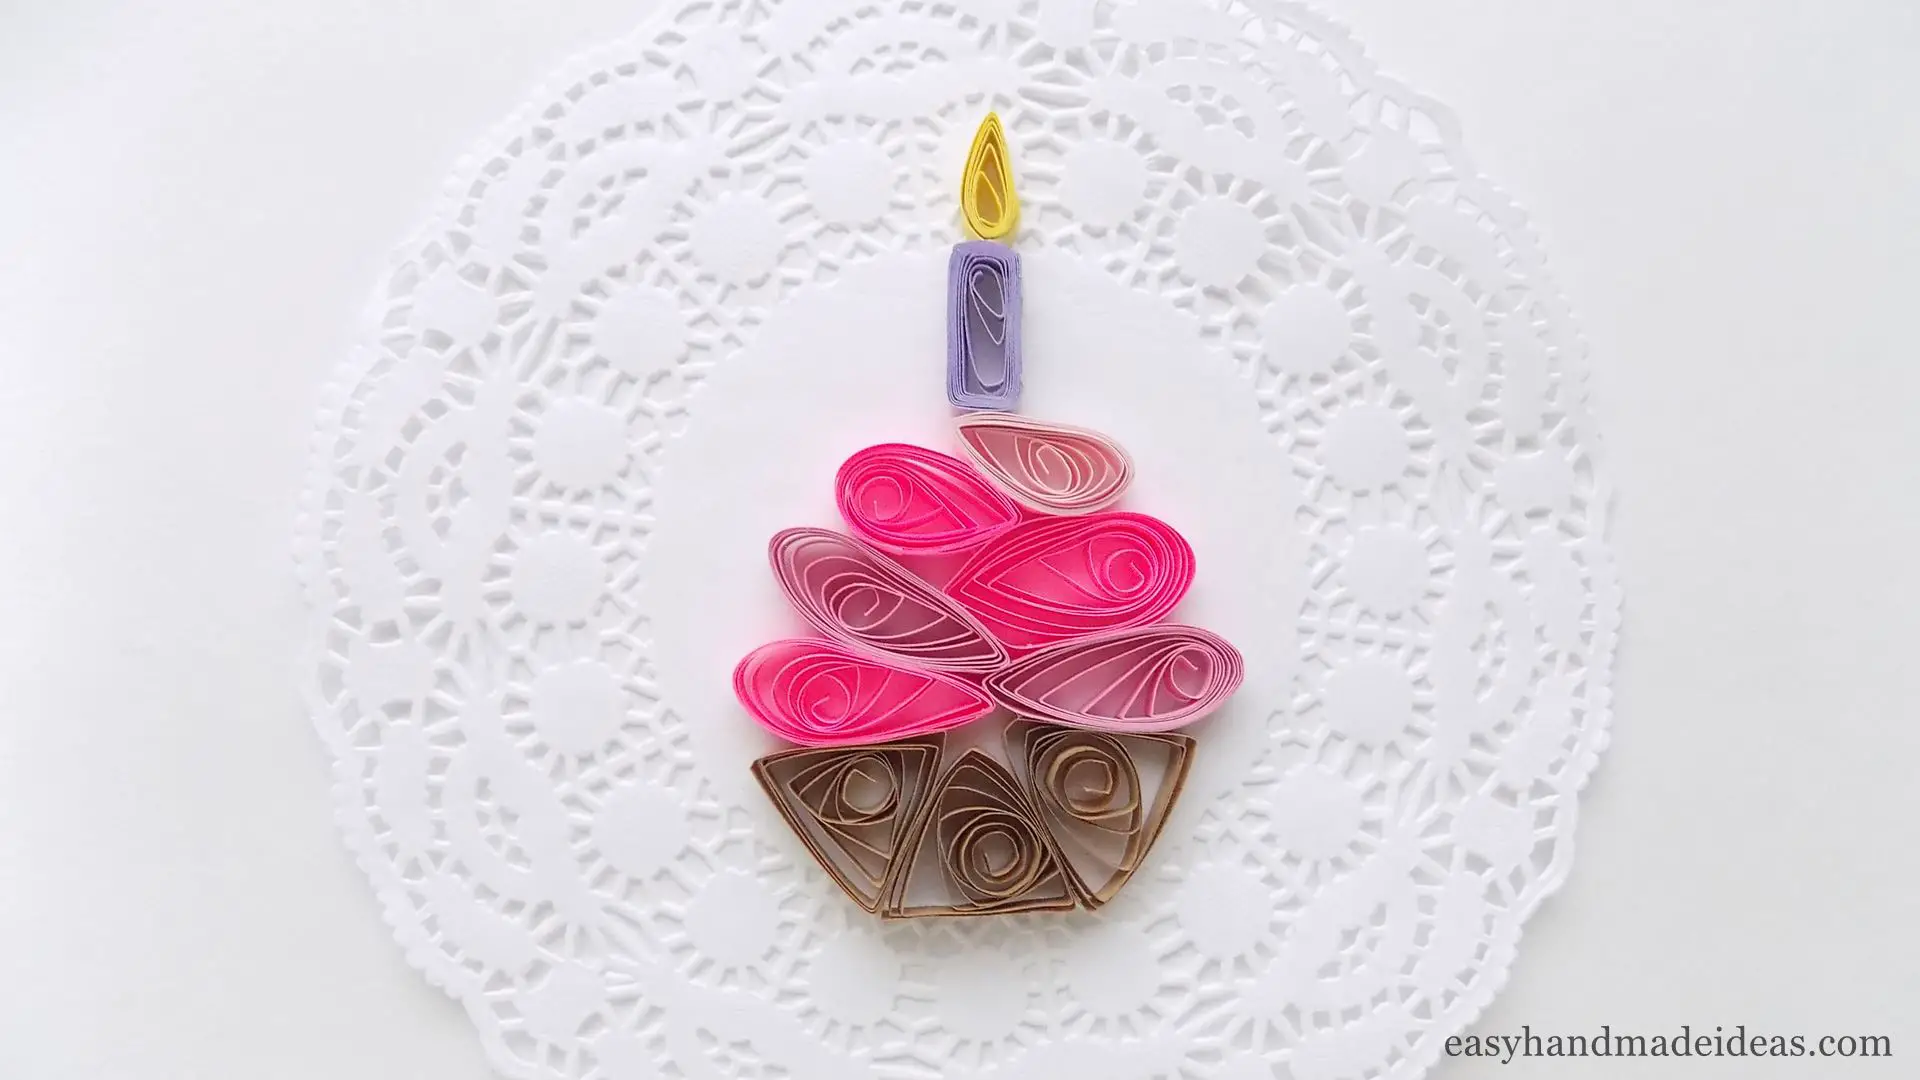
Quilled Cake
Total Time: 30 minutes
Step 1: Get the materials

Prepare paper quilling strips of the desired color. You can choose any color you like or get the ones I have.
Step 2: Make a brown loose coil

Take a brown paper quilling strip, roll it on the quilling tool and place the coil in a 20mm diameter cell on the quilling board.
Step 3: Use glue to fix the loose coil

Gently pull the coil out of the quilling tool and use glue to fix the tip.
Step 4: Make 3 brown loose coils in total

Based on the previous steps, make 2 of these blanks so that you will end up with 3 pieces.
Step 5: Make a triangle shape

Then use your fingers to pinch one side of the circle. Next, pinch both sides of the rest of the circle so that you get a triangle shape.
Step 6: Make 3 triangle shapes

Make a triangle shape from the other 2 loose coils. You’ve got the pieces for the base of the cake.
Step 7: Make the bottom of the cake

Glue the triangles together to make a trapezoidal base.
Step 8: Make the pink loose coil

Use pink paper strips to create the cream of the cake. Roll one of them into a coil and place it in the 20mm cell of the quilling board.
Step 9: Fix the tip of the pink loose coil

Take the loose coil out of the quilling board and glue the tip.
Step 10: Make a teardrop coil

Then use your fingers to pinch only one side of the loose coil to make a teardrop shape.
Step 11: Make 4 teardrop coils

Using the previous steps, make another 3 teardrop coils for a total of 4.
Step 12: Make a light pink loose coil

Roll the strip into a 15mm diameter cell on the quilling board.
Step 13: Use glue to fix the coils

Take out the coils and fix the tip with PVA glue.
Step 14: Make 2 teardrop coils

Then pinch the coil on one side with your fingers to make a teardrop coil. Make a second teardrop coil from a different shade of pink strip in the same way.
Step 15: Glue the teardrop coil onto the cake base

Glue the largest pink teardrop coil onto the brown base of the cake.
Step 16: Glue a second teardrop coil of the same size
Place a second piece the same size as the first teardrop coil next to it.
Step 17: Glue another two teardrop coils onto the cake

Start laying the cream on the cake in this way, i.e. gluing more pieces.
Step 18: Glue the remaining teardrop coils onto the cake

Add small teardrop coils made from 15 mm circles.
Step 19: Make a yellow and lilac loose coils

Roll a 10mm circle from half of the yellow paper quilling strips and a 15mm circle from the lilac paper quilling strips.
Step 20: Make two shapes of coils: teardrop and rectangle

Take the loose coils from the quilling board and fix the tip with glue. Then from the yellow coil make a teardrop coil by pinching one side of the circle with your hands. And from the lilac coil form an elongated rectangle shape.
Step 21: Make a cake candle

Glue the teardrop and rectangle shapes together.
Step 22: Glue all the pieces together

Glue the candle on top of the cake made in the quilling technique.
Supply:
- multicolored paper quilling strips.
Tools:
- PVA glue;
- scissors;
- quilling tool;
- quilling board.
You can modify this craft by using quilling strips of different colors. For example, the cream can be white, and add a few candles on top.