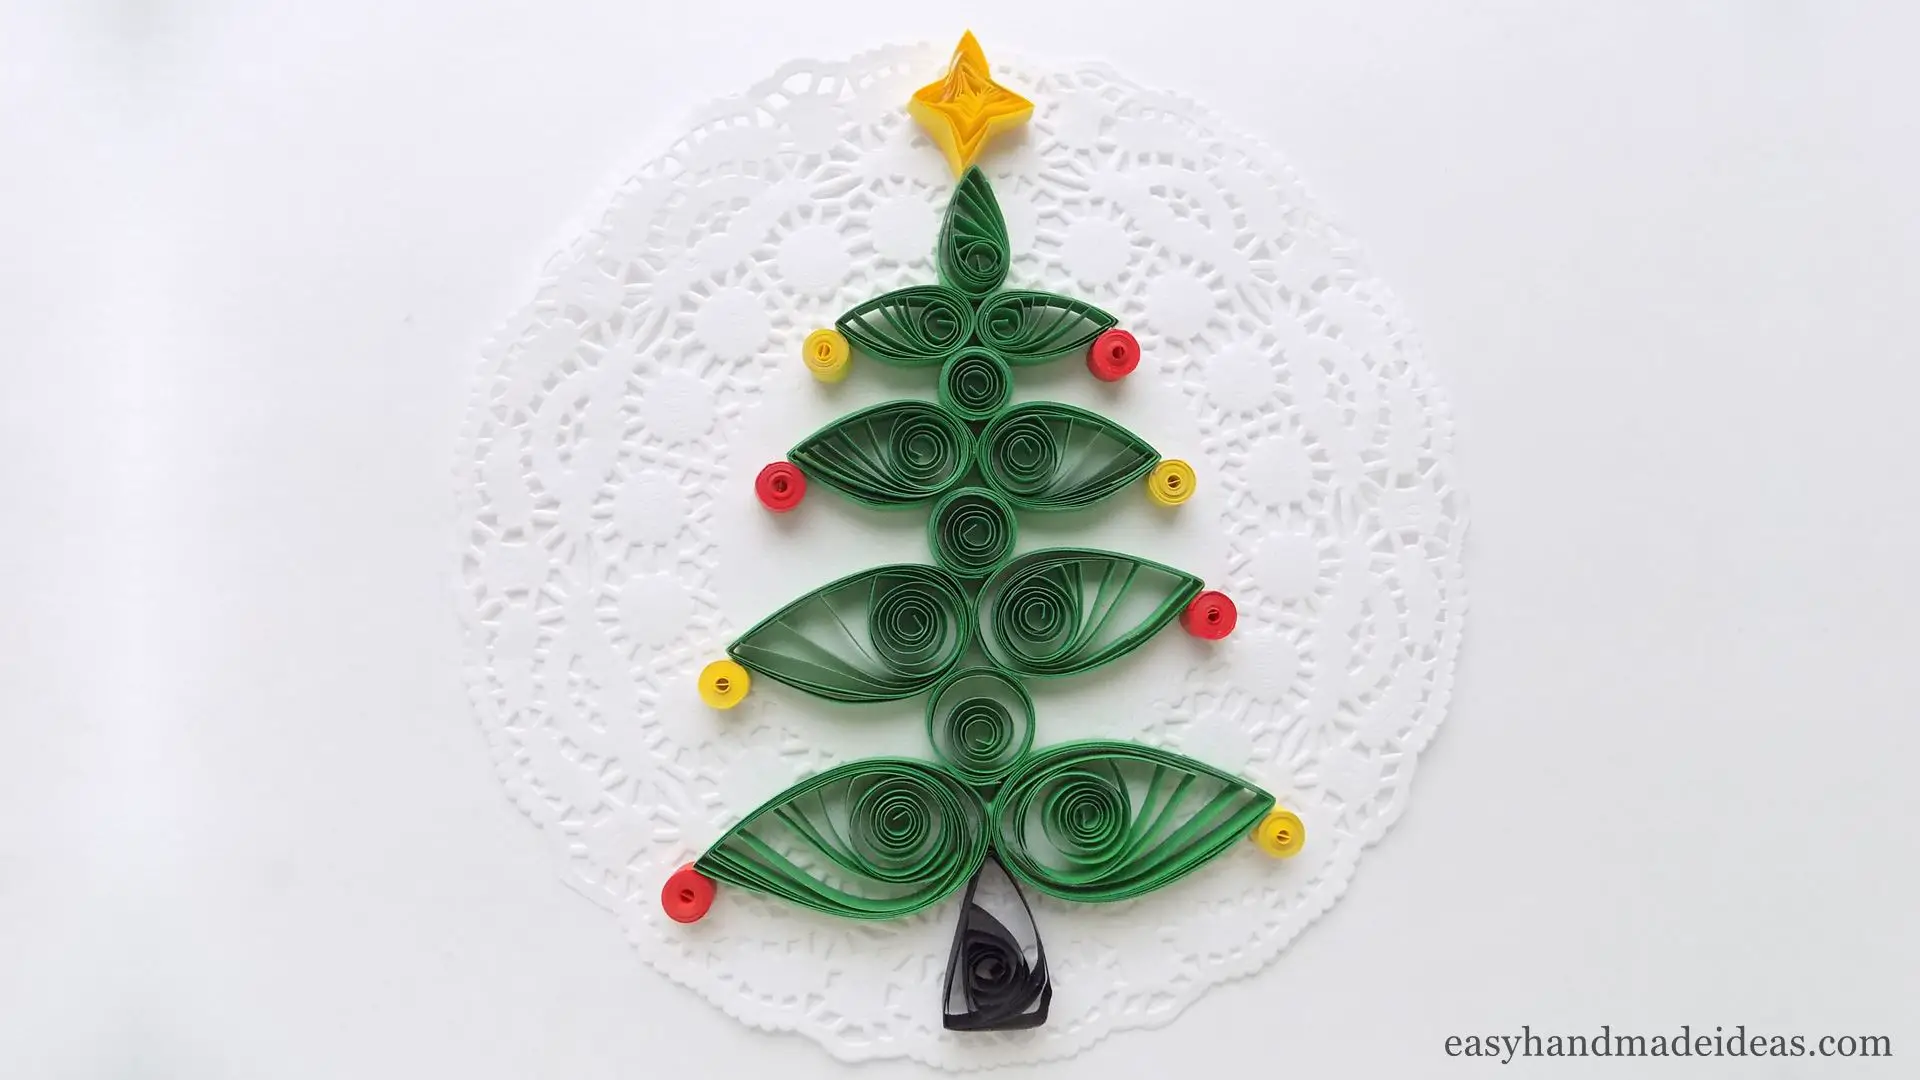
The Christmas tree presented in this master class can become a decorative element in the creation of a greeting card. And you can make it using quilling technique. In my instruction you will clearly learn how to make a quilled Christmas tree in a few steps.
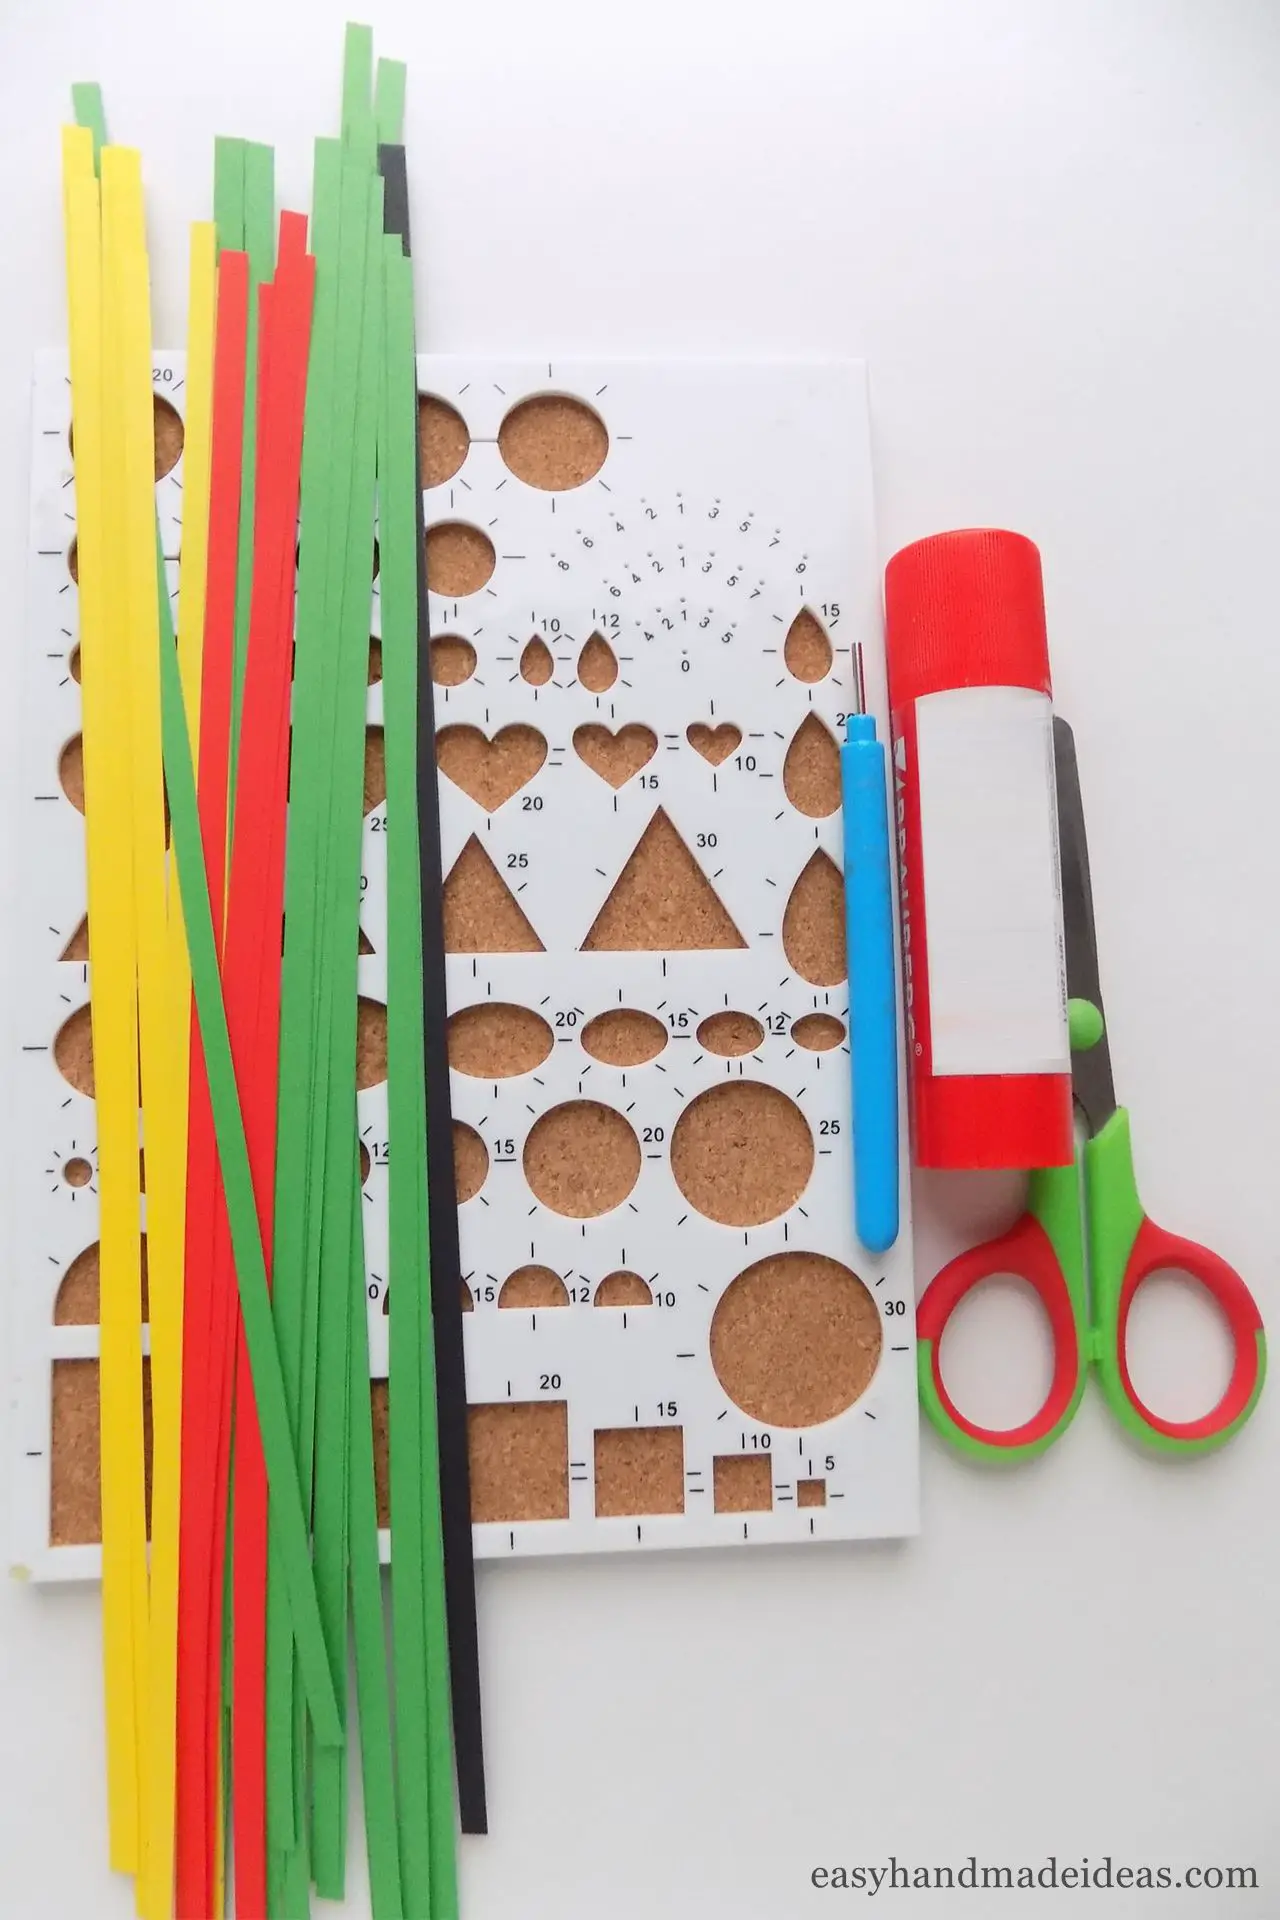
Materials and tools:
- paper quilling strips of green, black, red, yellow colors;
- glue;
- scissors;
- quilling board;
- quilling tool.
Making branches of a Christmas tree
Step 1. Get the materials and tools to make your craft. You can choose paper strips of other colors, after all, this is a Christmas tree that can be decorated to your taste.
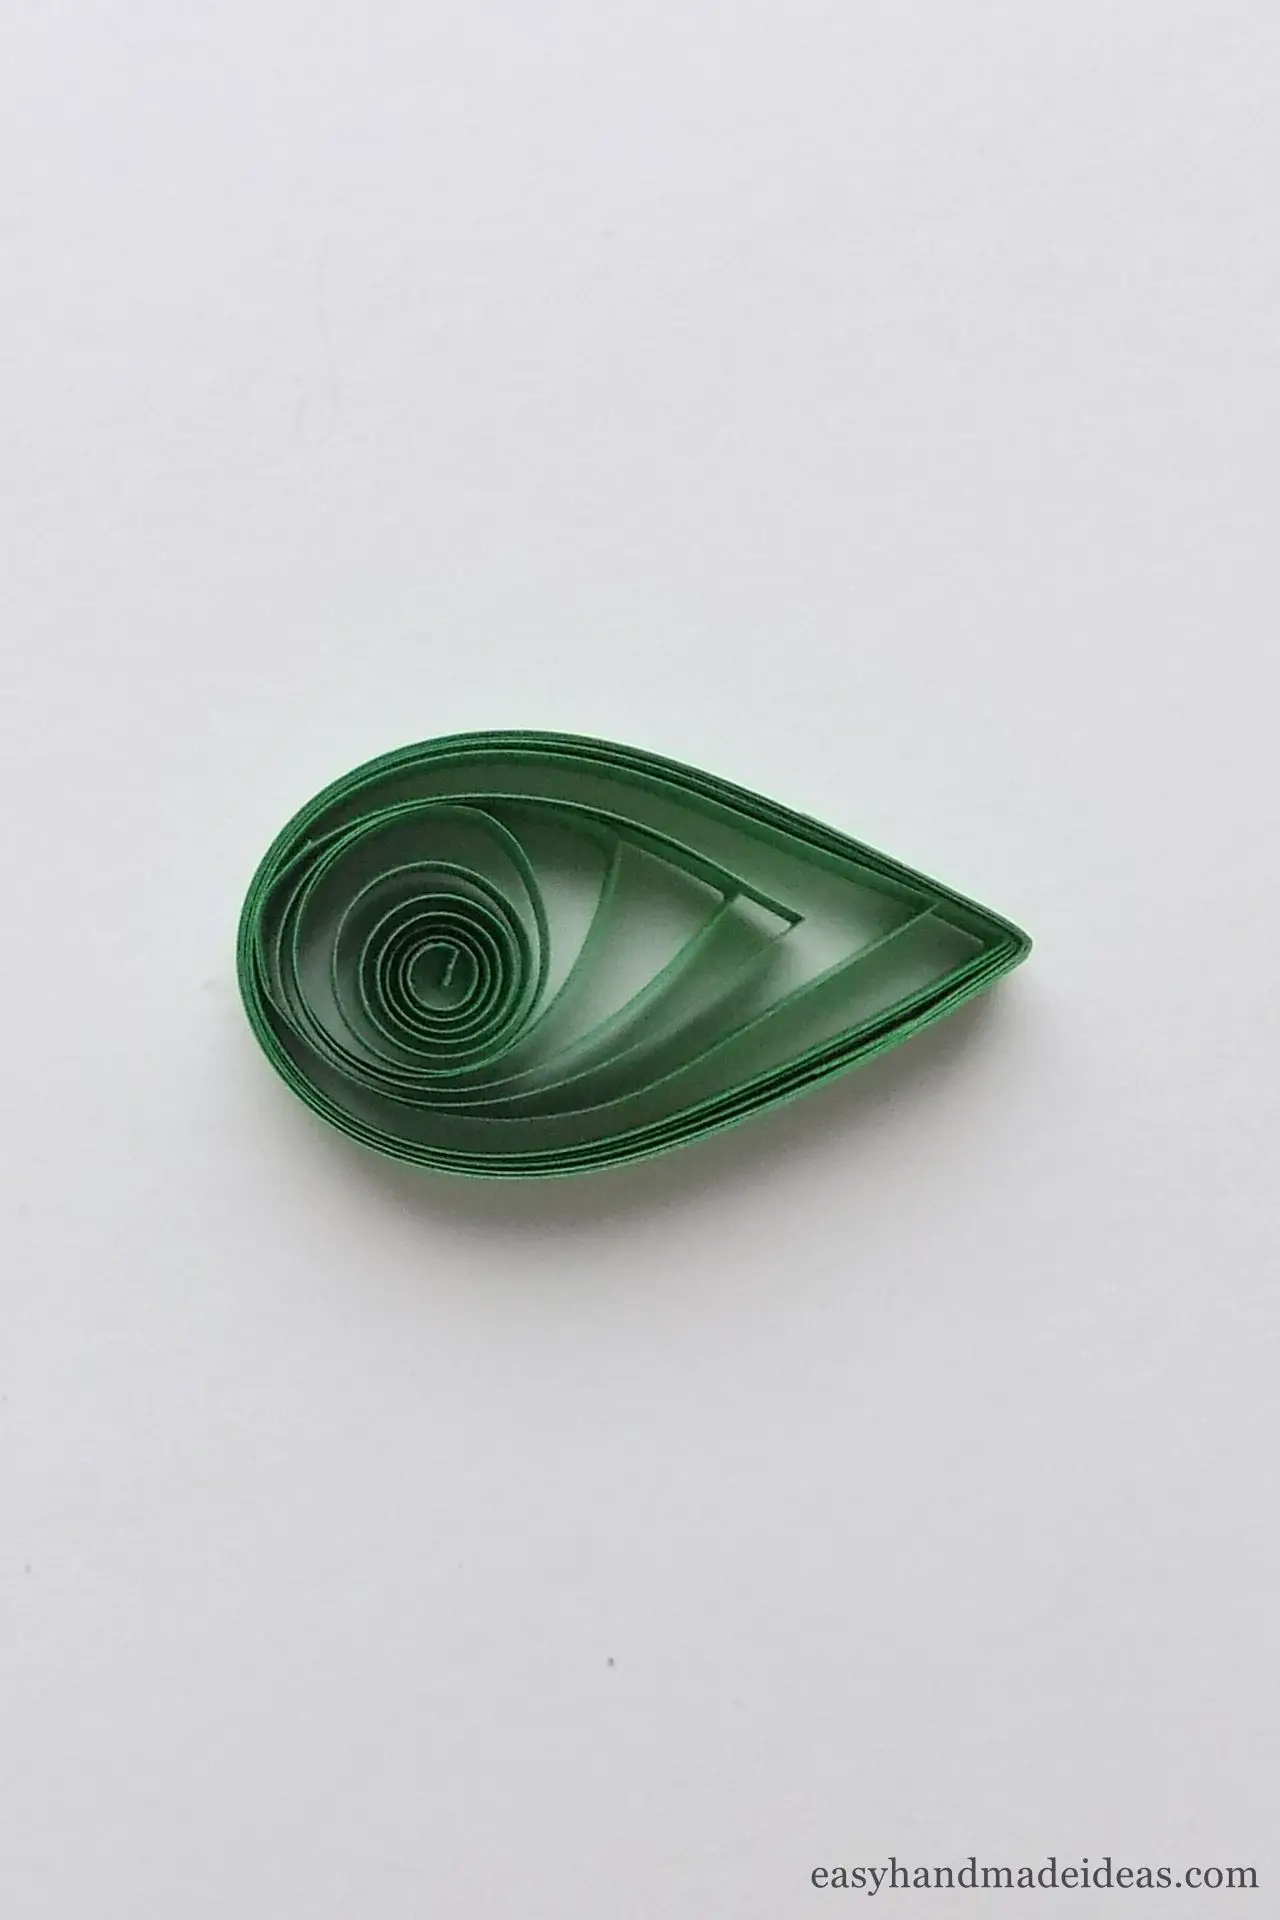
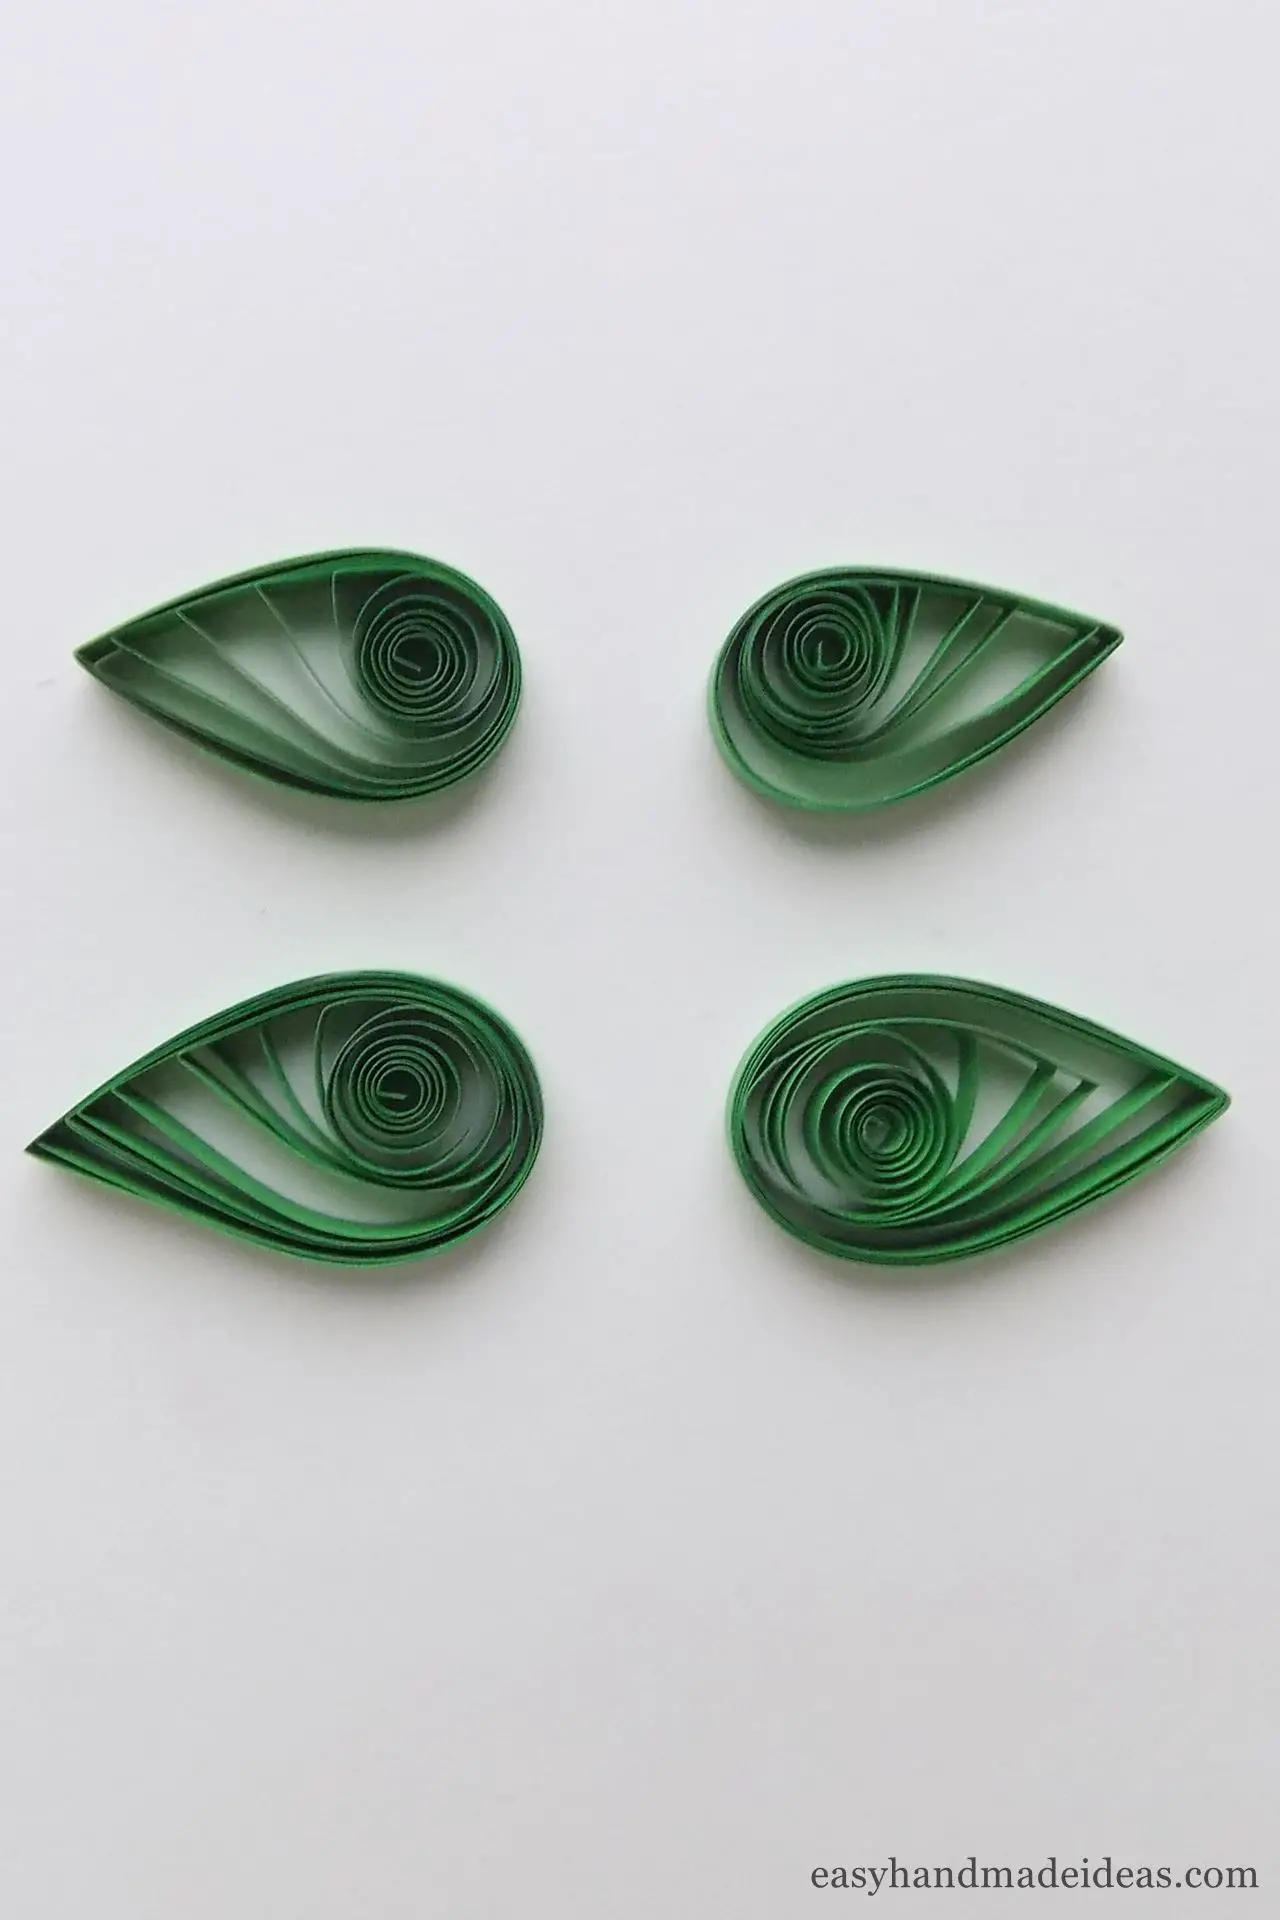
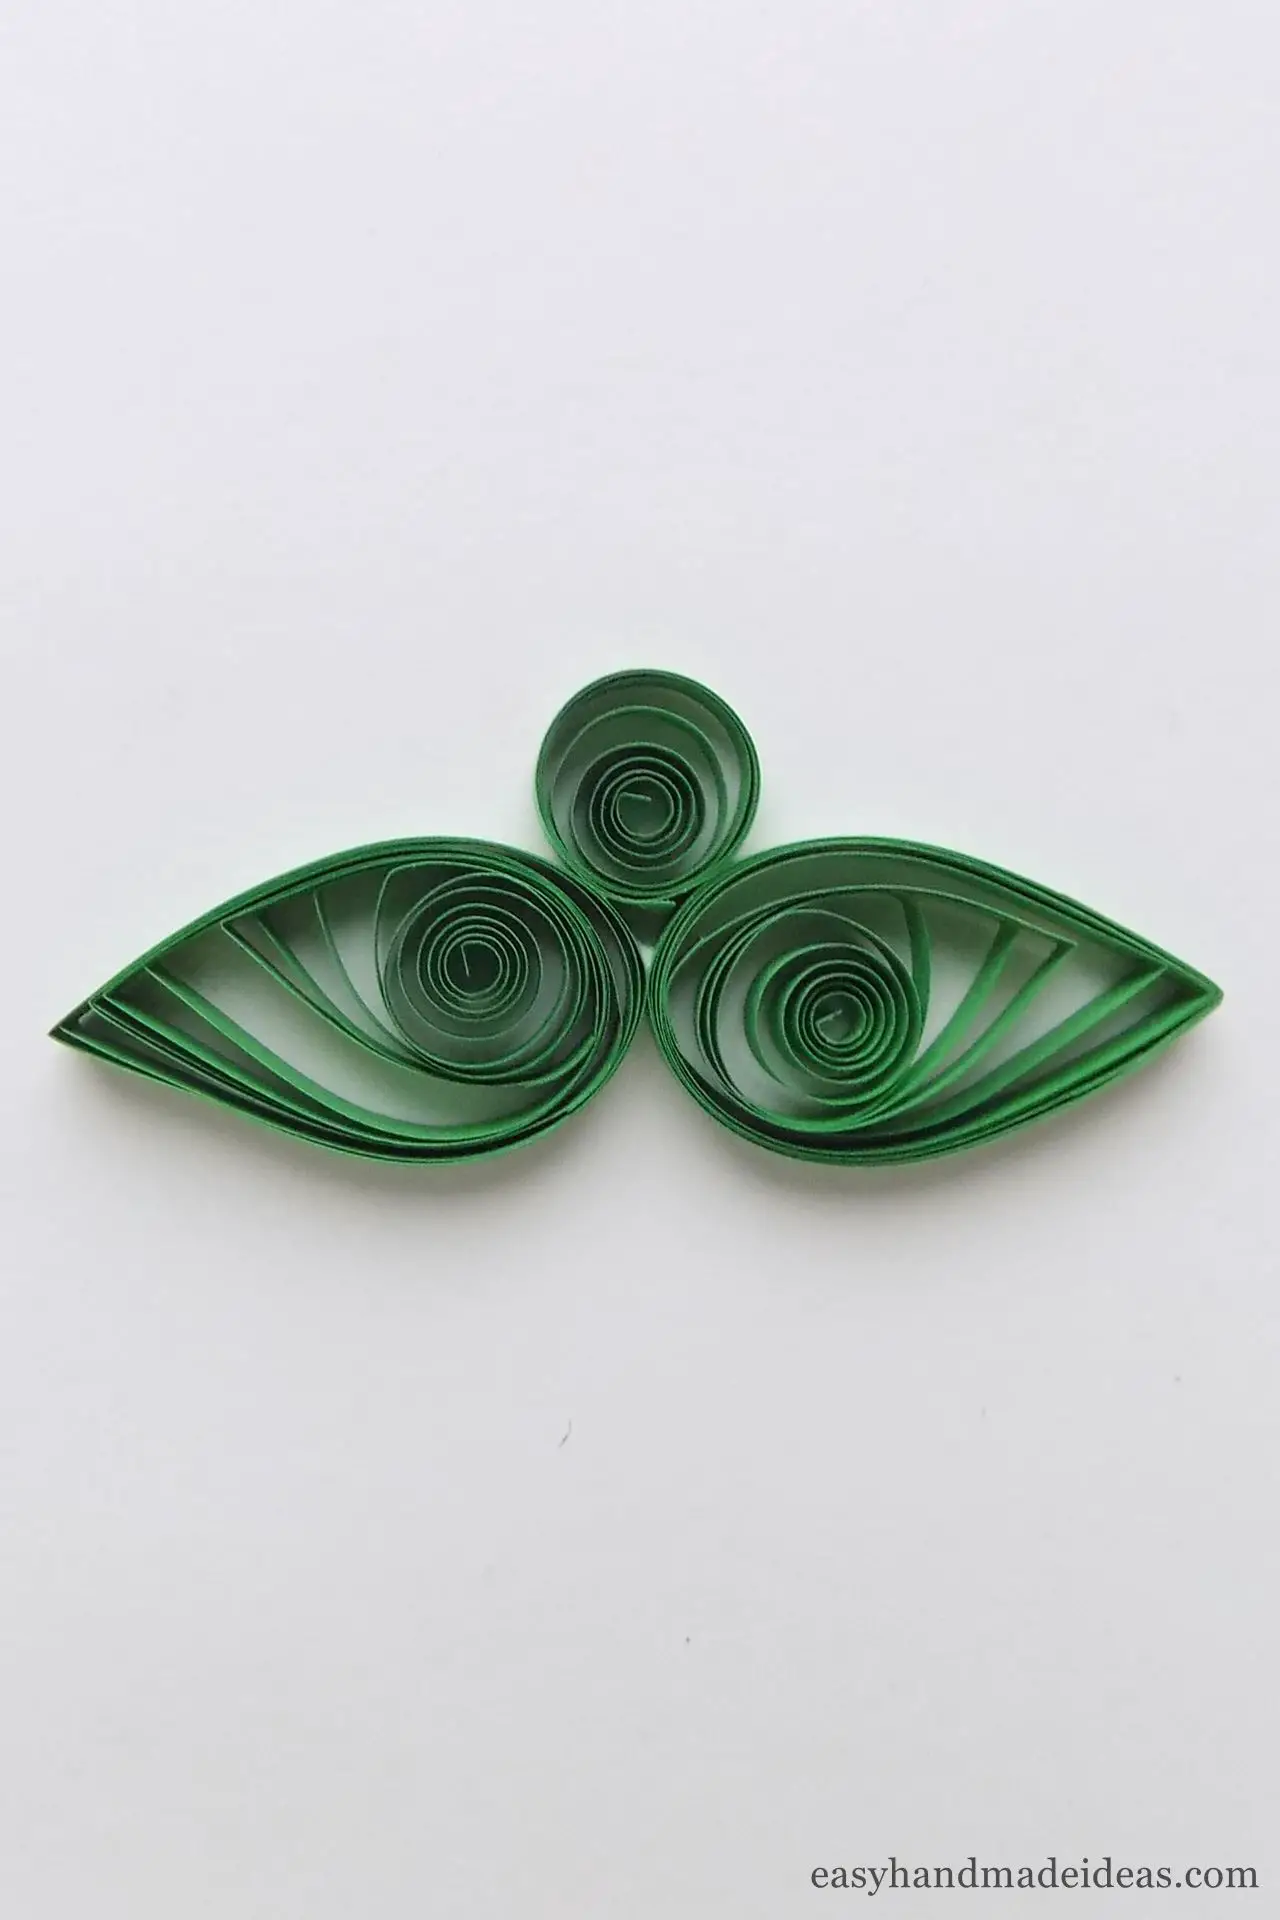
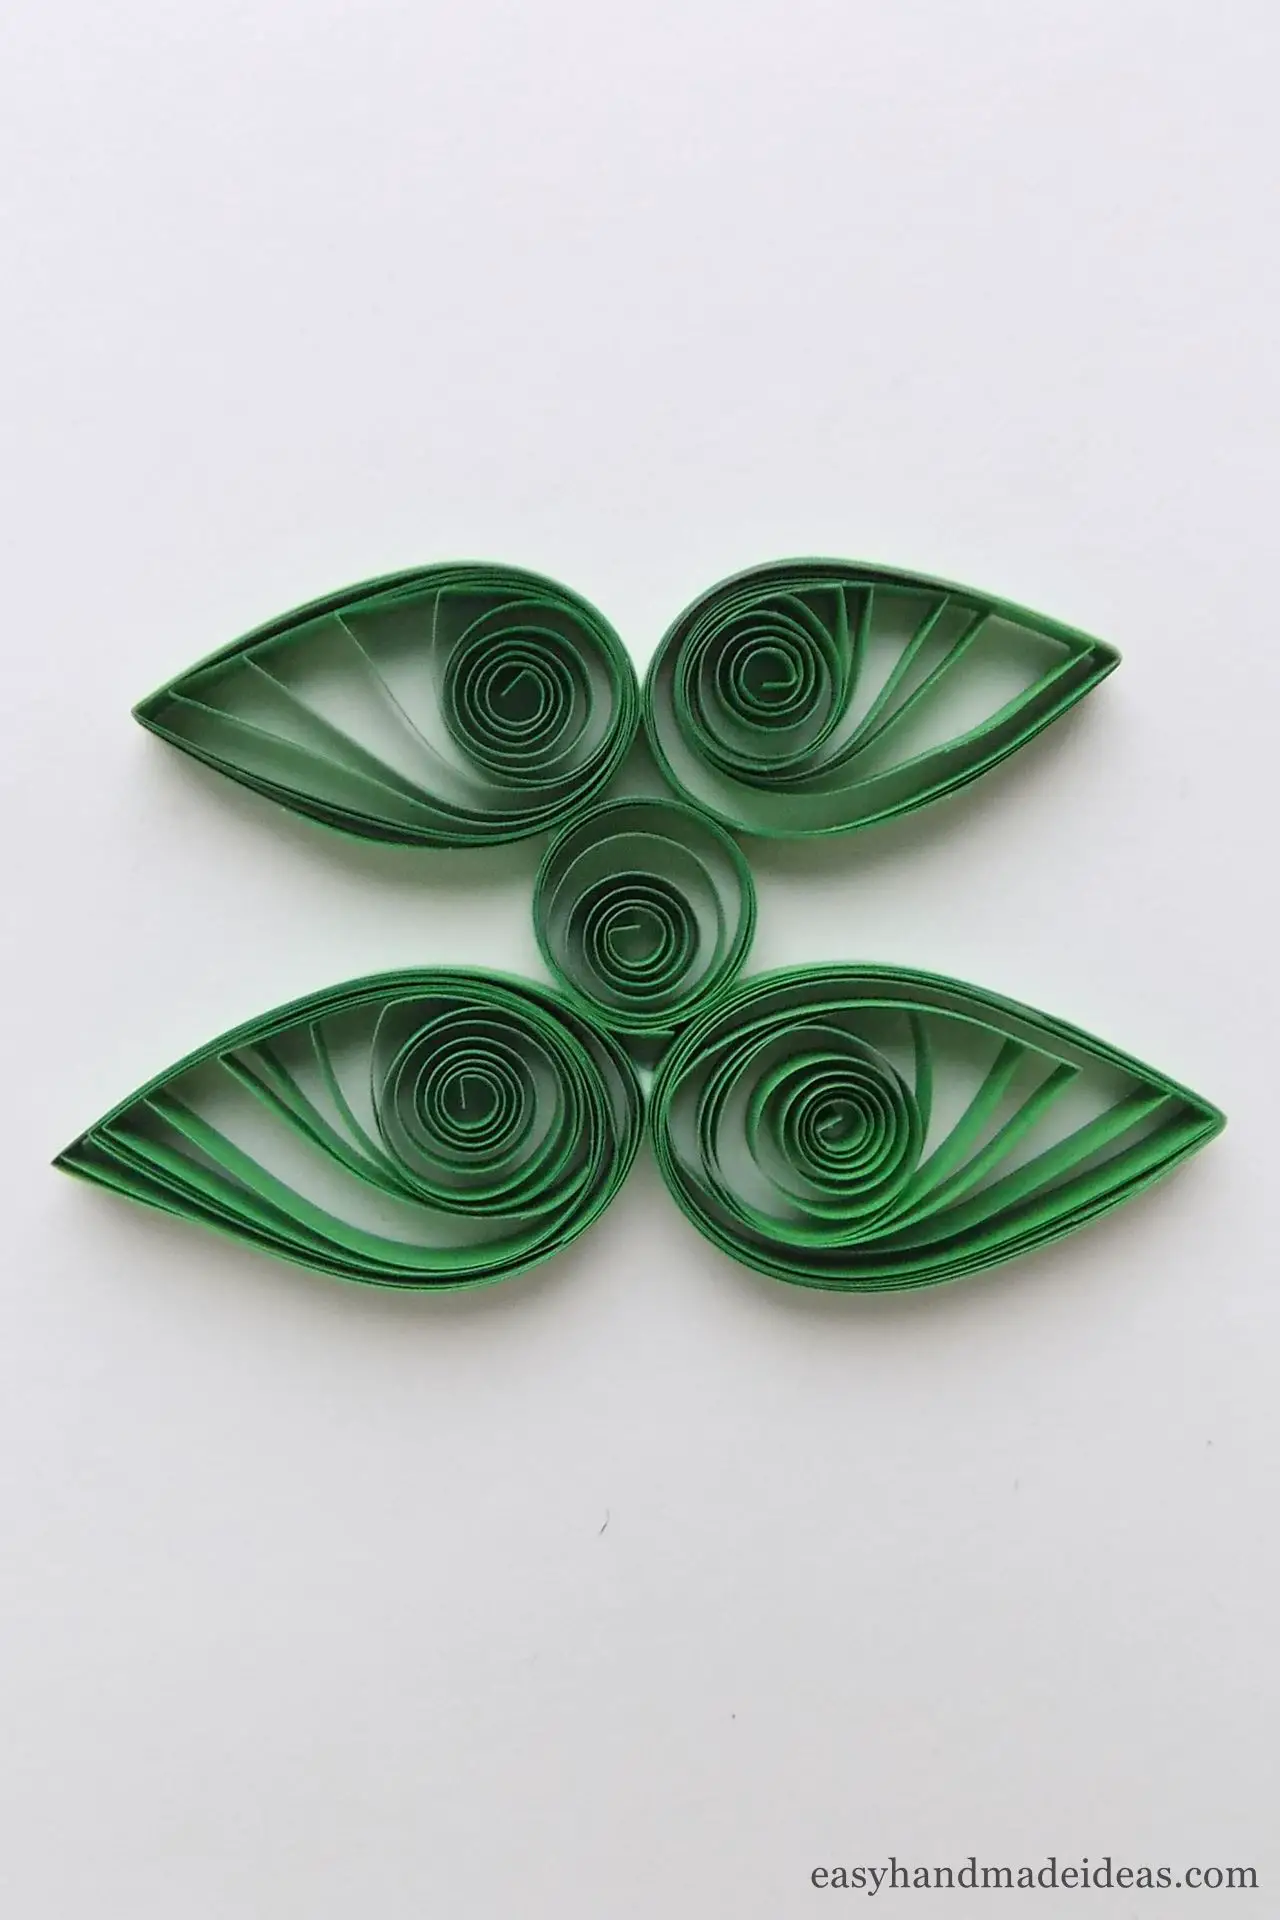
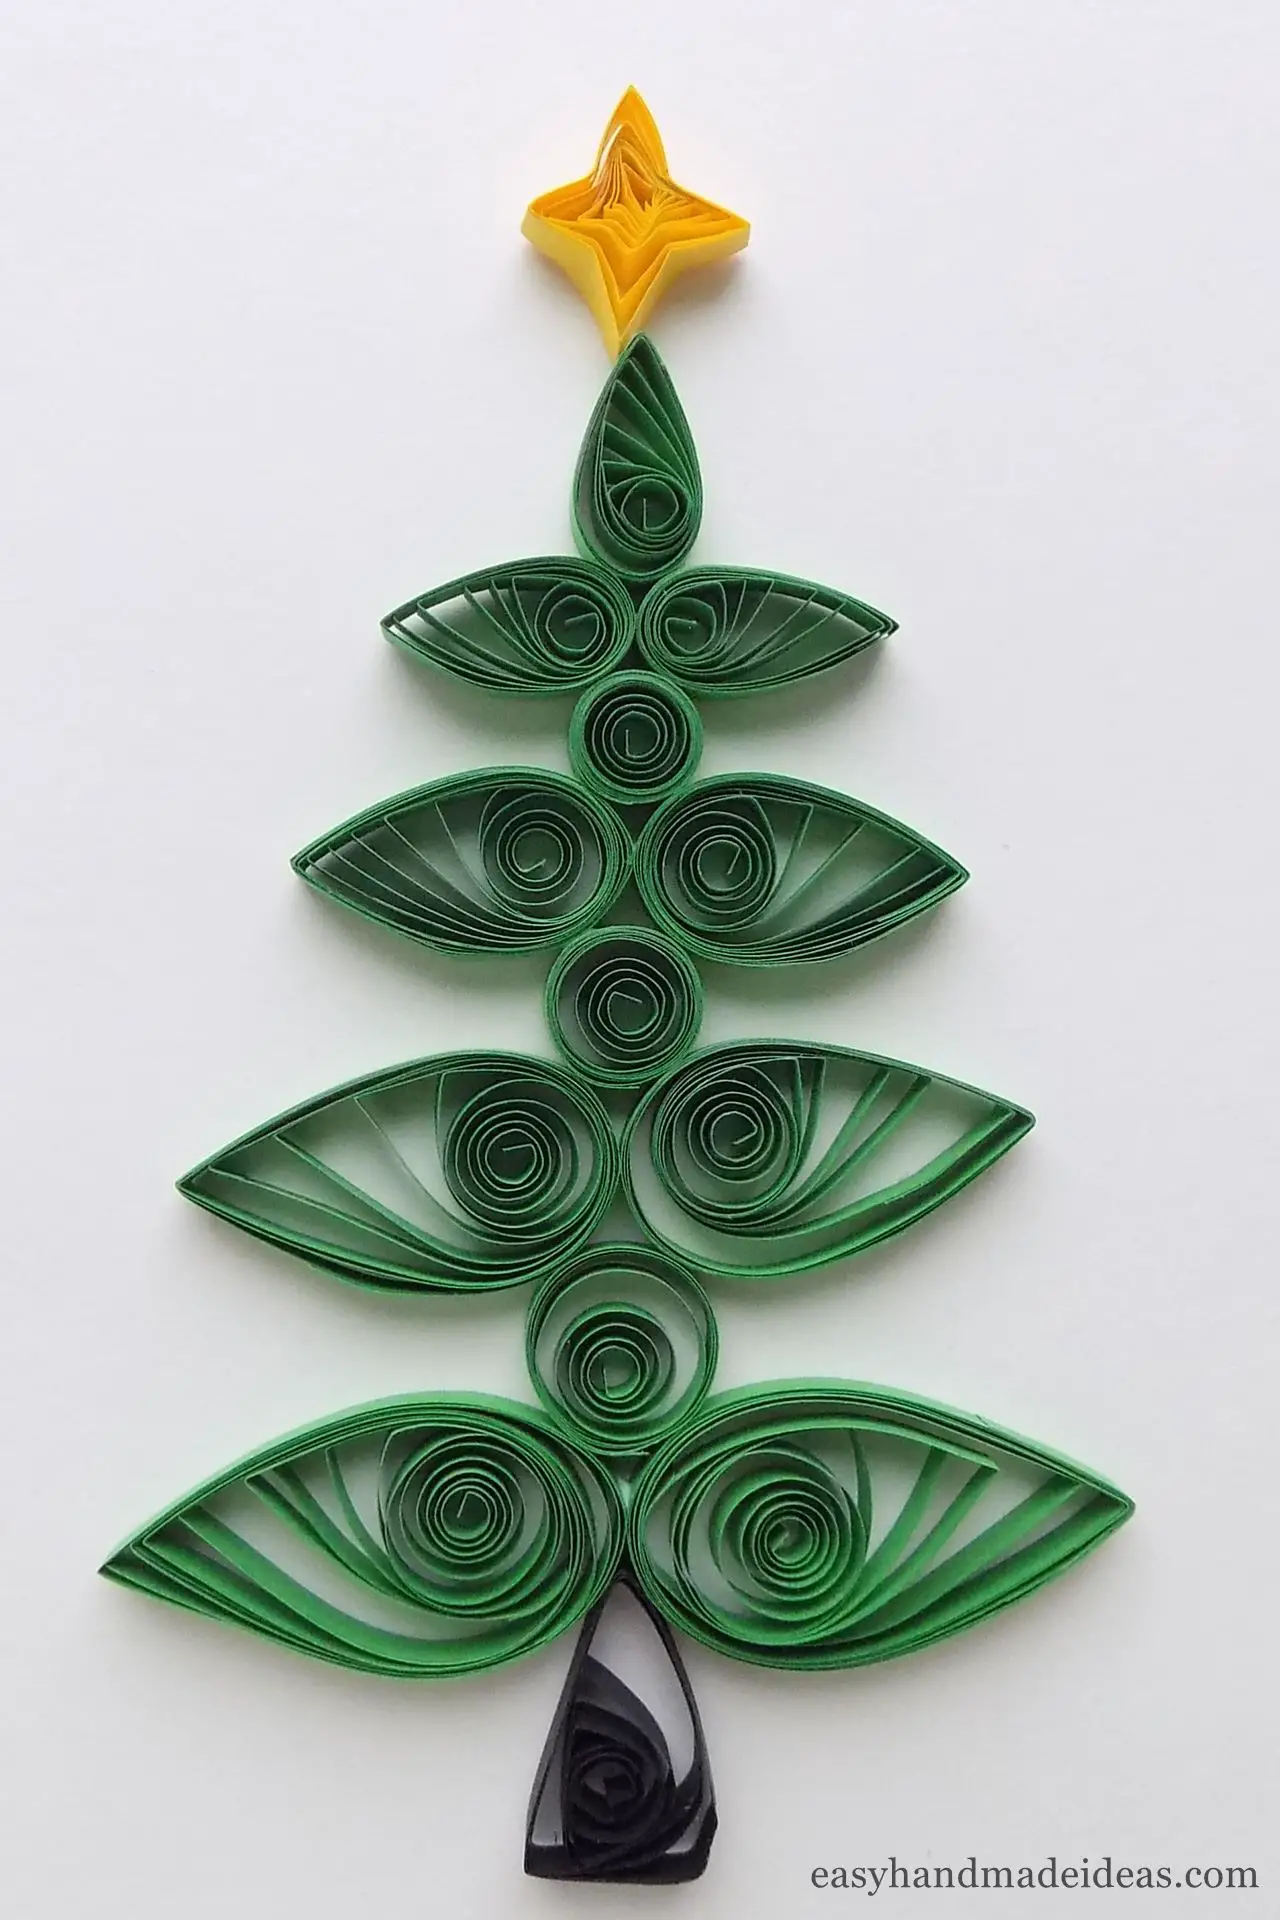
Step 2. Glue 3 green strips in sequence, and then roll them and place them in a quilling board with a diameter of 30 mm (1,1811″).
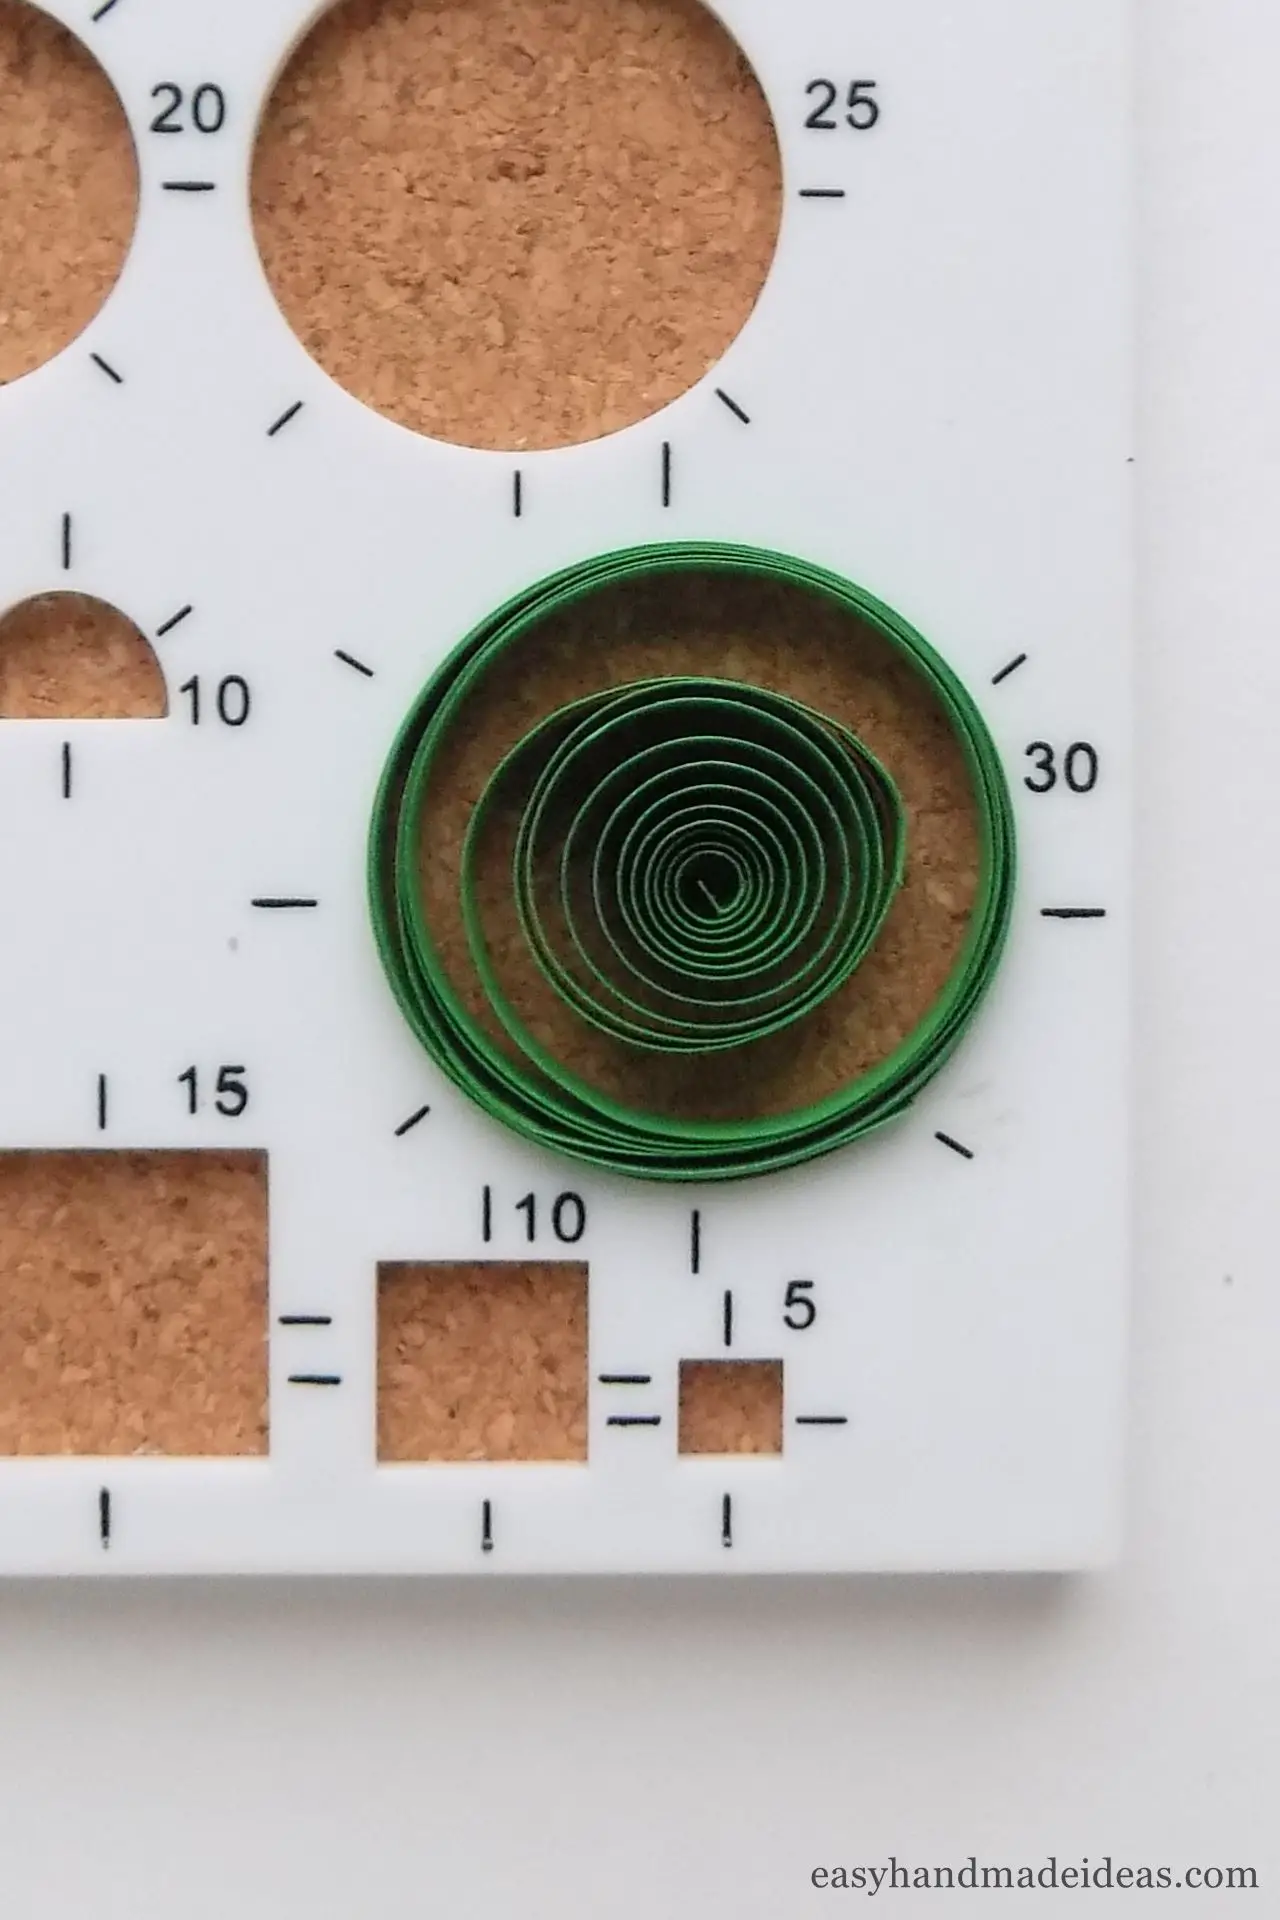
Step 3. Then carefully pull out and fix the tip with glue. You will get the loose coil in the result.
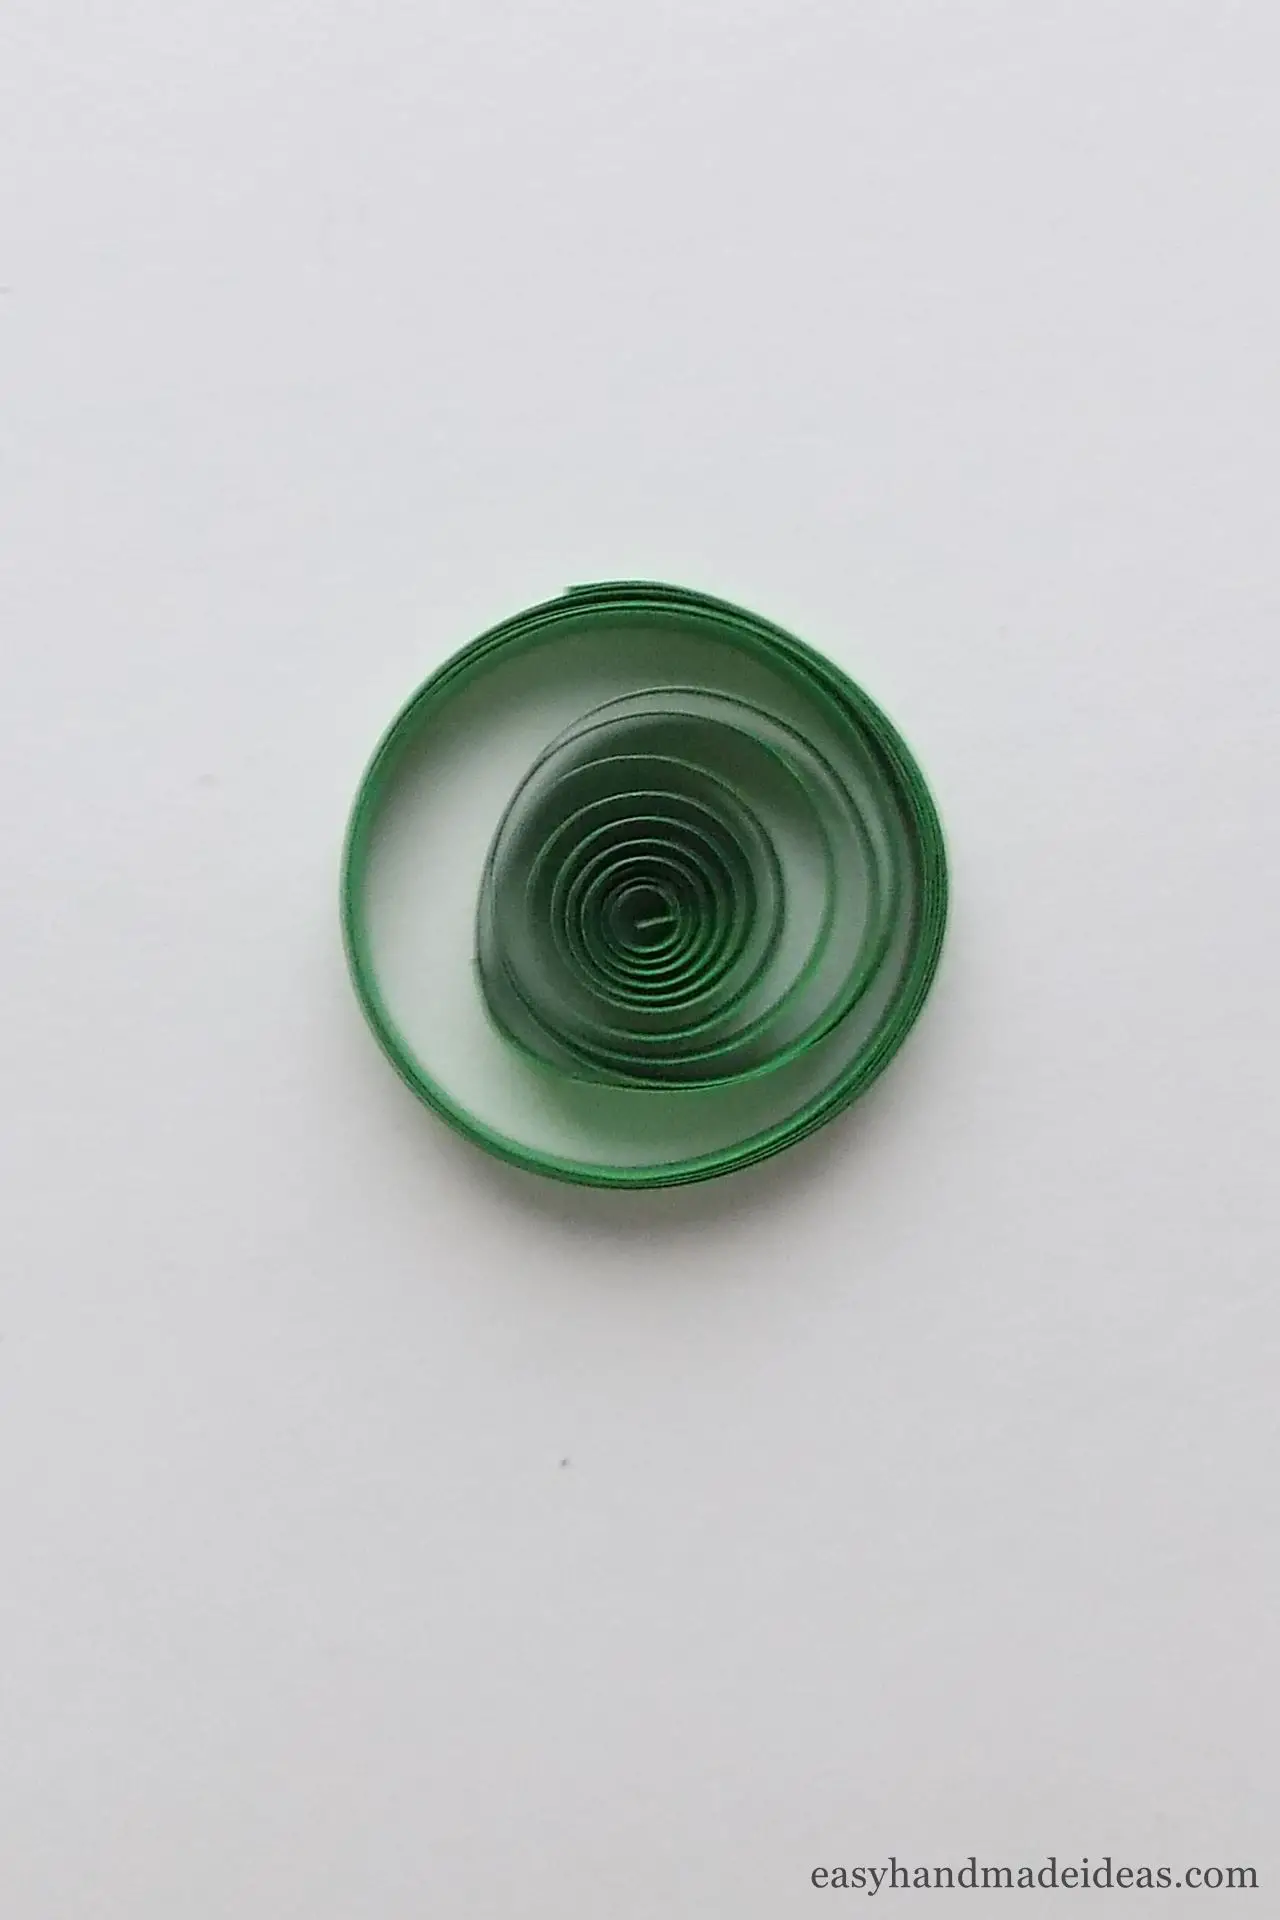
Step 4. Pinch the piece with your fingers on one side to get a tear drop coil.
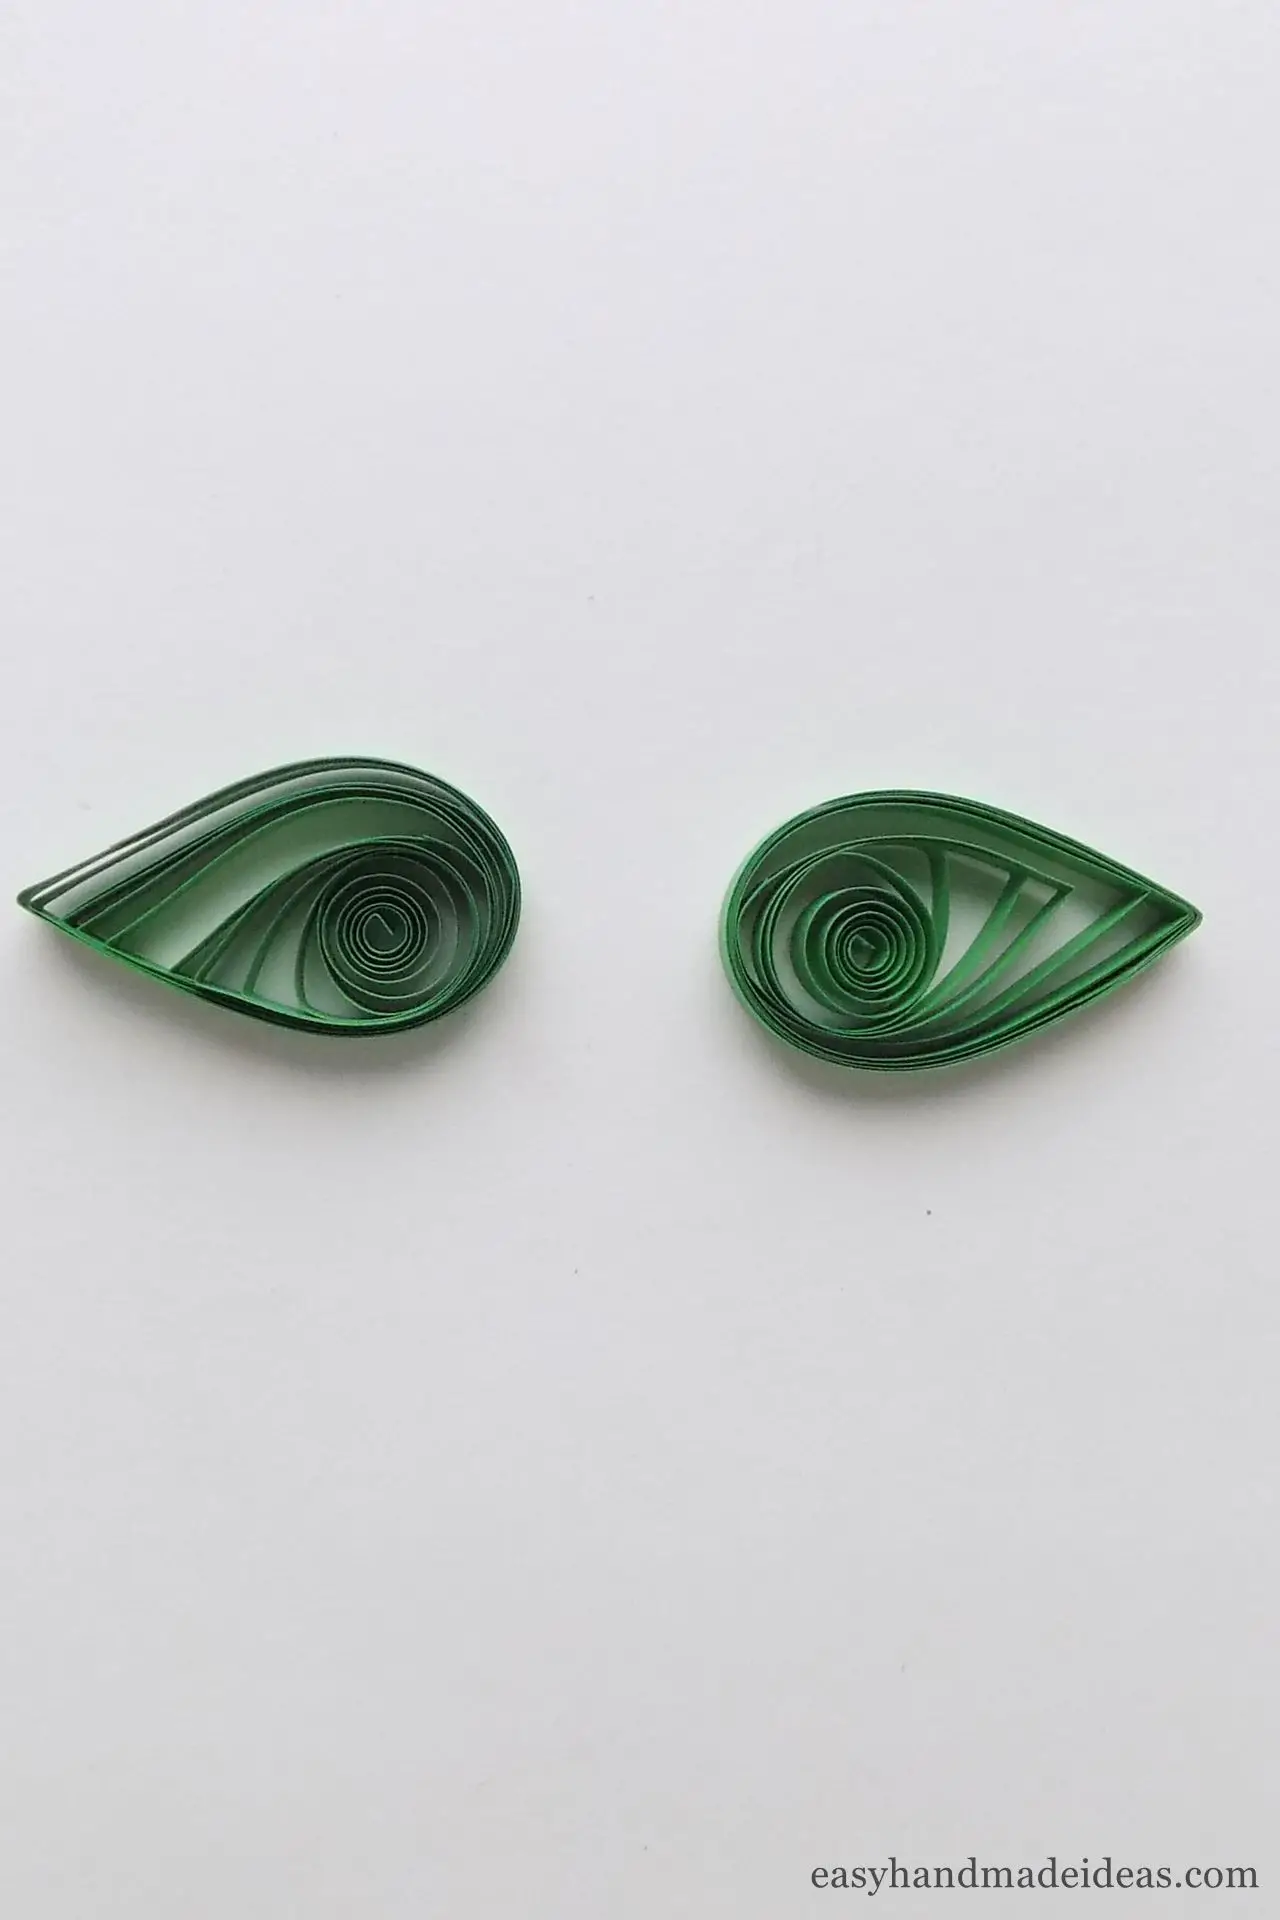
Step 5. Make another tear drop coil. These will be the lower branches of the future Christmas tree.
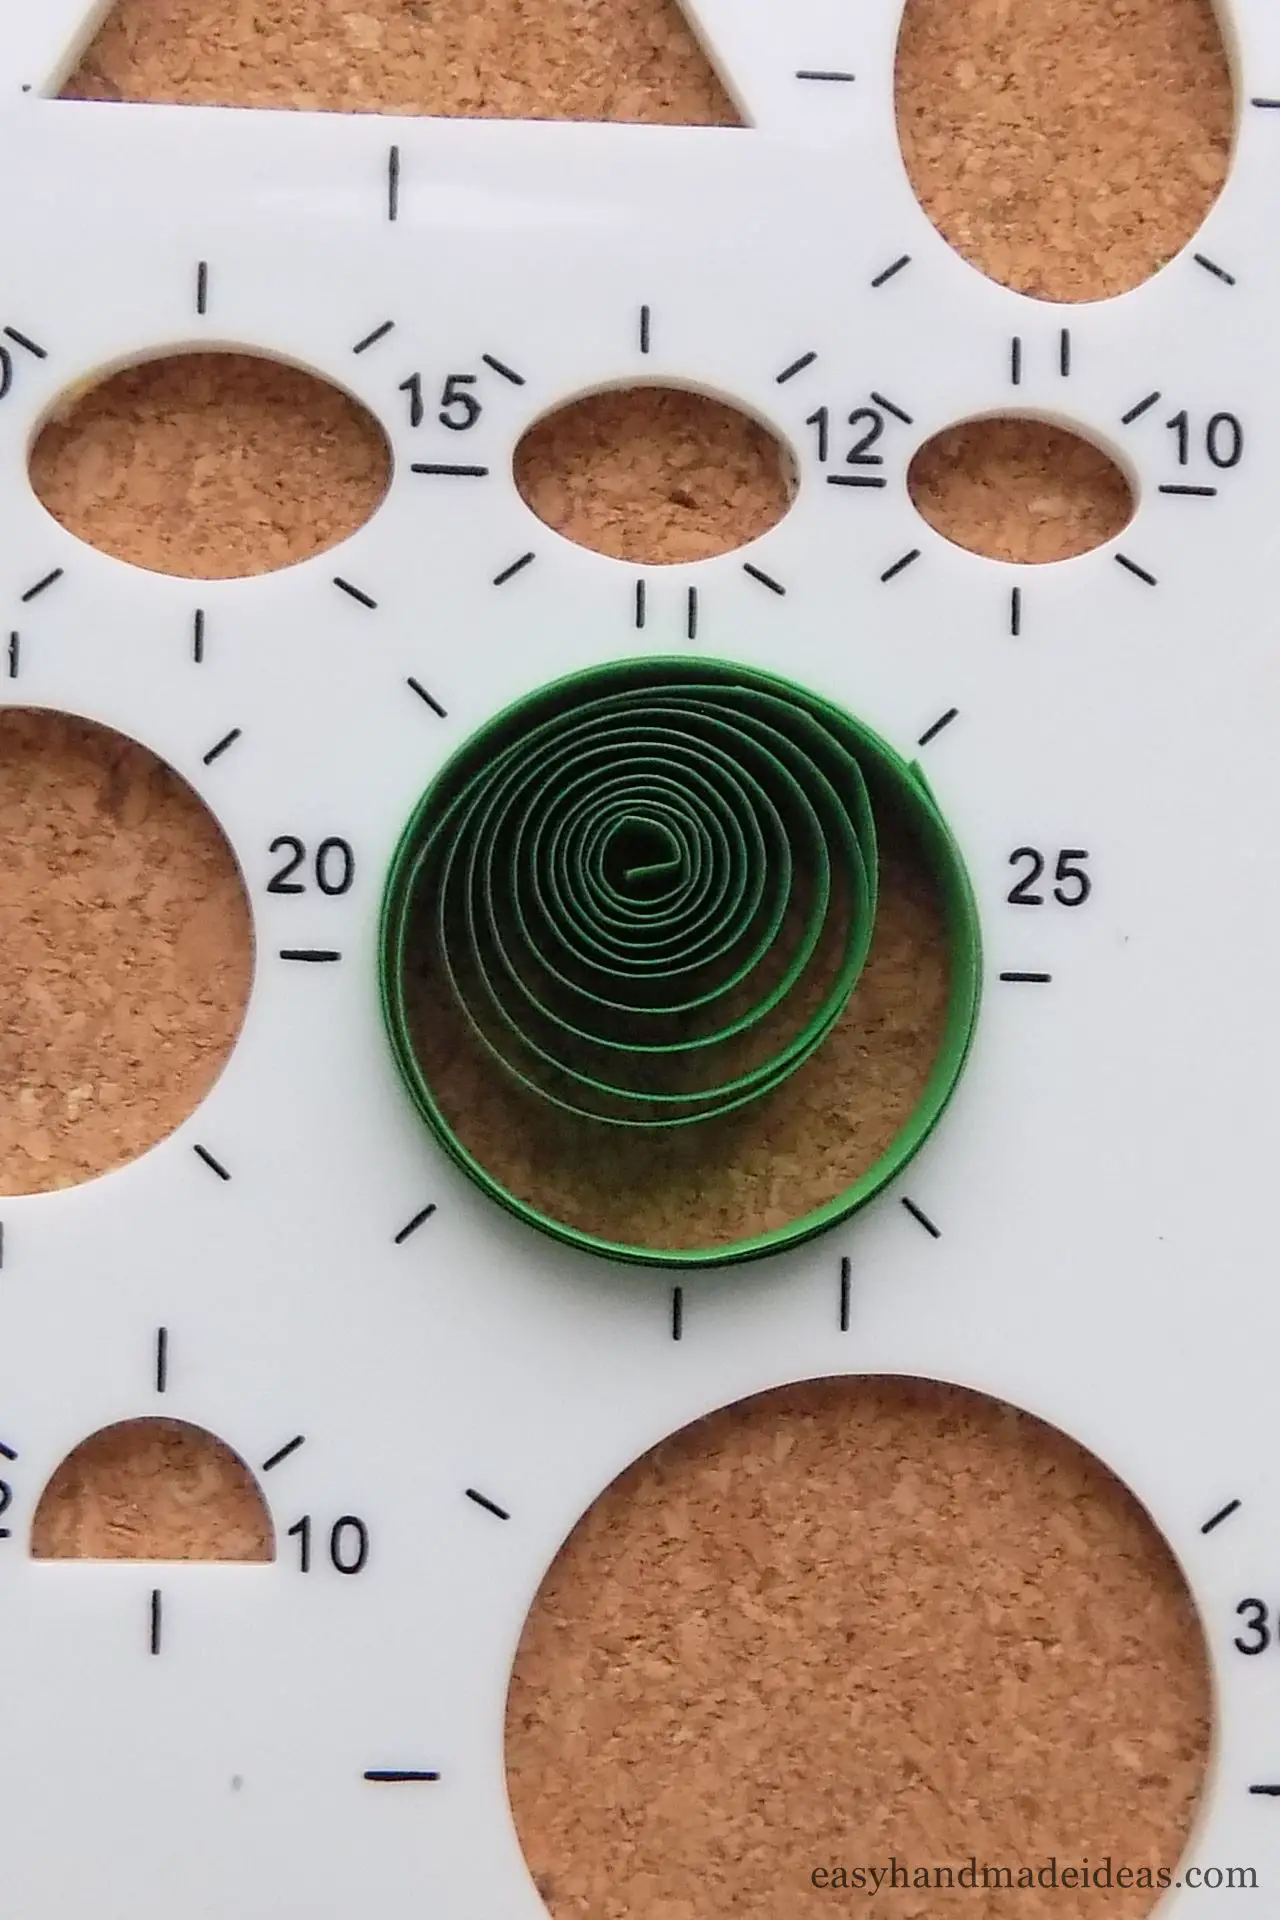
Step 6. Next, glue 2 paper strips together and form the loose coil with a diameter of 25 mm (0,9843″).
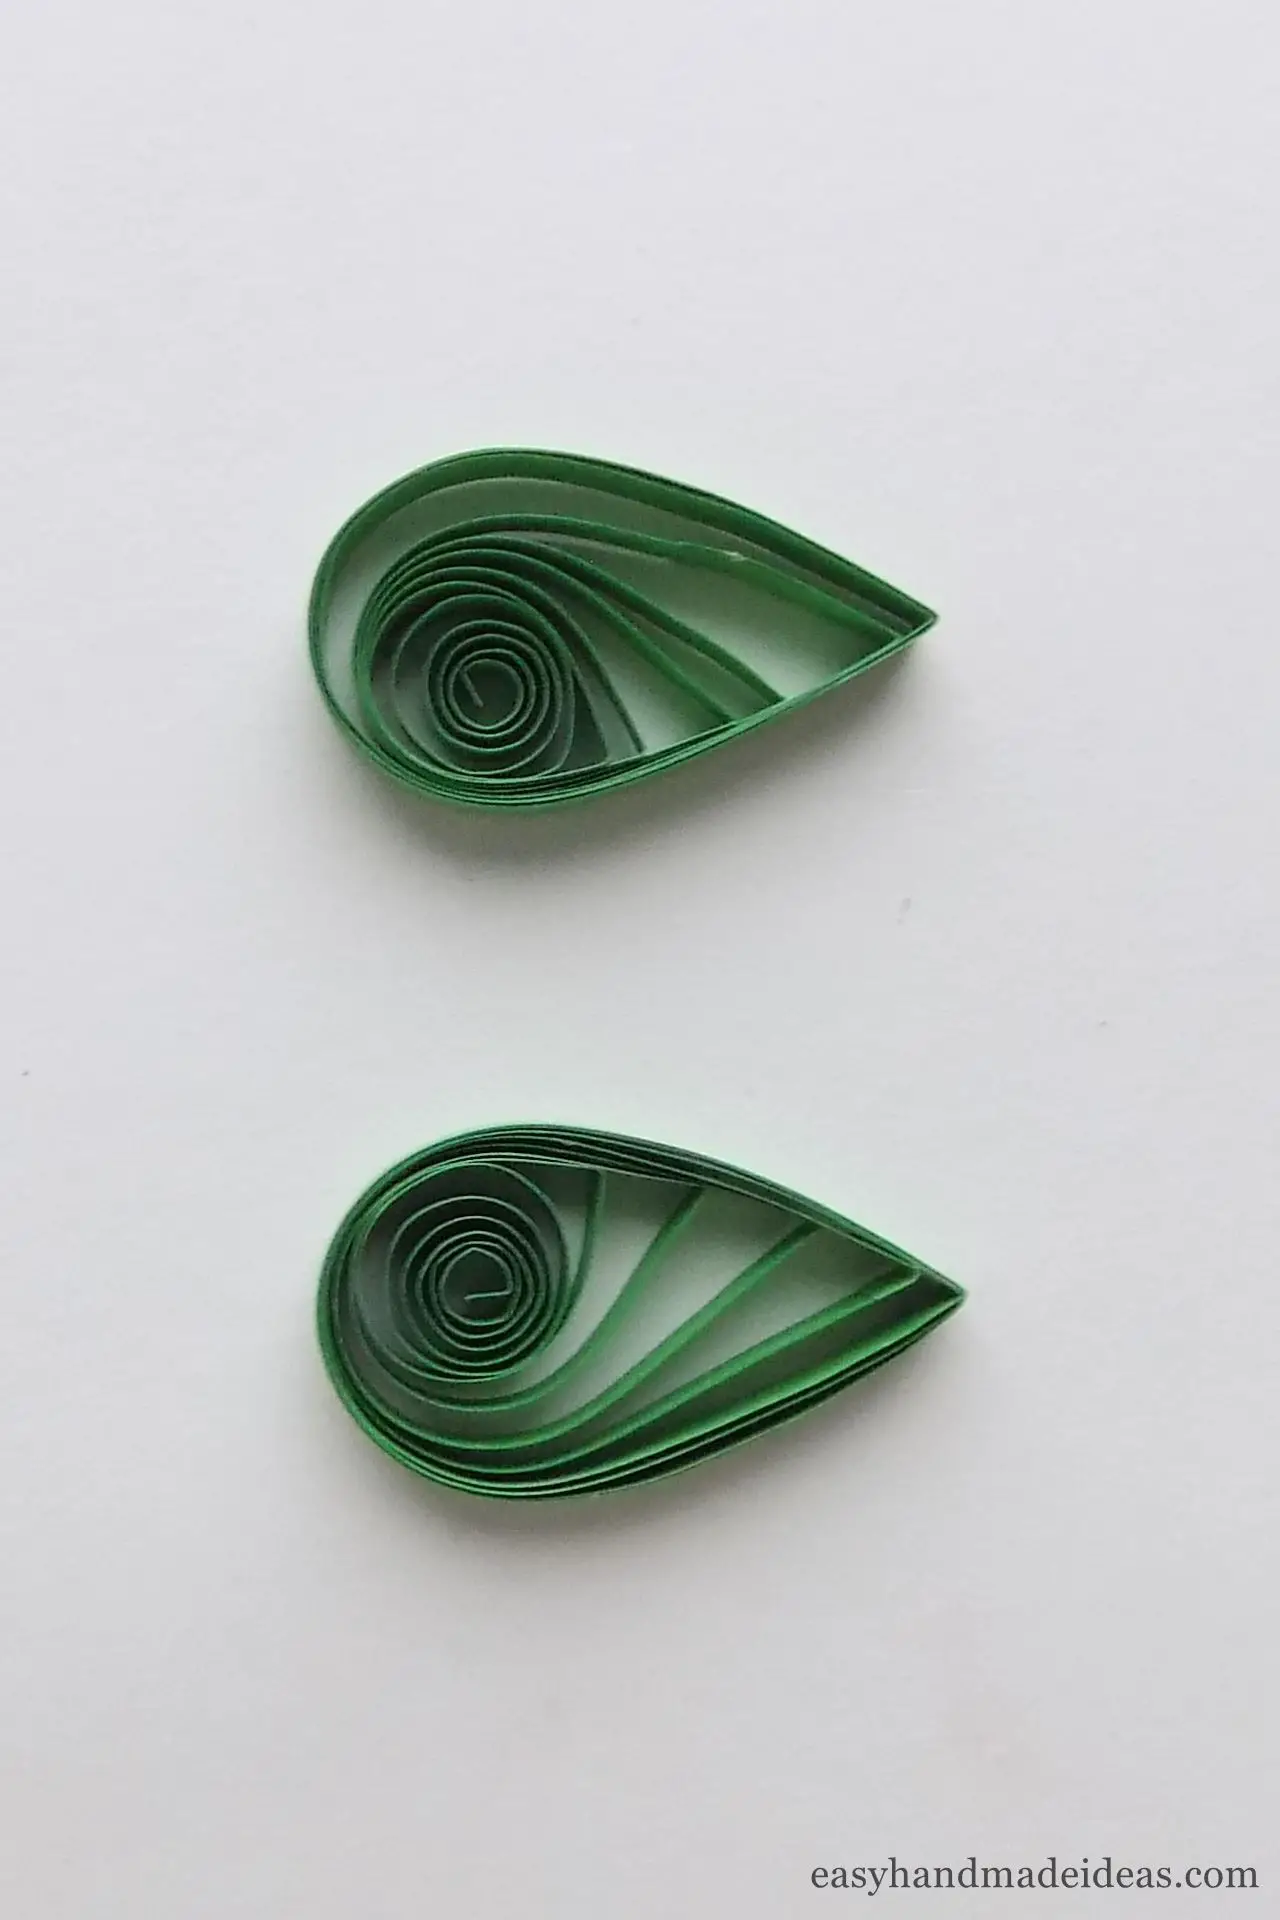
Step 7. Make 2 tear drop coils in the method described above.
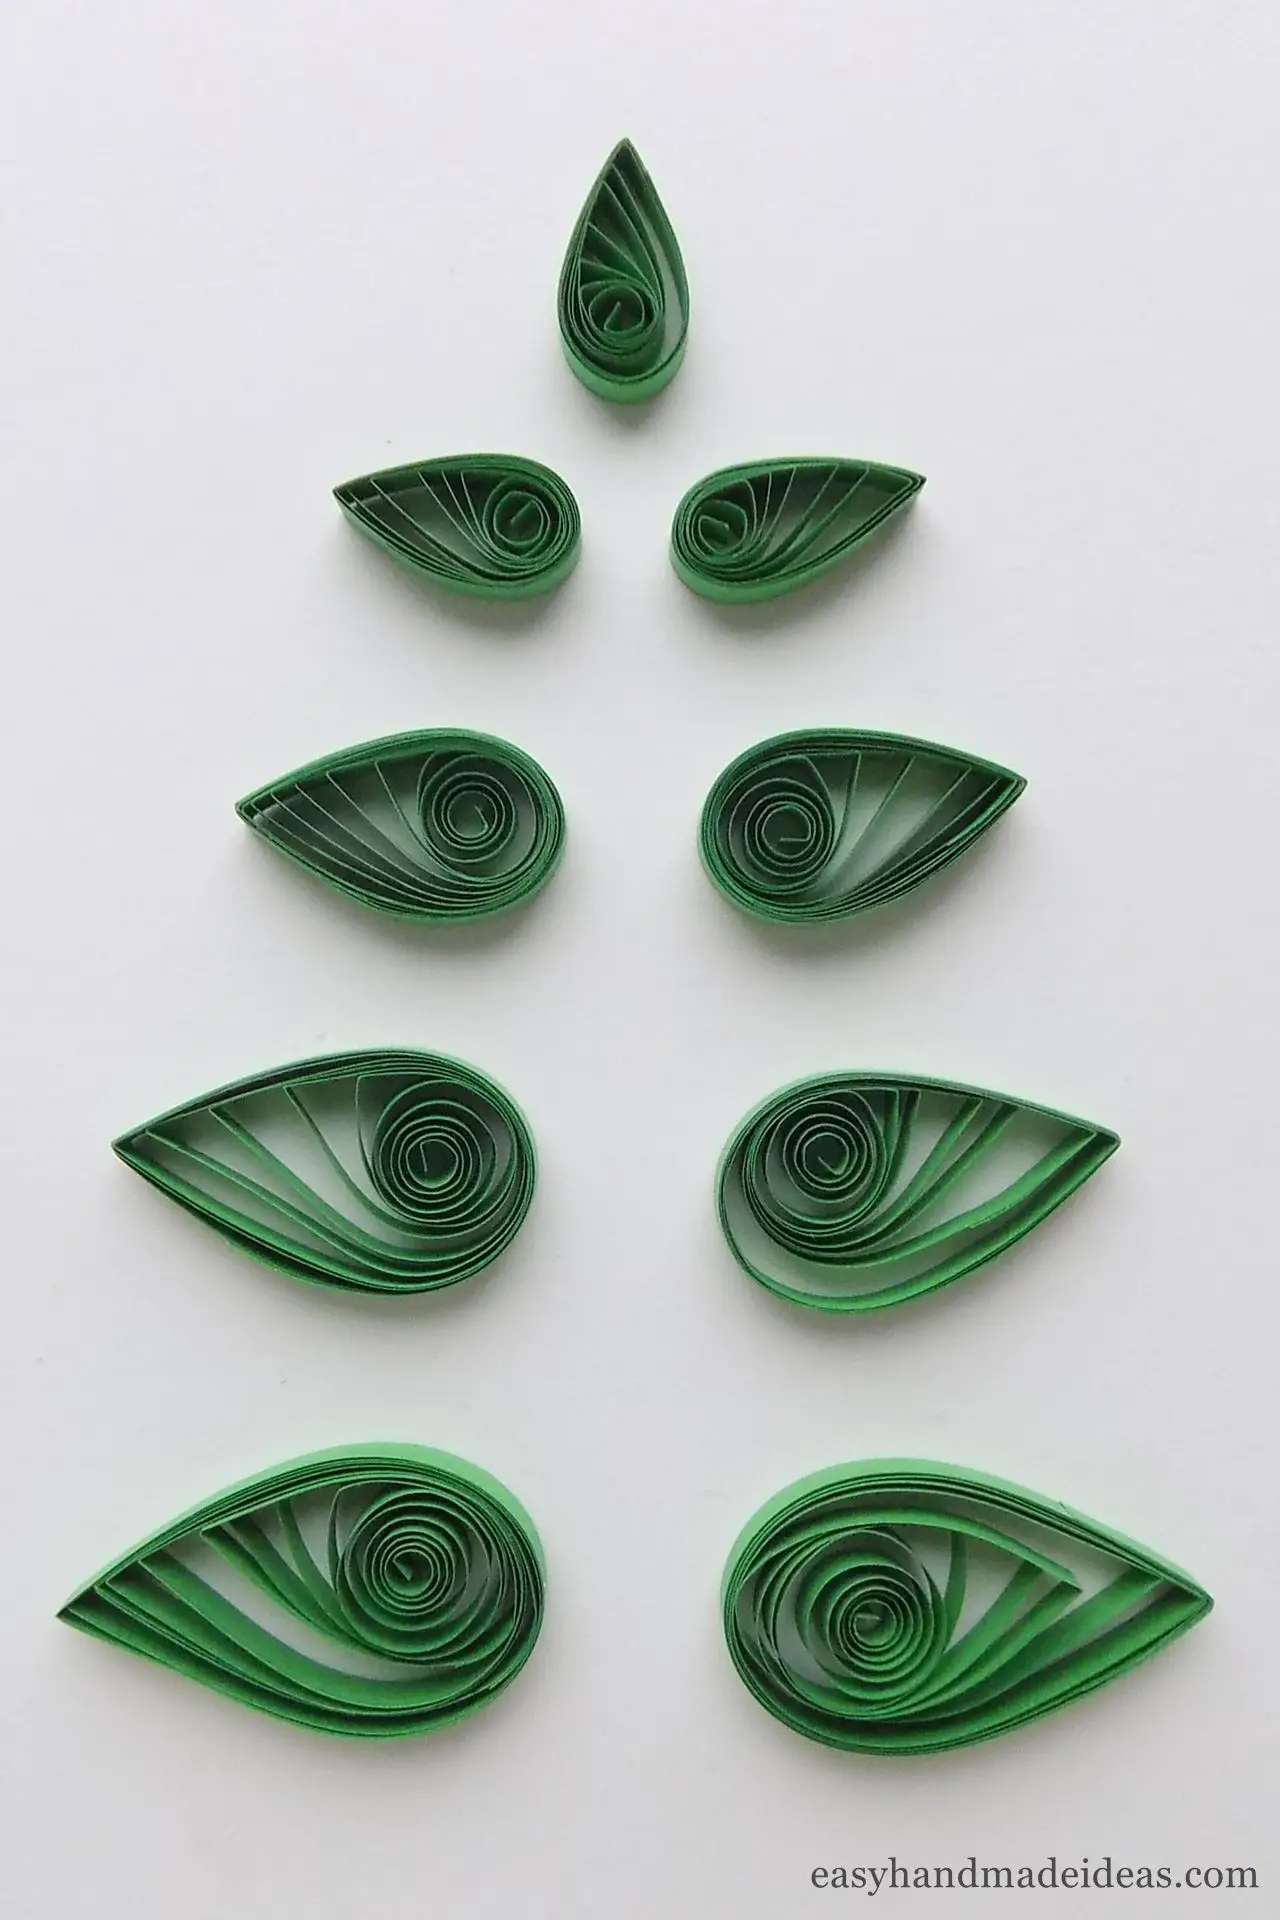
Step 8. At this step you should have 4 branches in the form of tear drop coils.
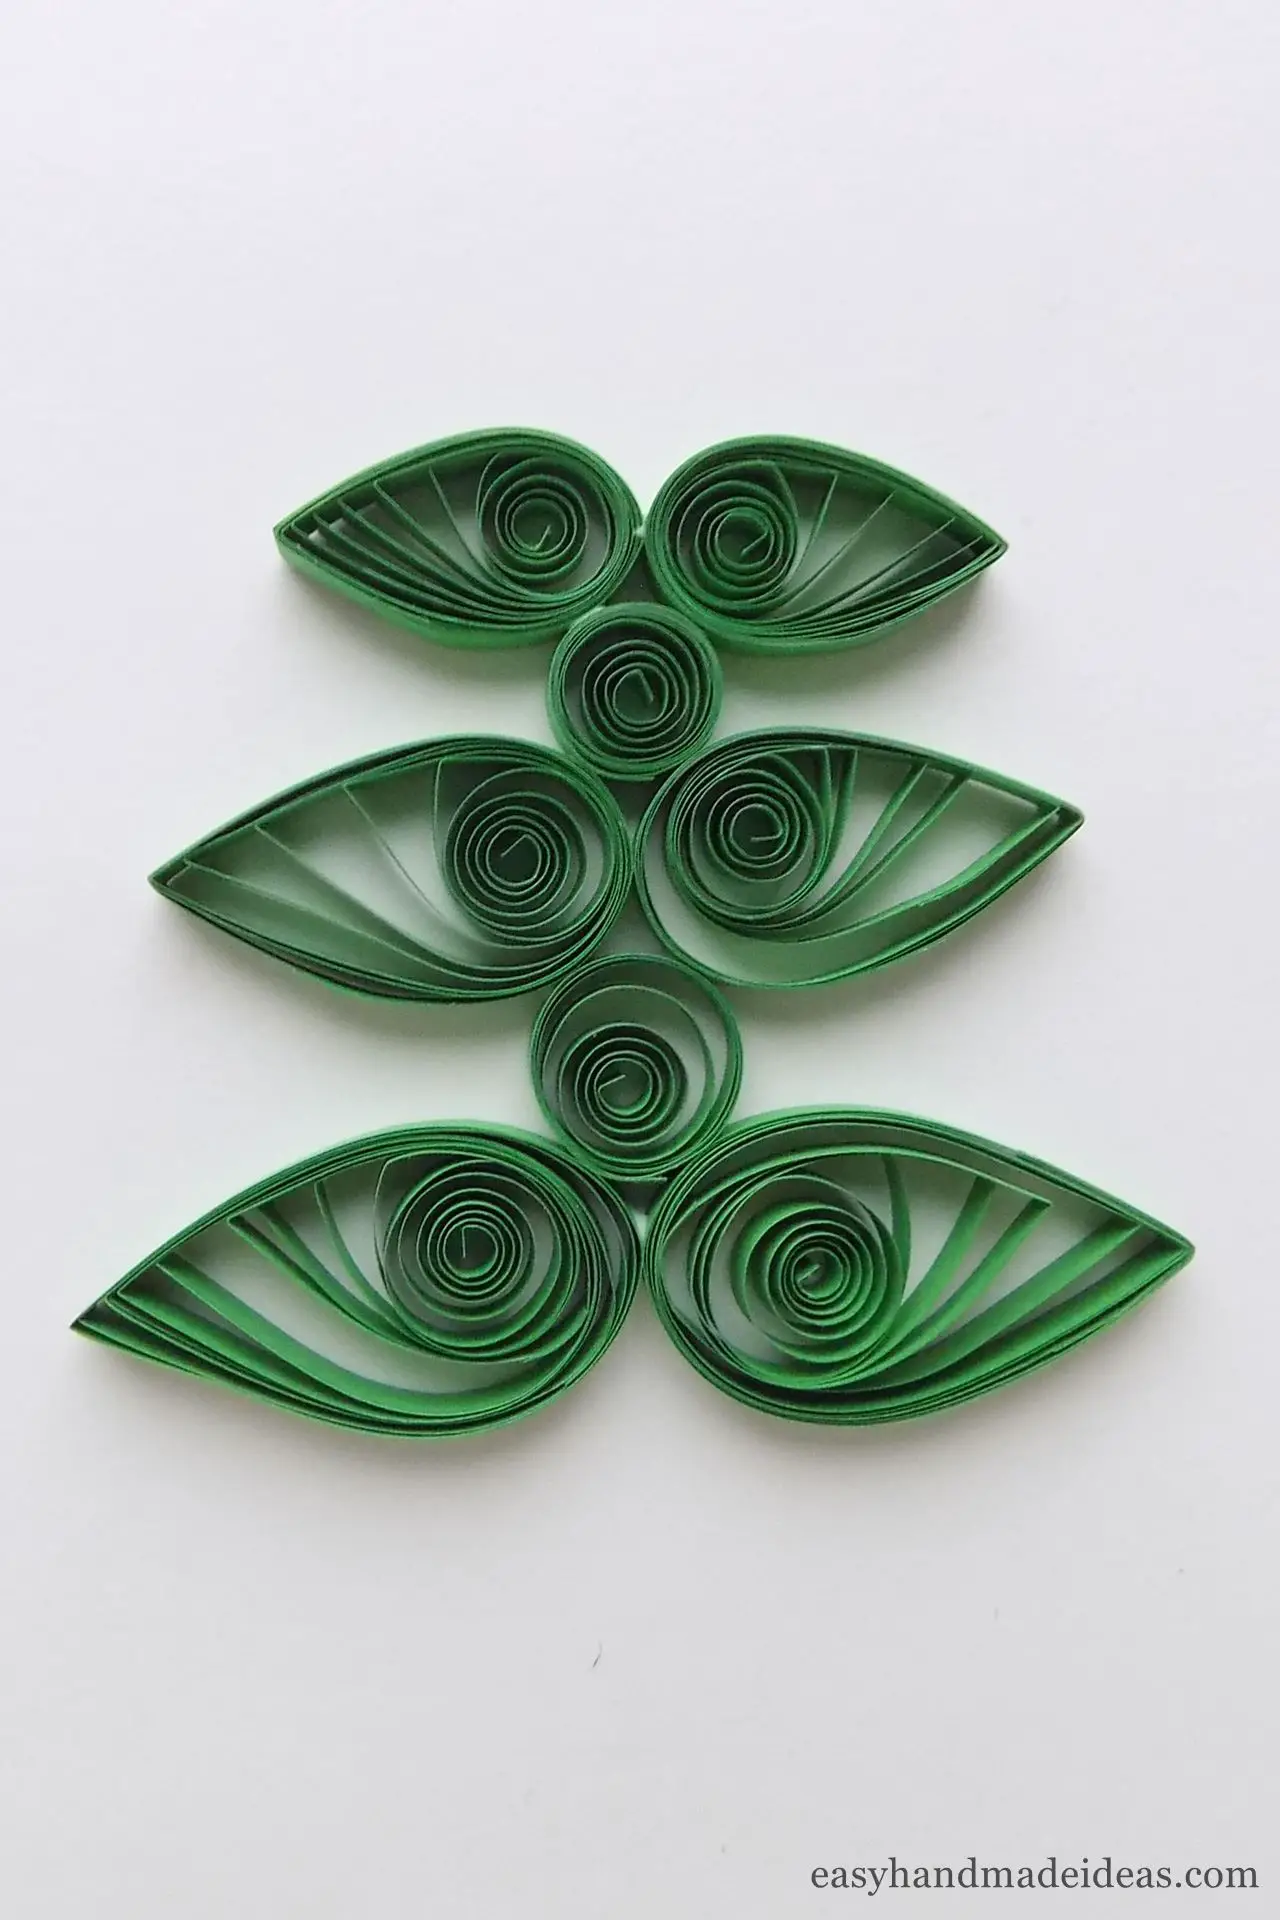
Step 9. Next, make 2 more tear drop coils from 20 mm (0,7874″) circles.
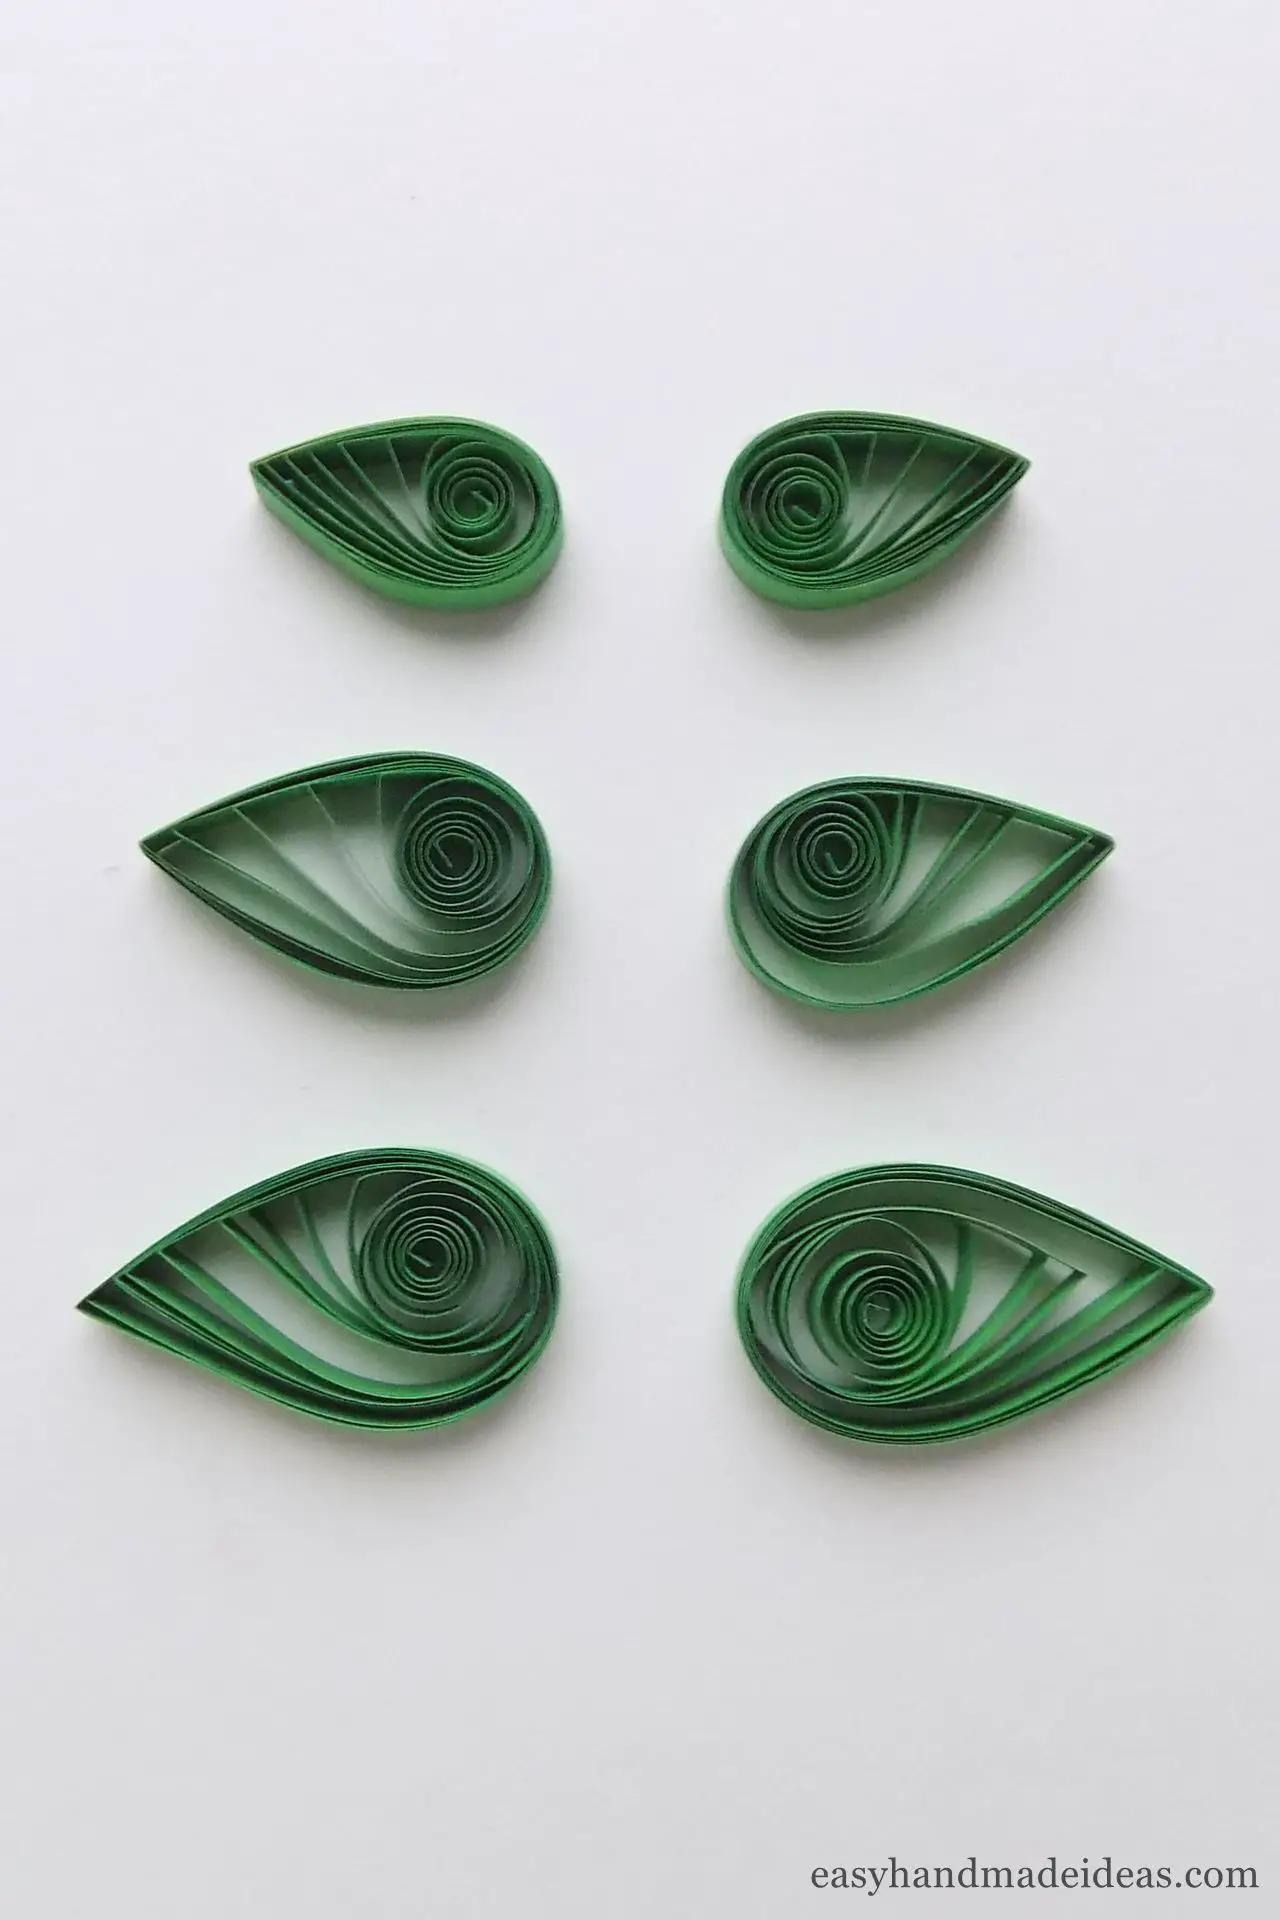
Step 10. Finally, make 3 tear drop coils of 15 mm (0,5906″).
Creating the connecting elements of the Christmas tree
Step 11. Roll one green strip each and put them in a quilling board of 10 mm (0,3937″), 12 mm (0,4724″) and 15 mm (0,5906″) to make 3 loose coils.
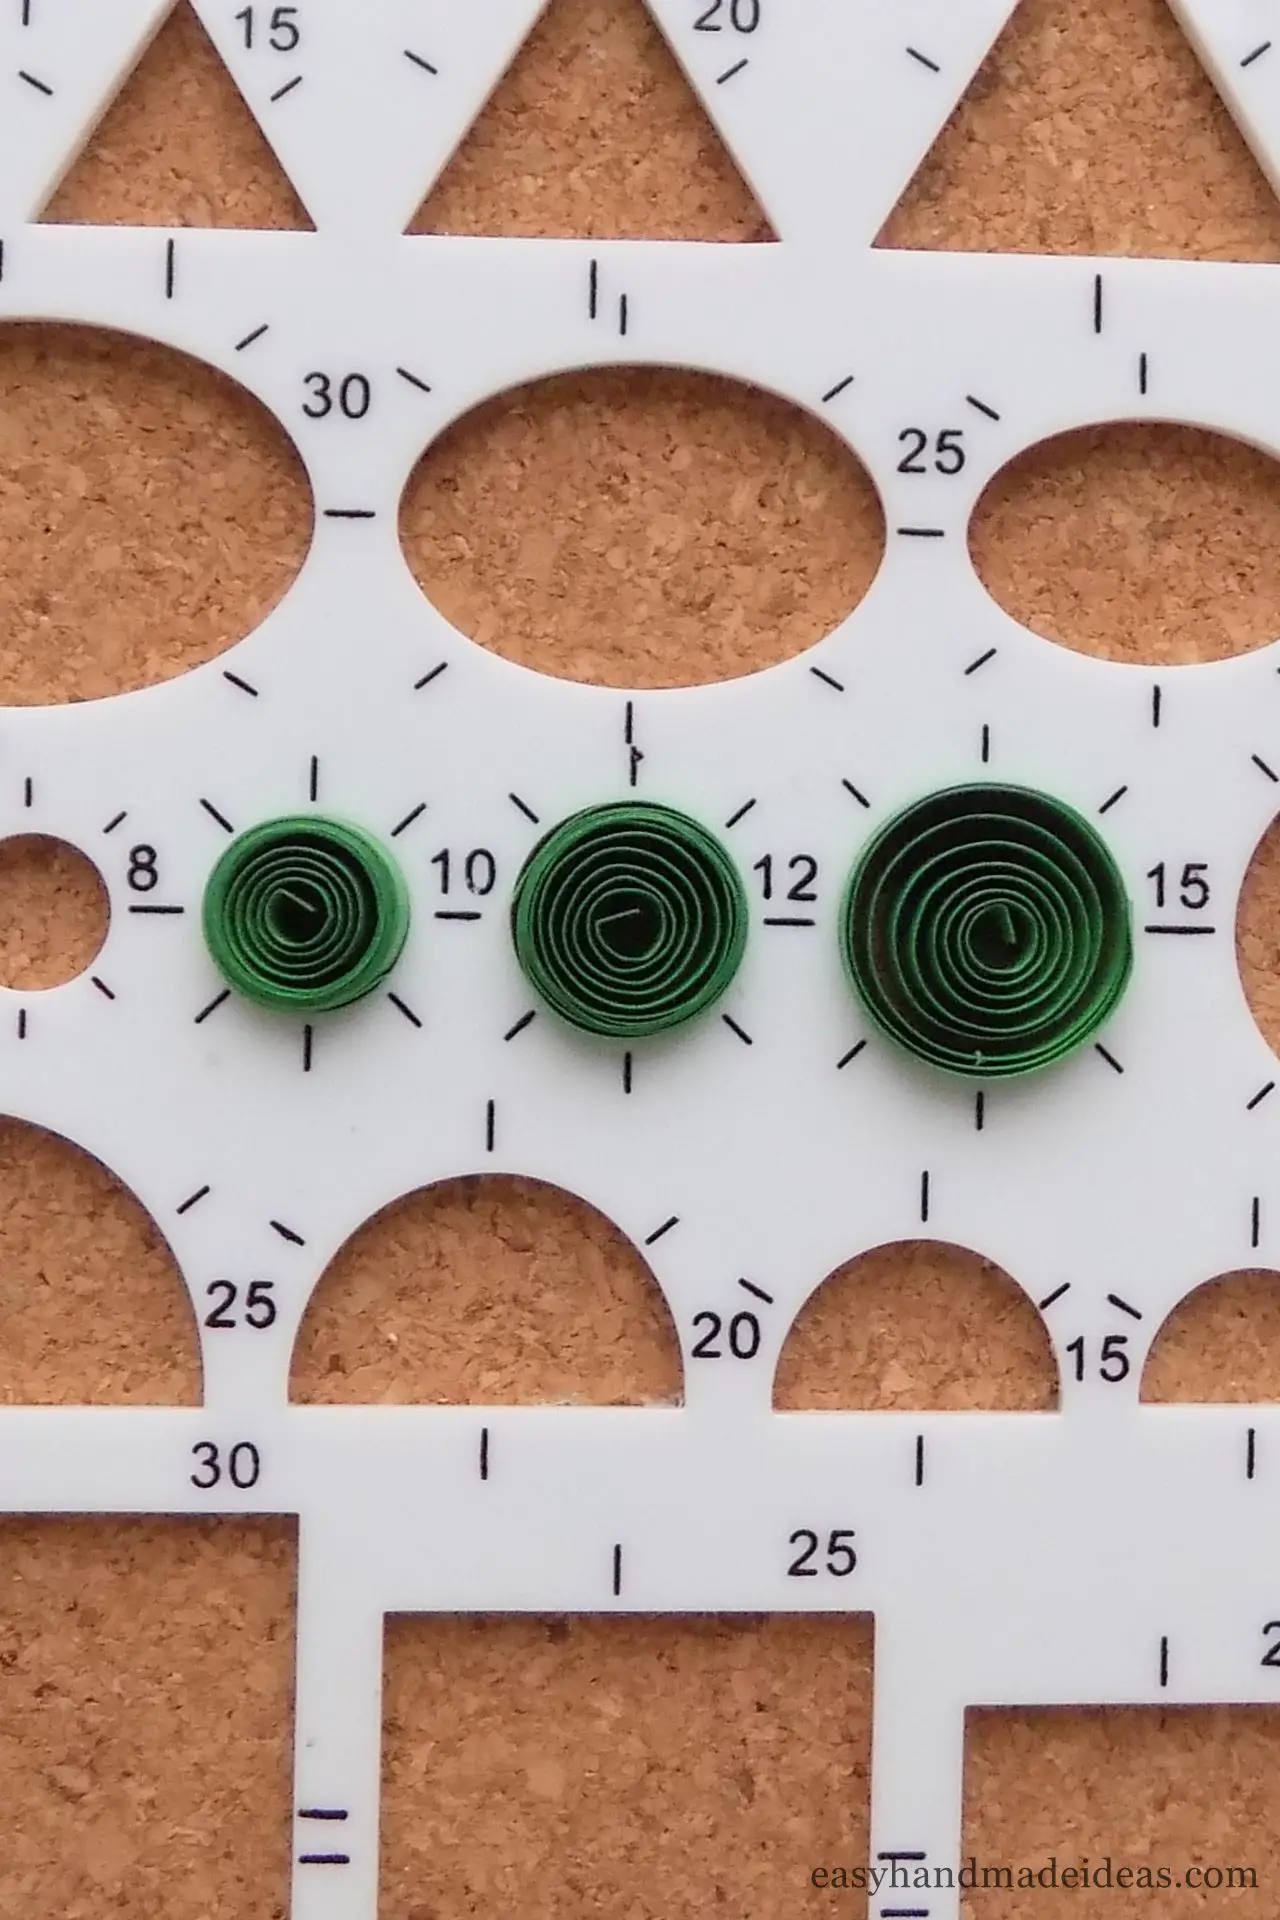
Step 12. Carefully pull out and fix the tips with glue. These connectors will help in assembling the Christmas tree.

Creating the trunk
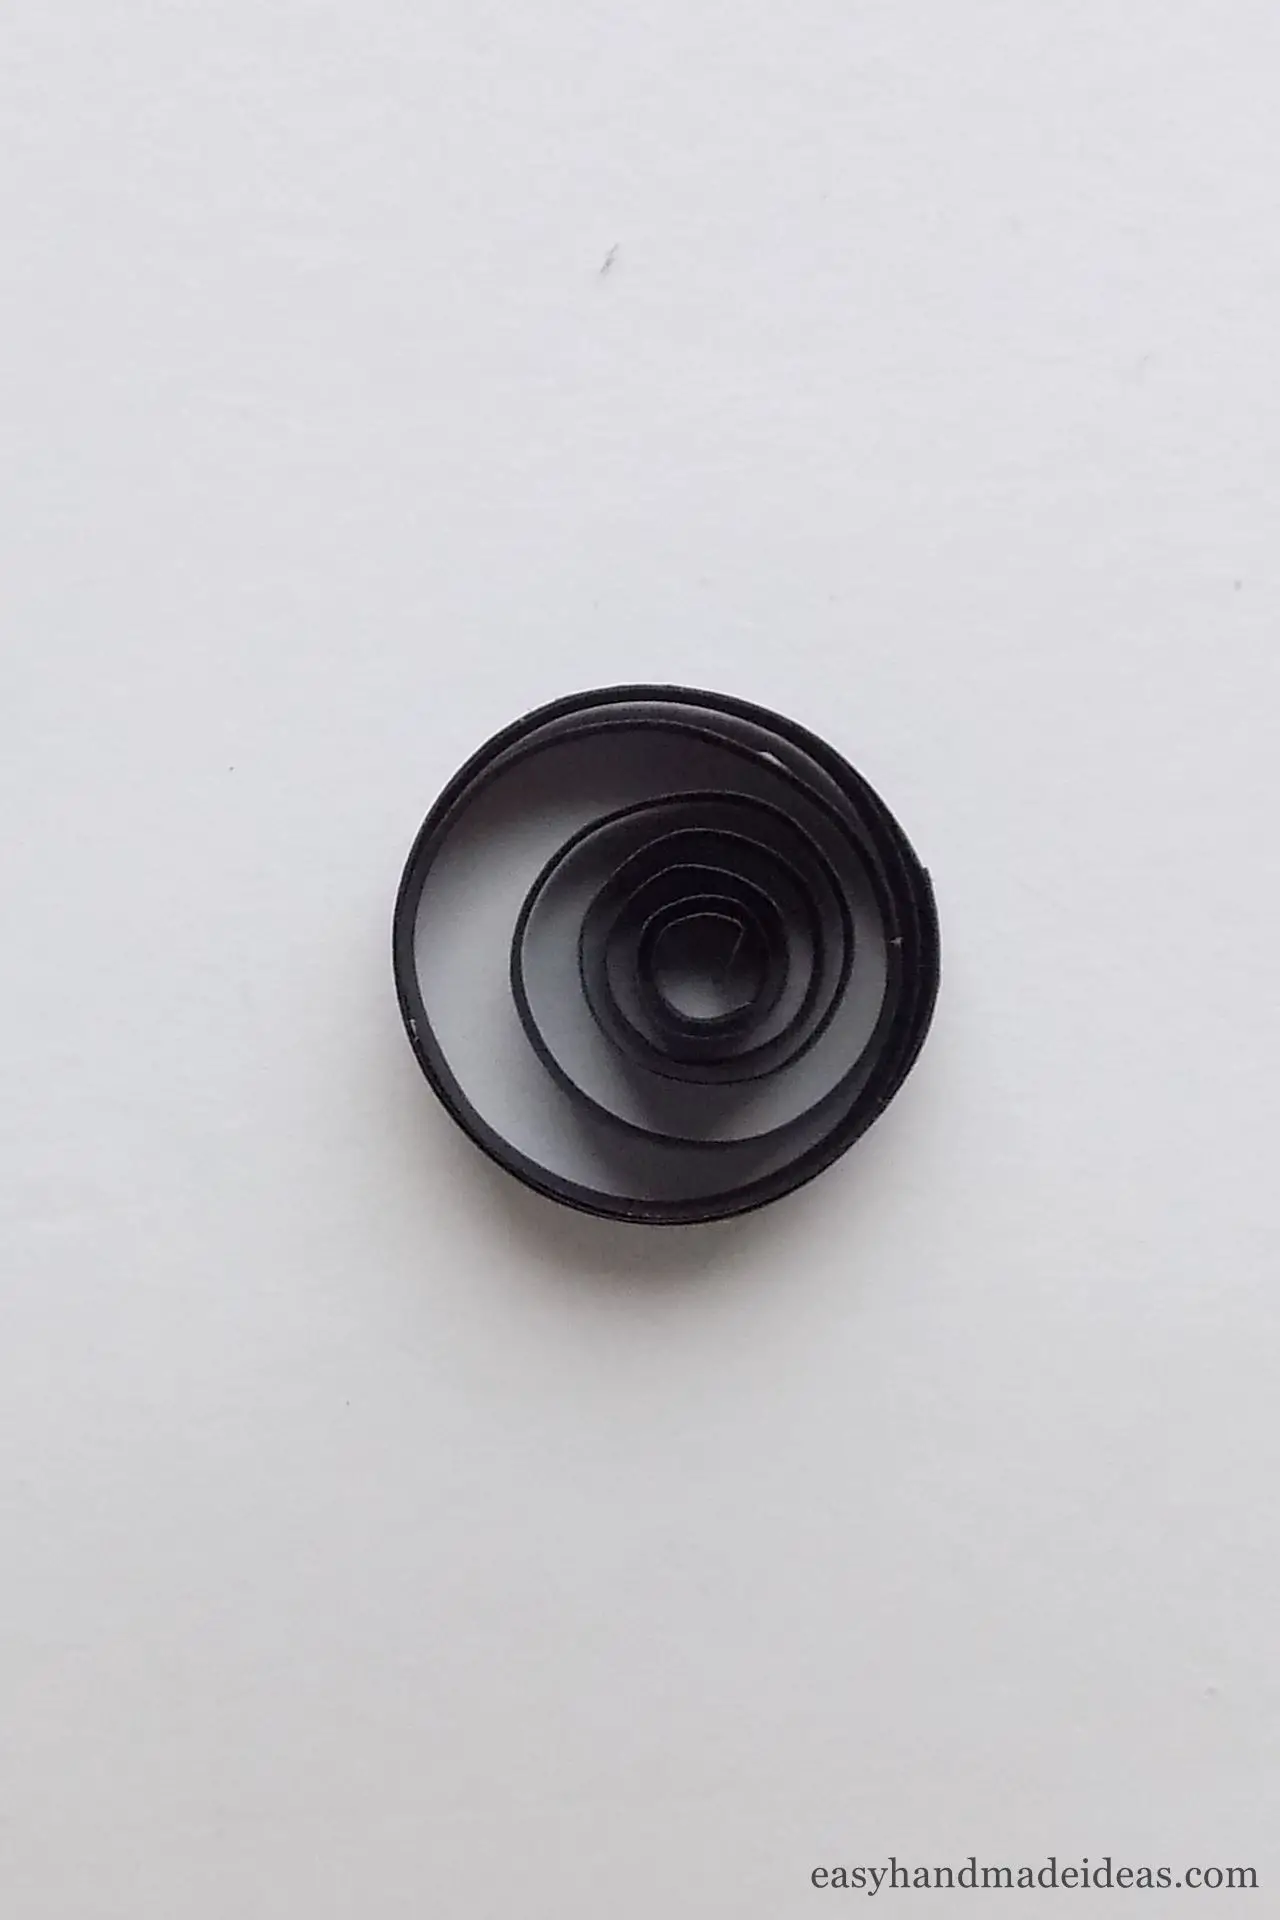
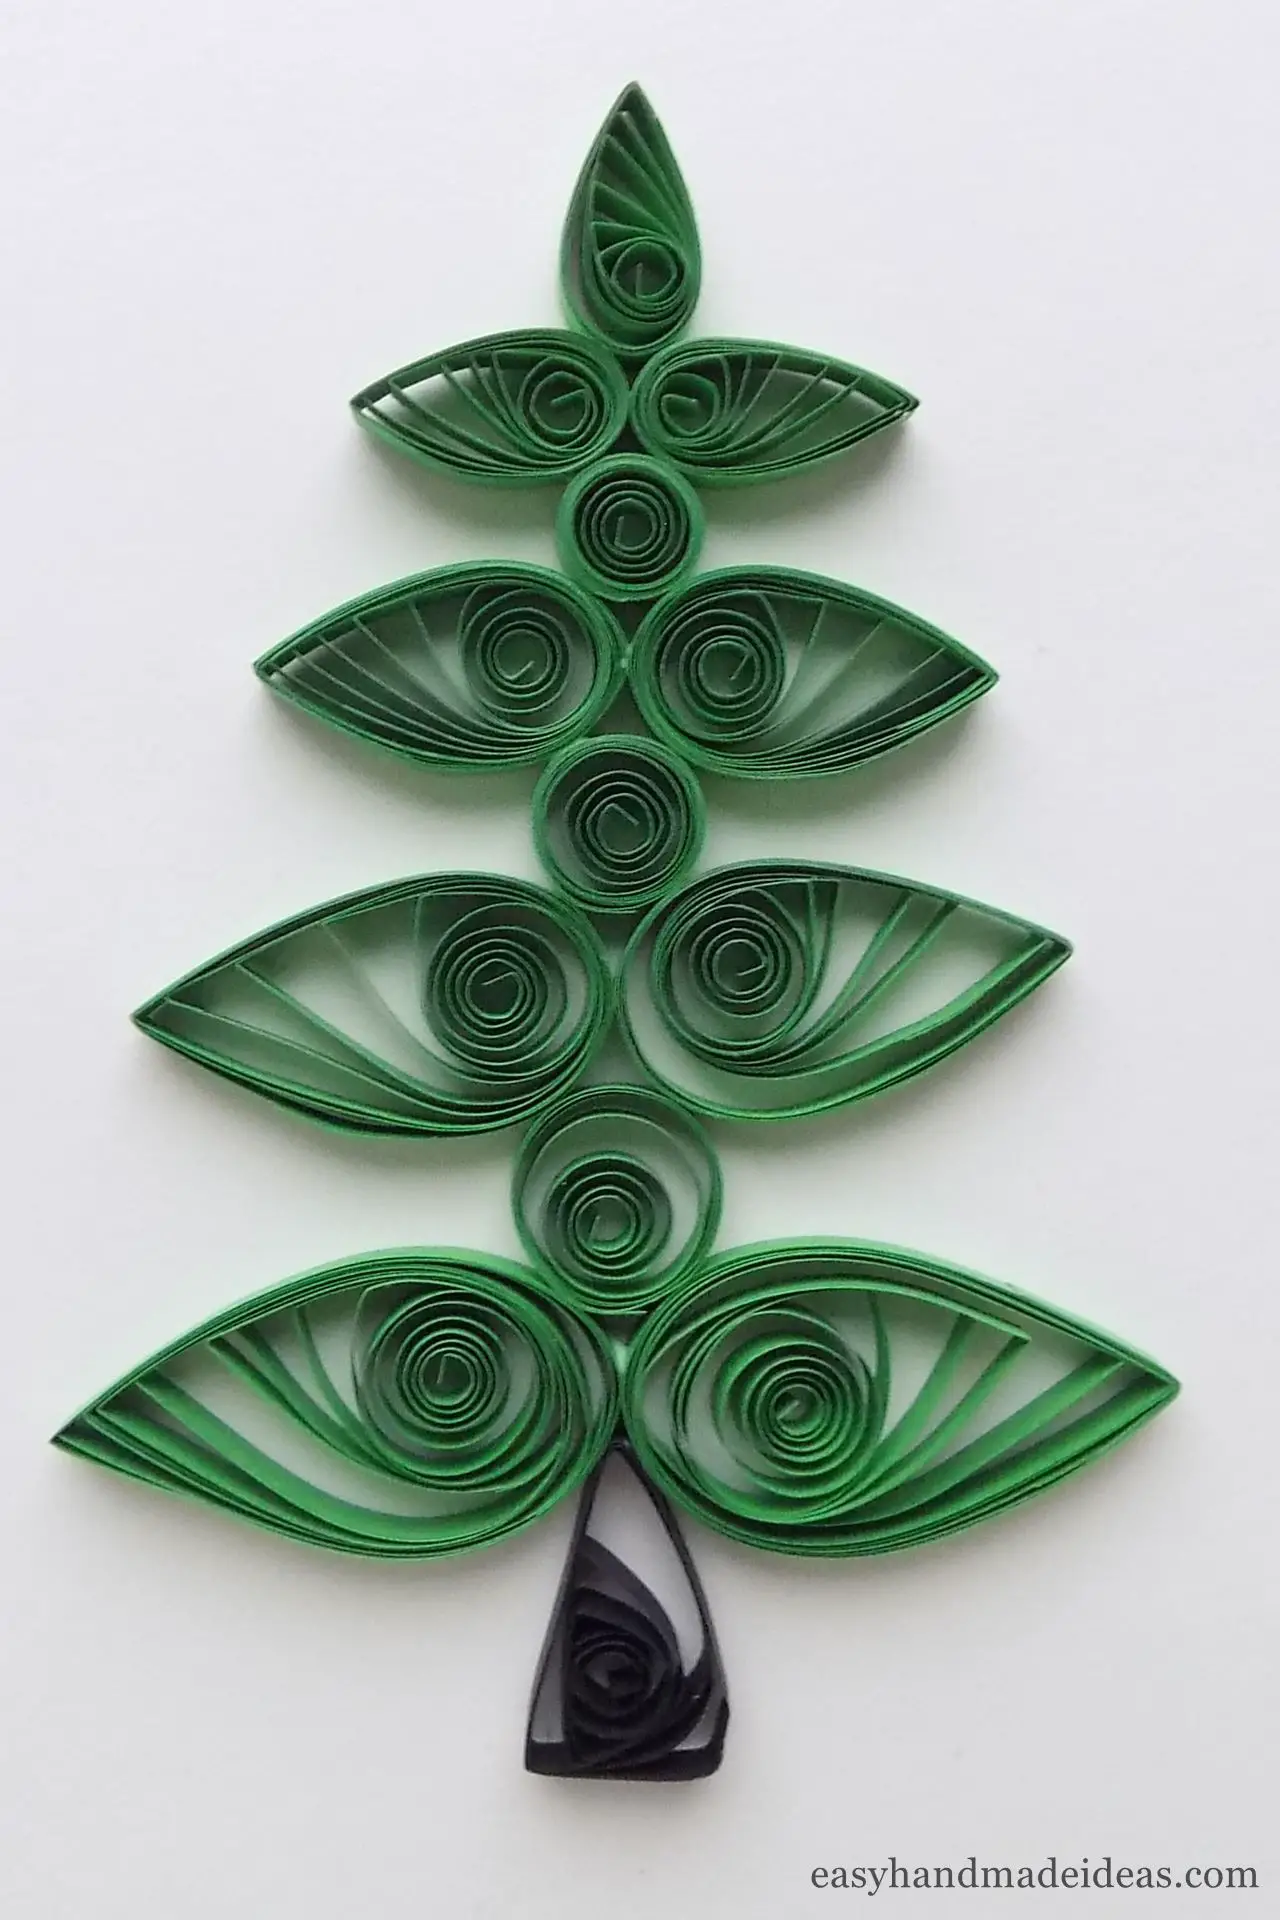
Step 13. Roll the black paper strip and place it in a 20 mm (0,7874″) cell on the quilling board.
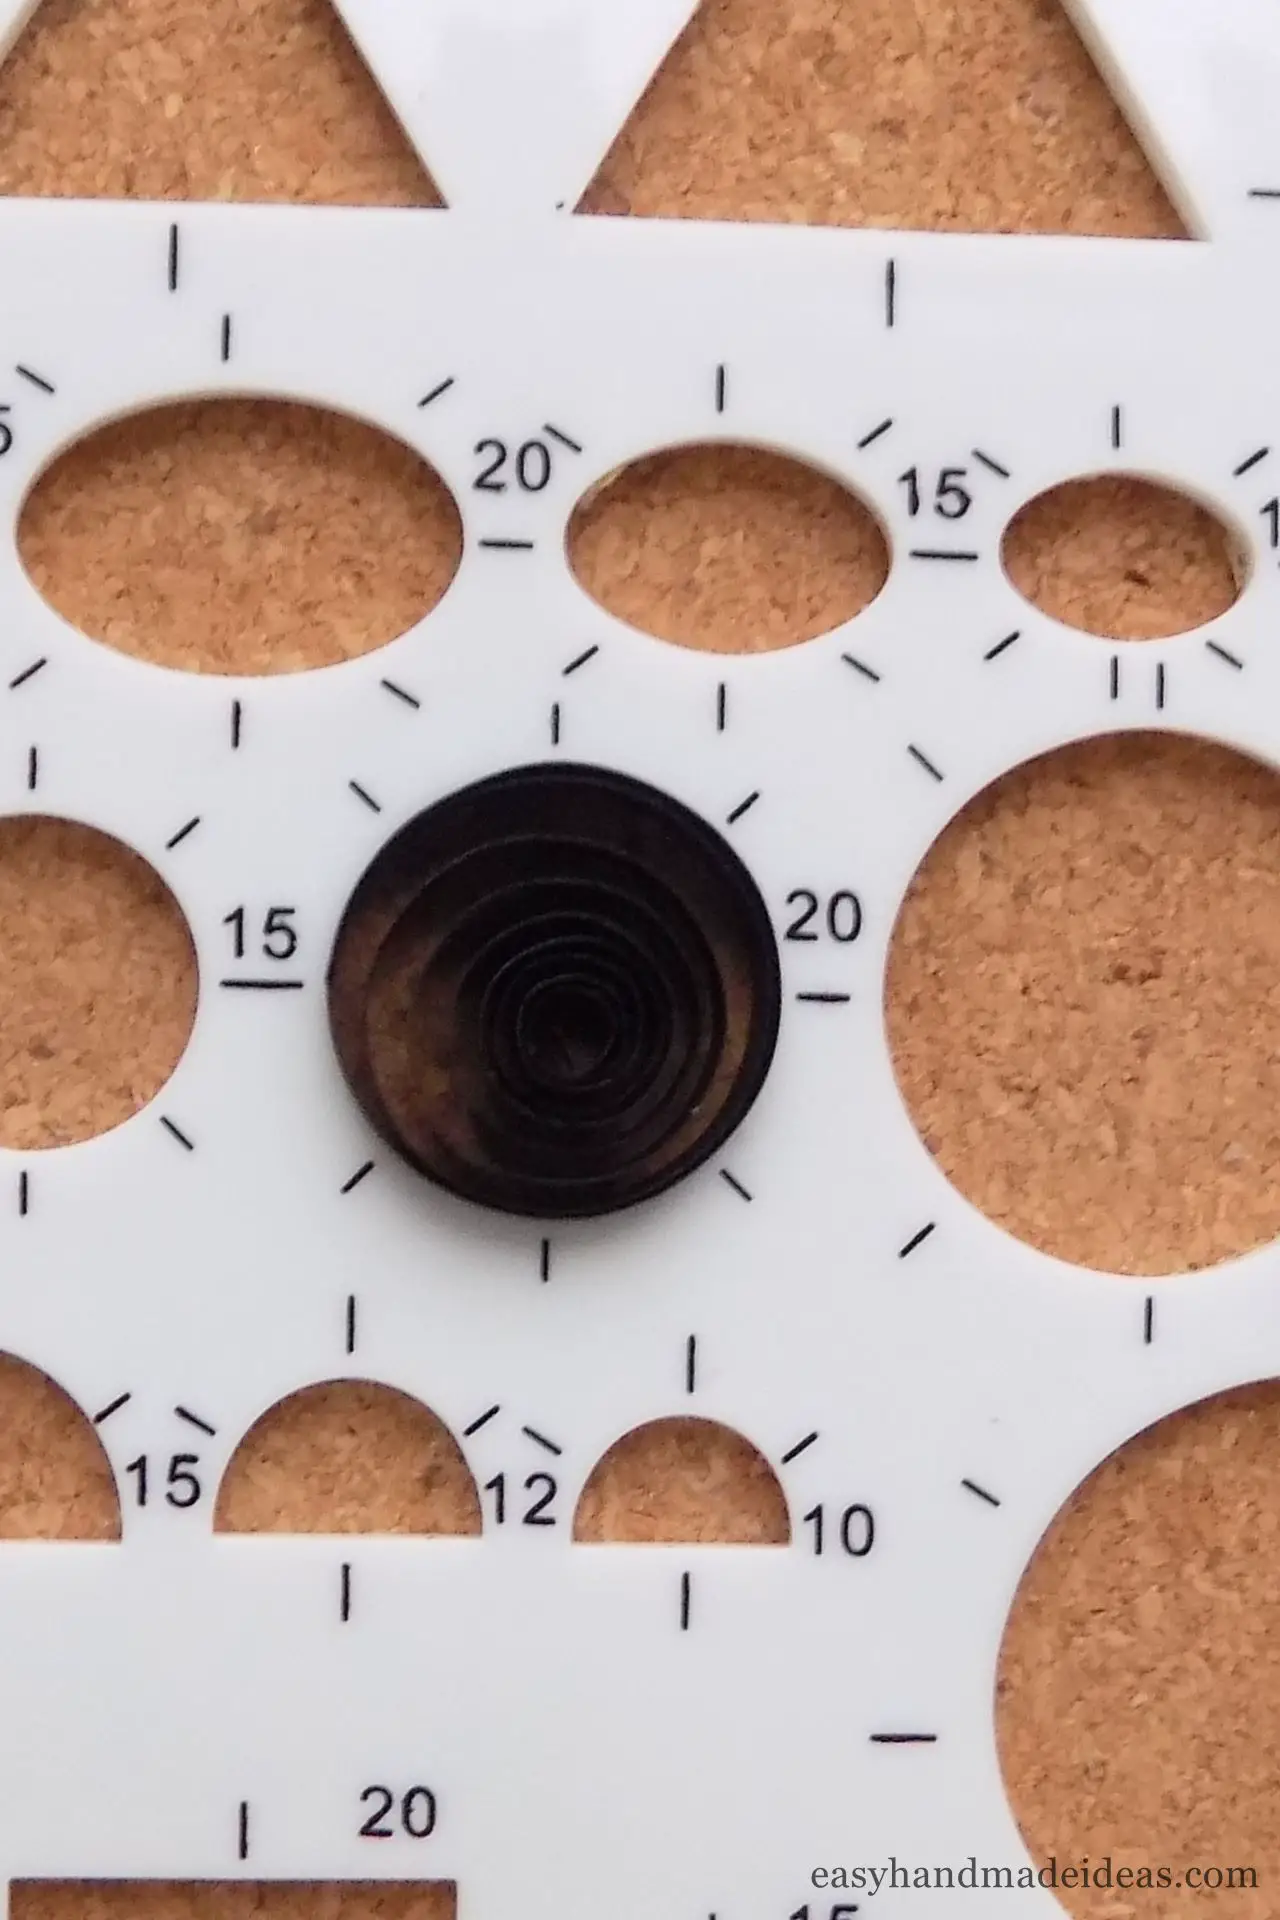
Step 14. Take out the loose coil and glue the tip.
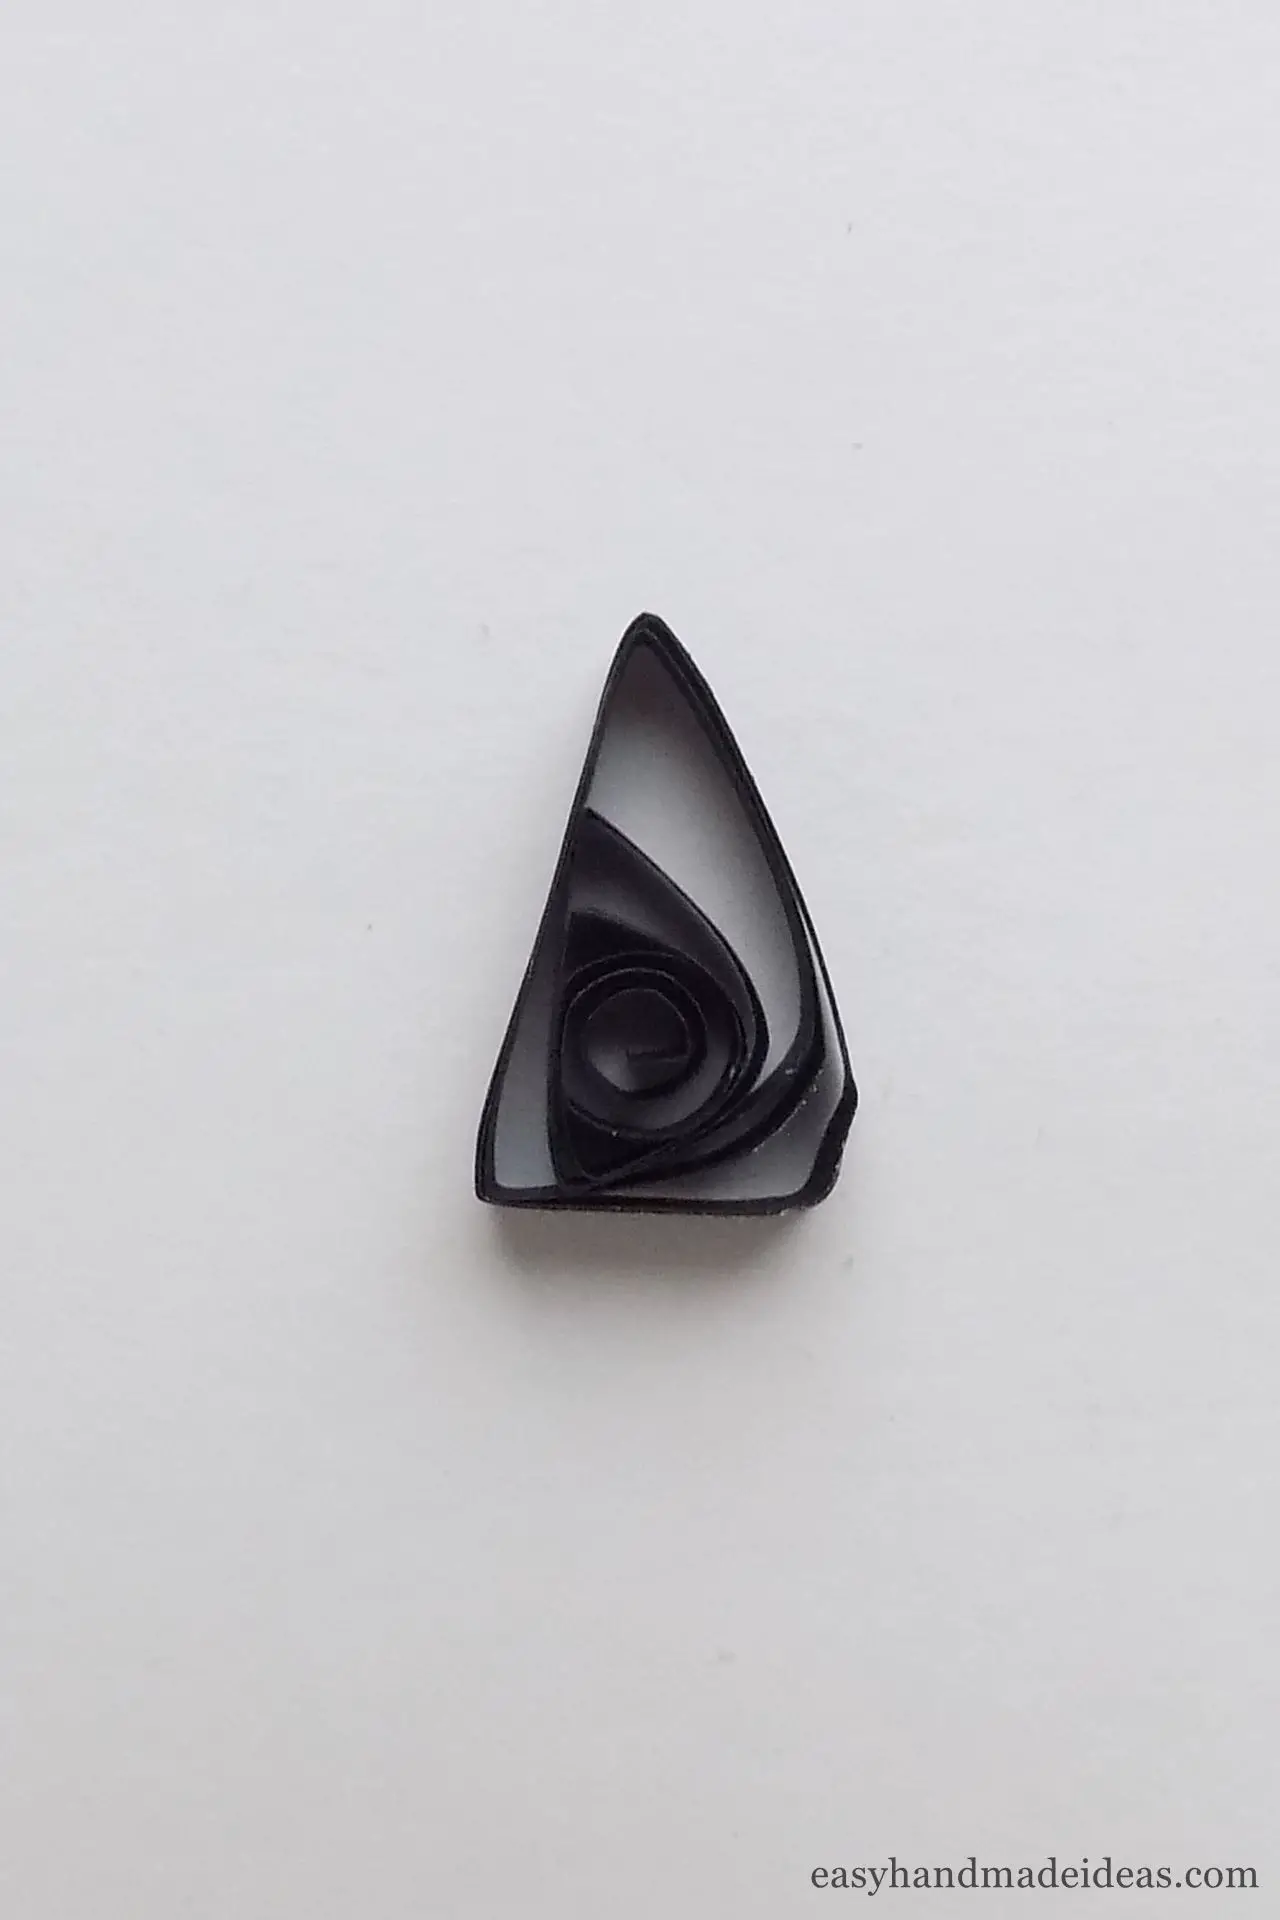
Step 15. Give the coil a triangular shape. To do this, pinch the coil in three points with your fingers to get the shape of a triangle coil.
Making decorations
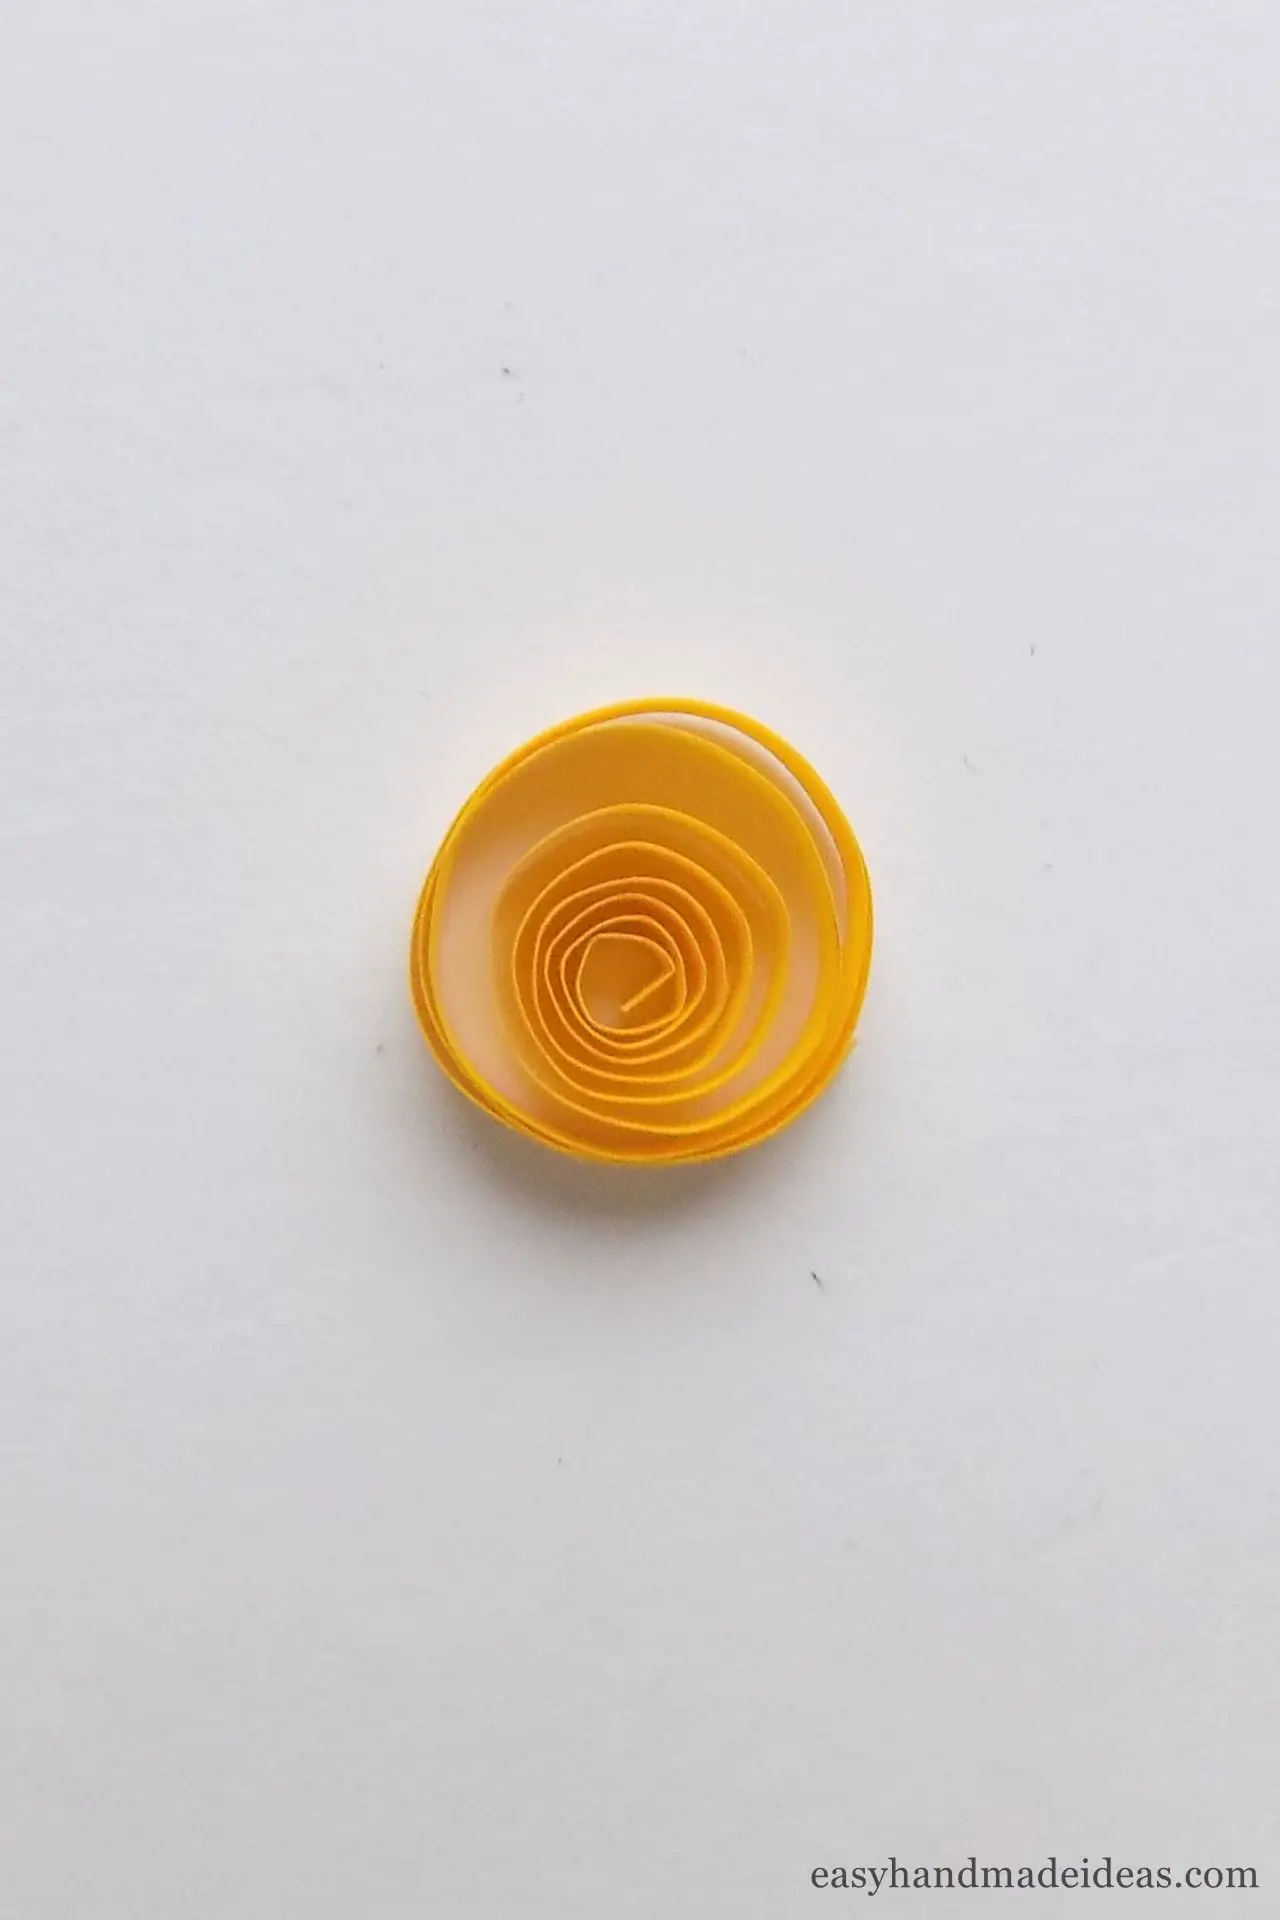
Step 16. First make a star to decorate the top of the Christmas tree. To do this, roll a yellow paper strip and place it in a 20 mm (0,7874″) diameter cell of the quilling board.
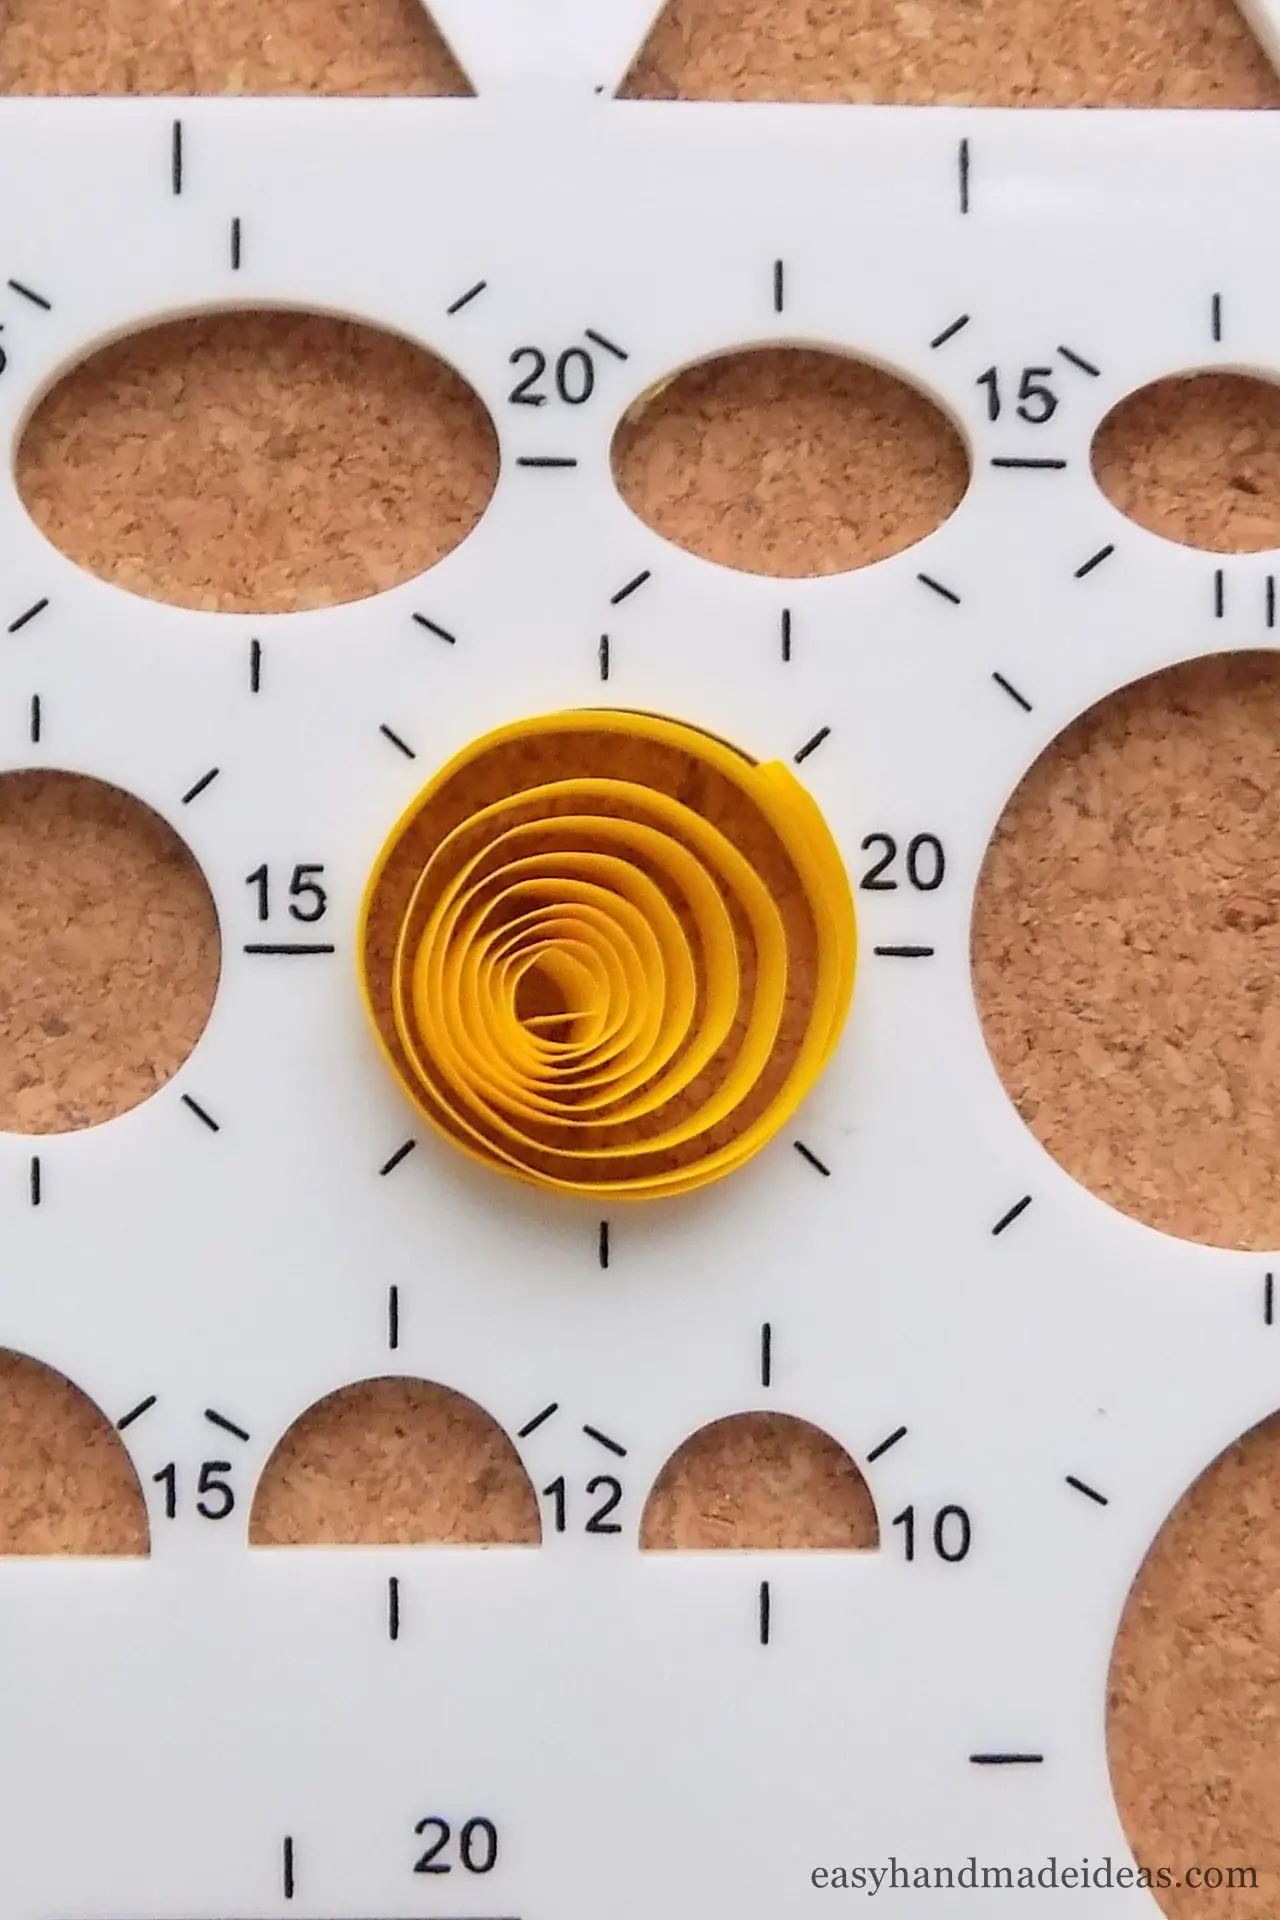
Step 17. Carefully take out a circle (loose coil) and glue its tip.
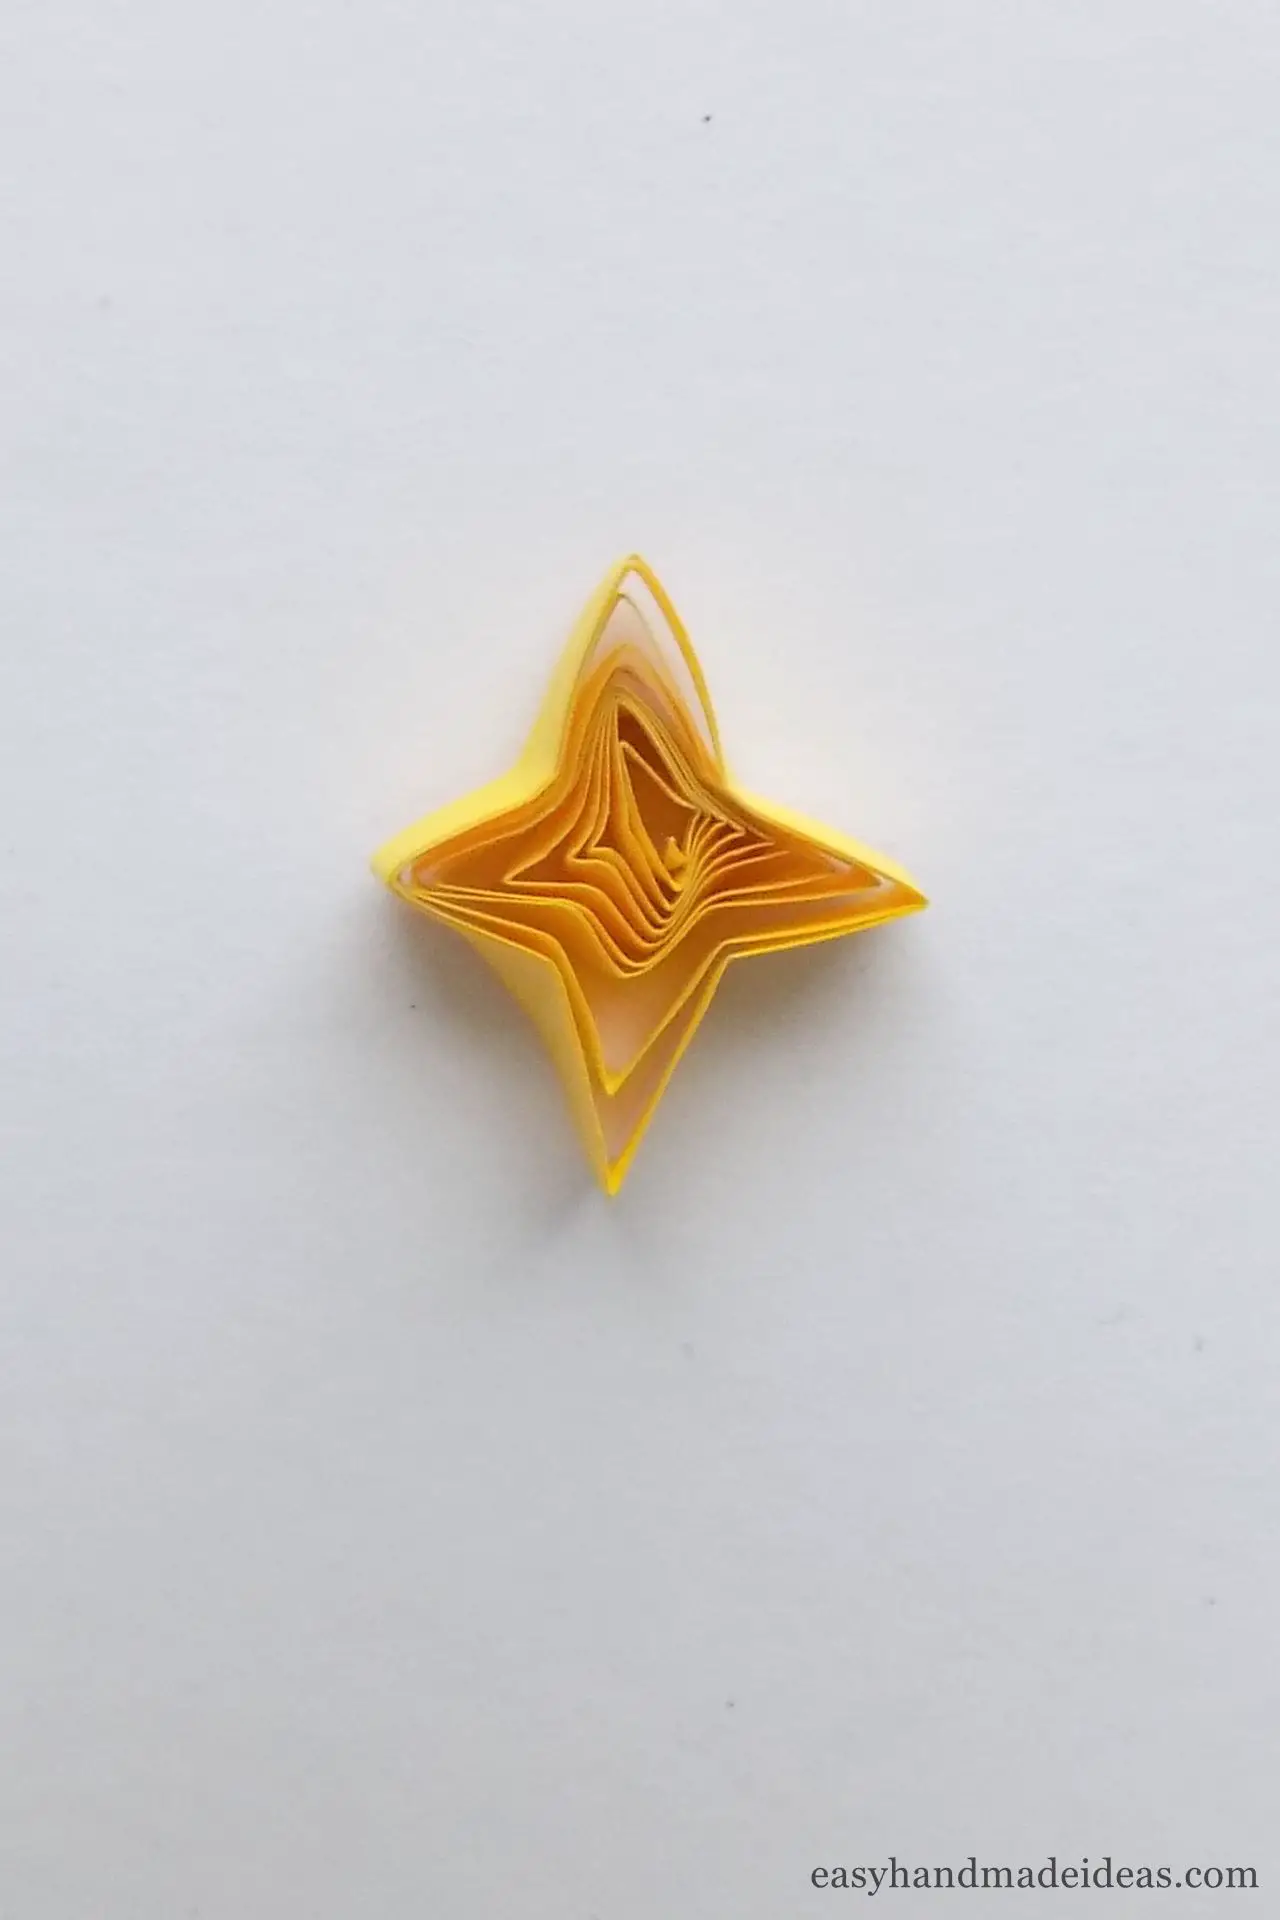
Step 18. With your fingers give the shape of a four-pointed star. To do this, pinch the circle on both sides, you will get a marquise coil. Then pinch the other sides to make a diamond shape.
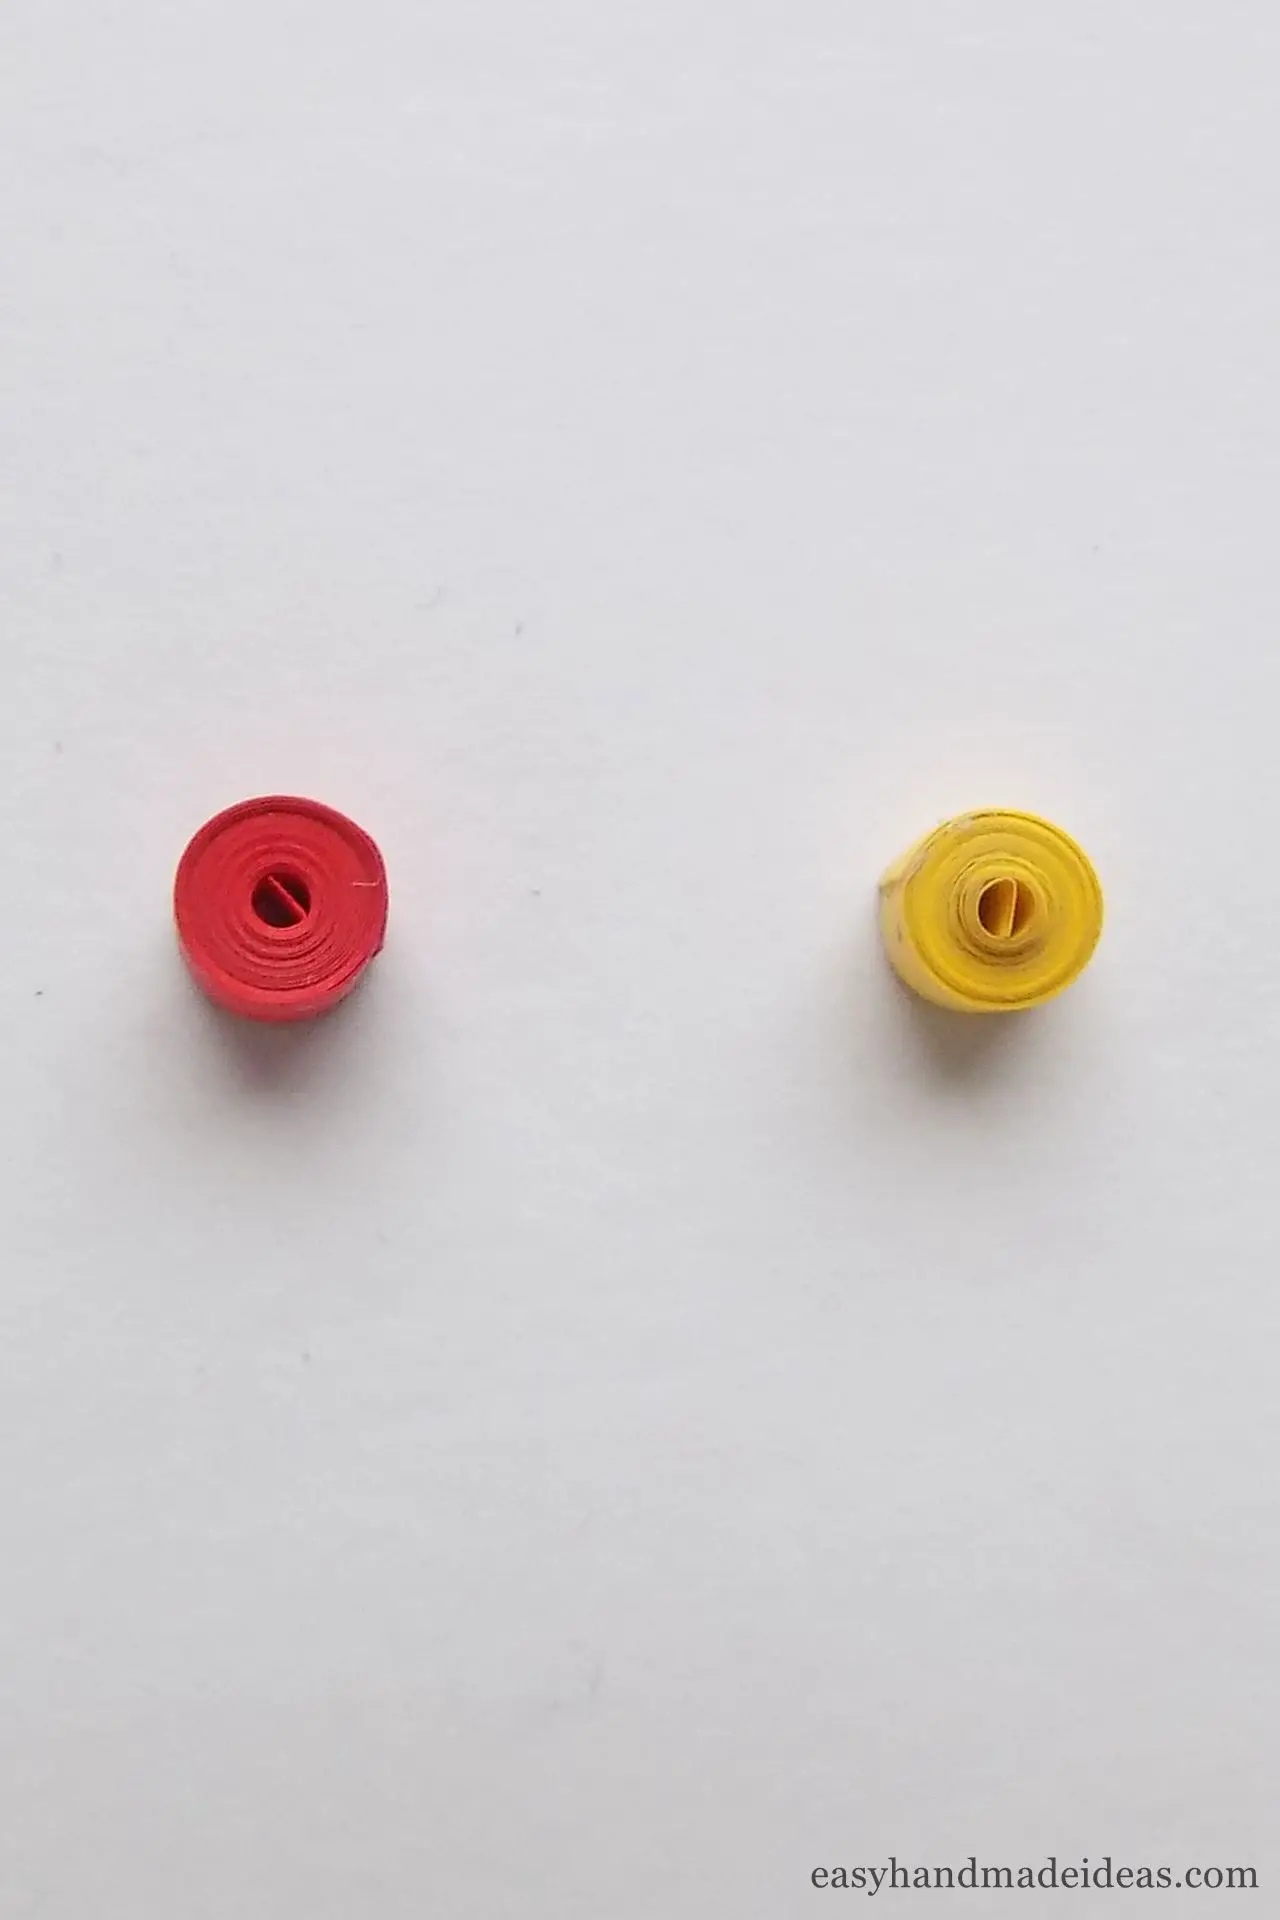
Step 19. To make Christmas tree balls, twist tightly red and yellow paper strips to get 2 tight rolls.
Assembling a Christmas tree
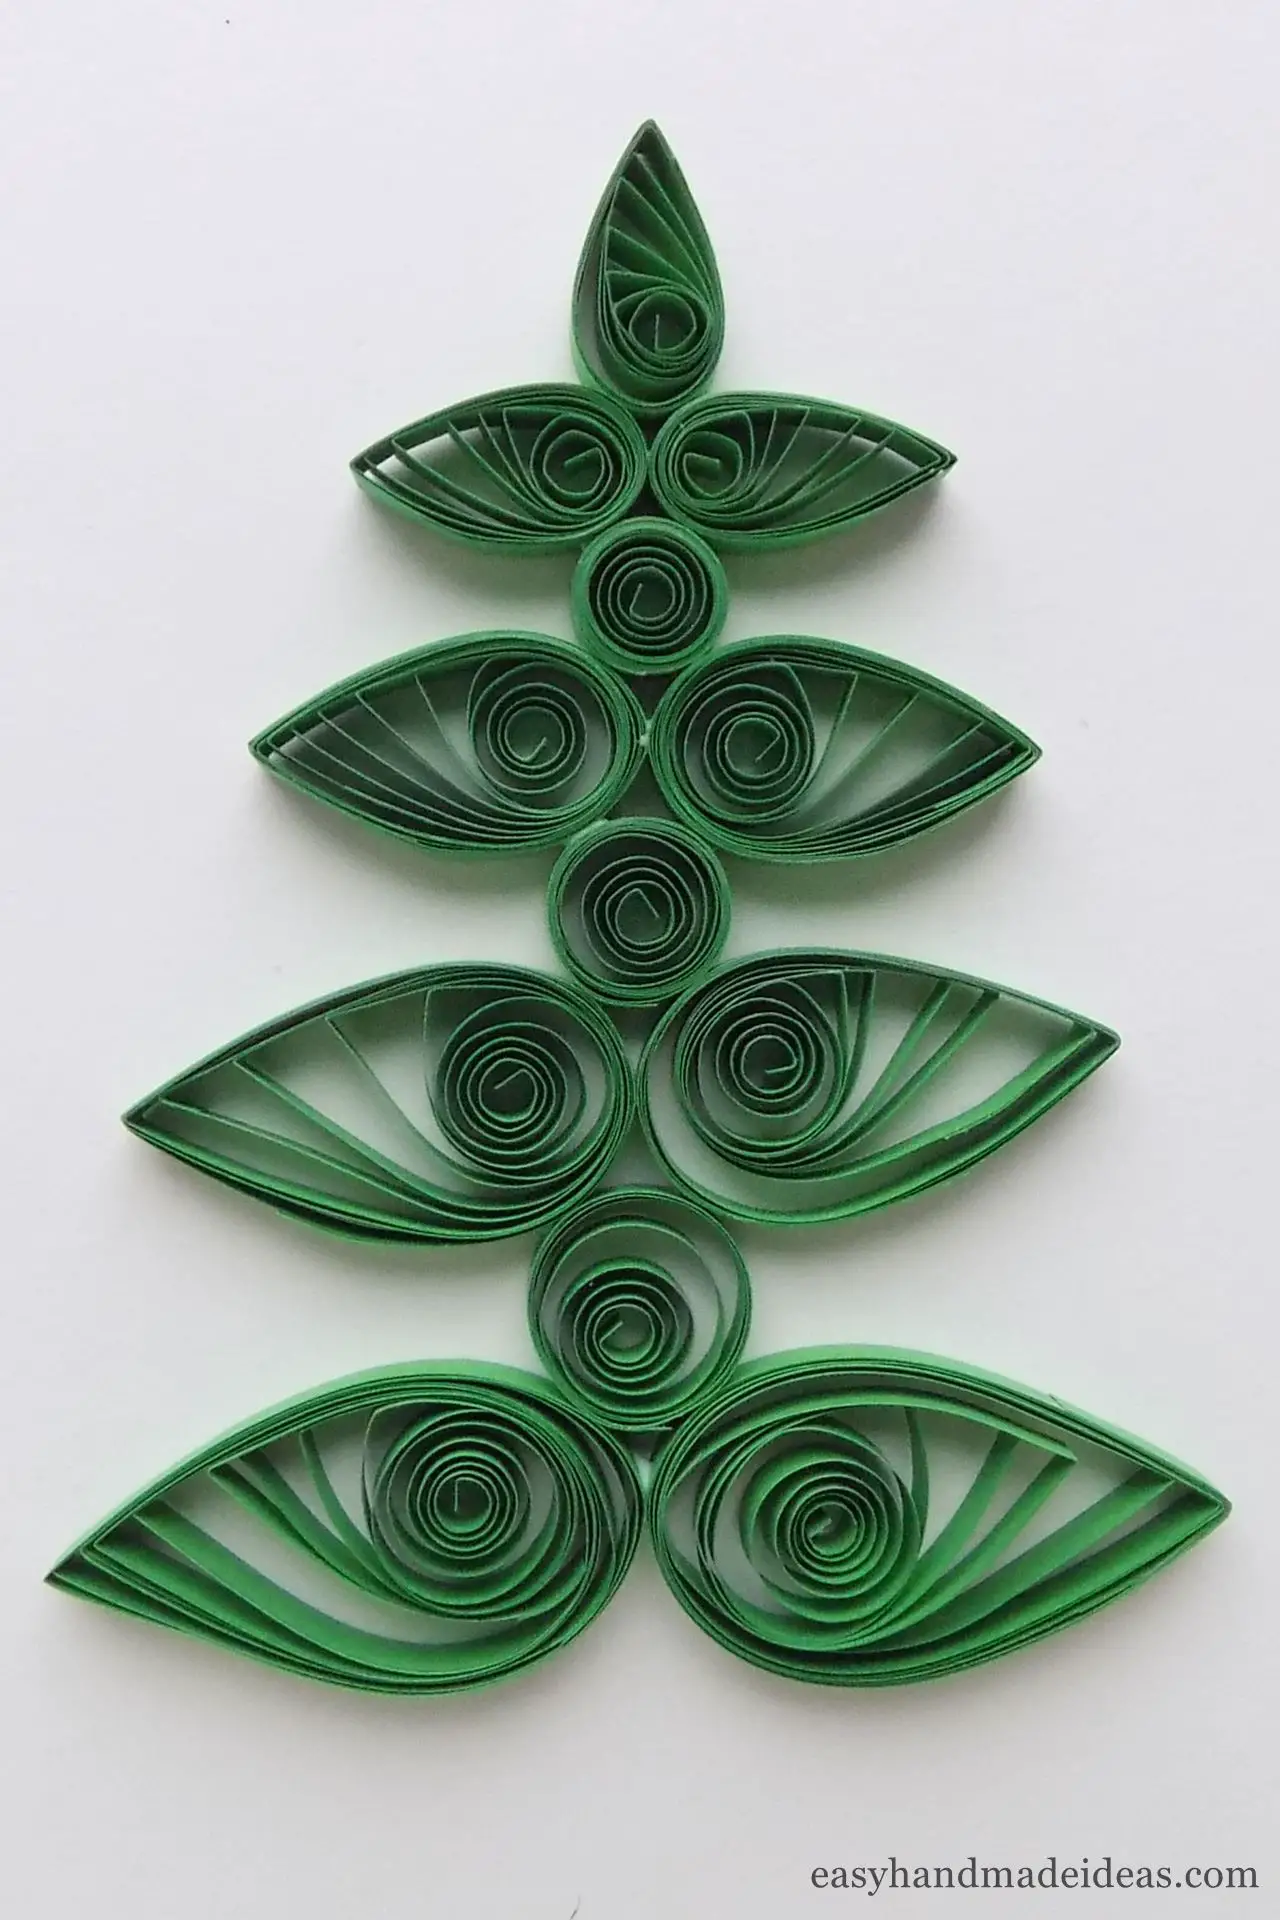
Step 20. First glue together the green drop coils with a size of 30 mm (1,1811″), and fix the loose coil with a diameter of 15 mm (0,5906″) on top.
Step 21. Add branches made of 25 mm (0,9843″) tear drop coils on top.
Step 22. Glue the loose coil 12 mm (0,4724″), and then add branches of 20 mm (0,7874″).
Step 23. Finally, glue the remaining parts to make a Christmas tree like in the photo.
Step 24. Glue the trunk at the bottom.
Step 25. On the top of the tree place a yellow star.
Step 26. And on the branches glue small balls. You got a Christmas tree in quilling style.
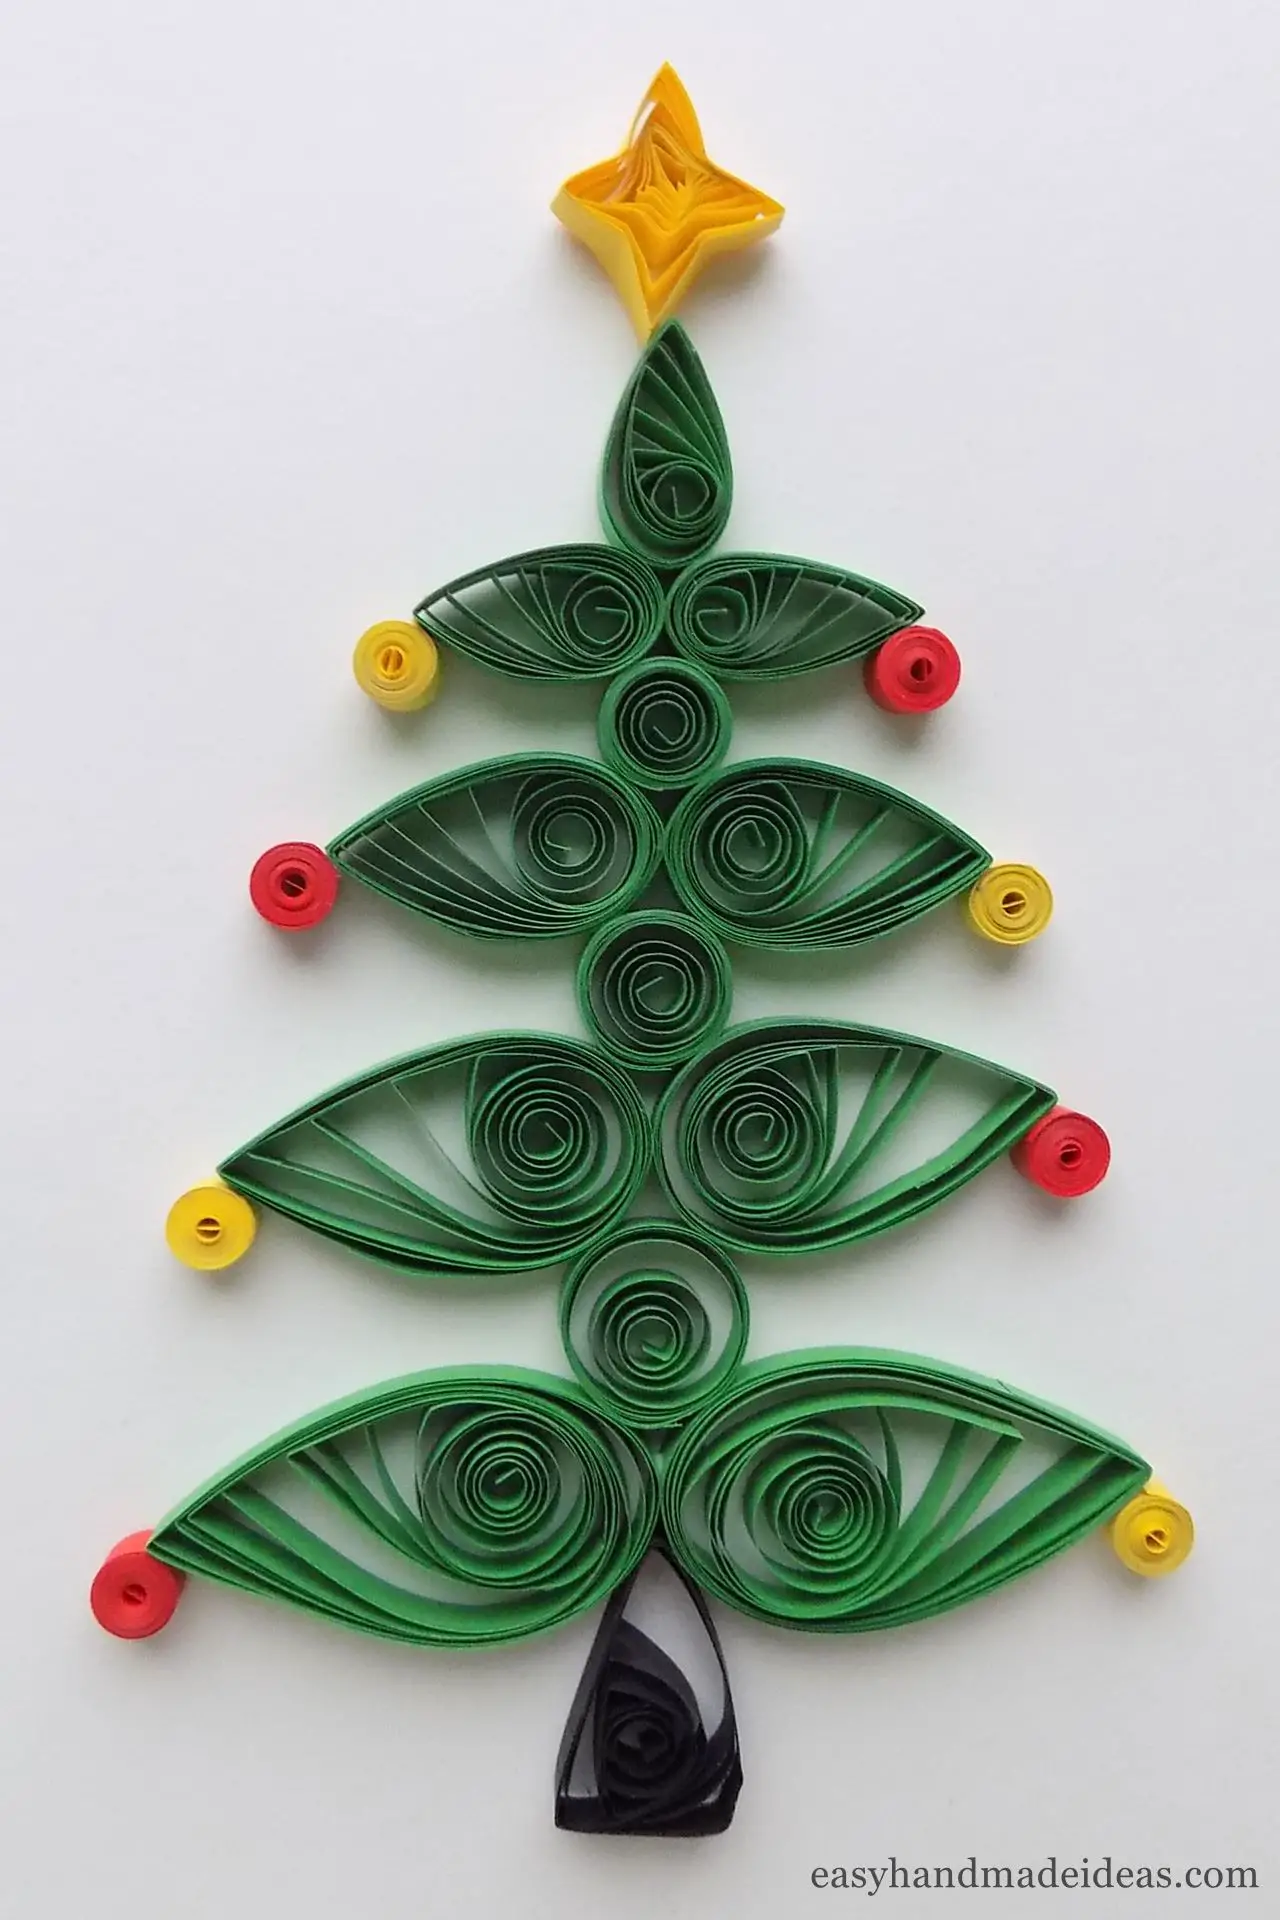
Using pieces of different sizes, you can vary the size of the finished craft. And you can decorate it at your choice, adding Christmas tree toys made of paper strips.