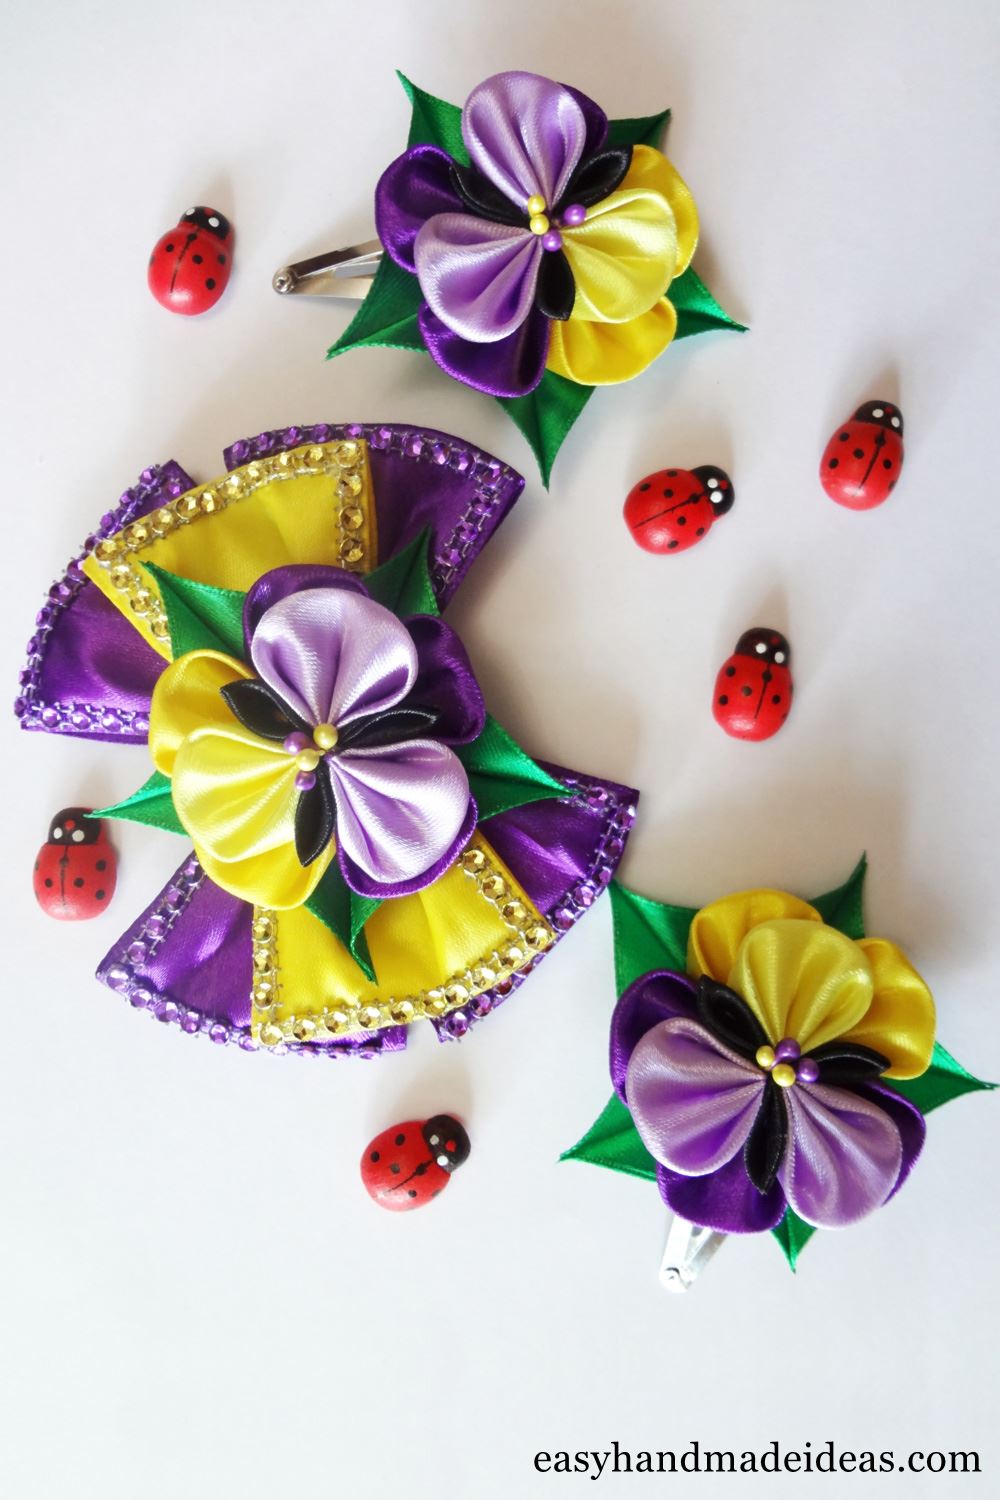
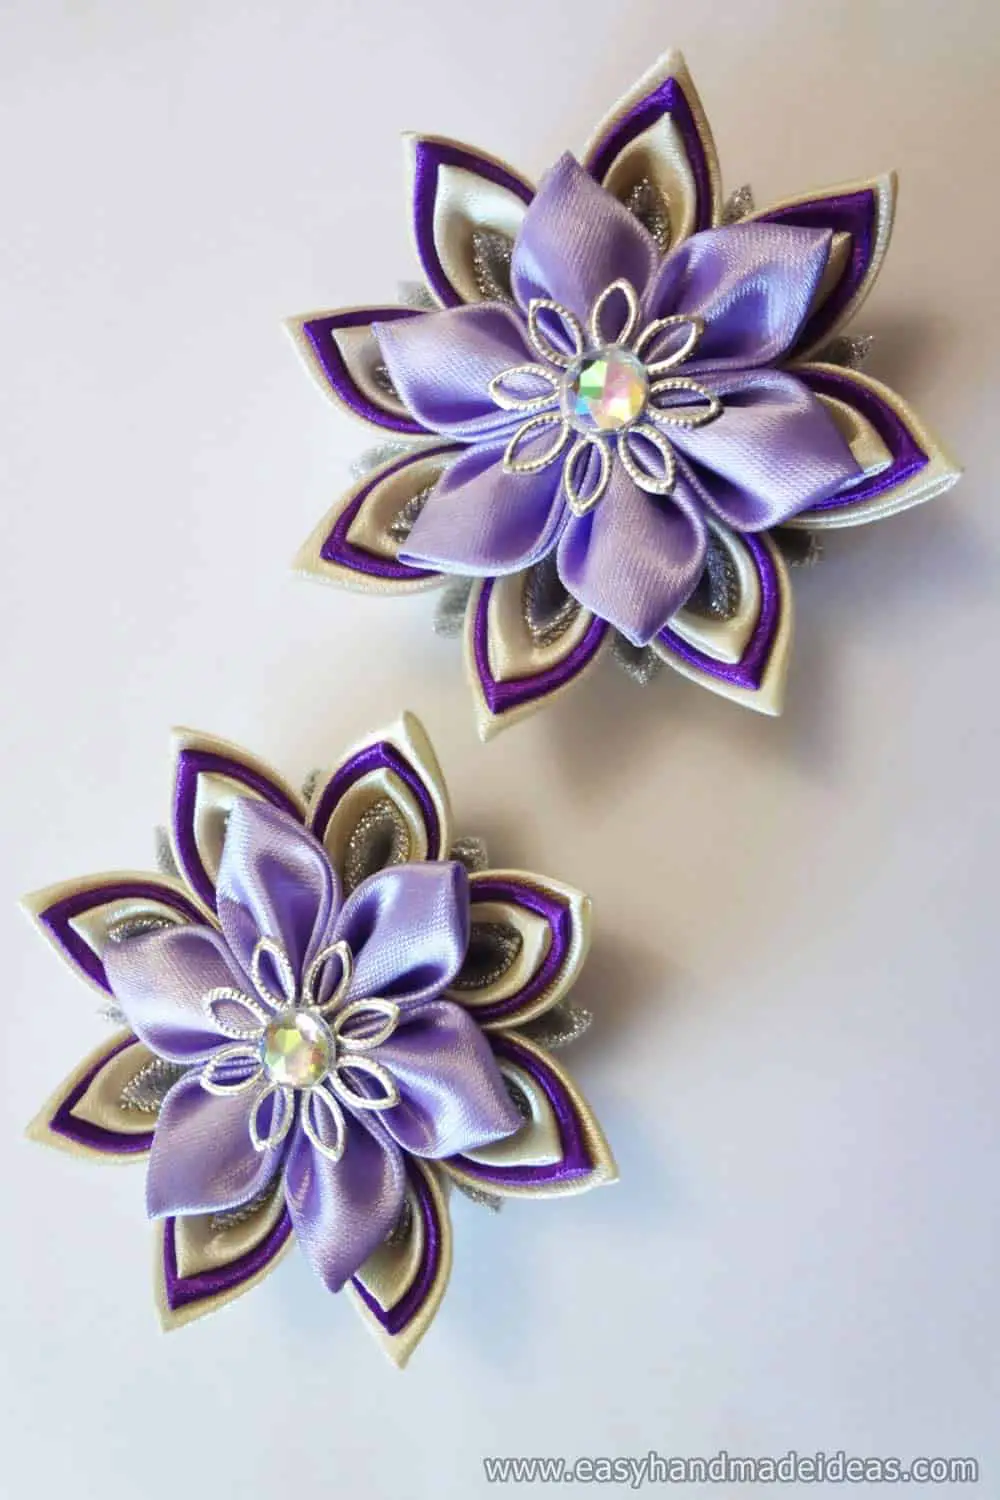
Hair accessories are products that are necessary for girls and adult women. This life hack shows how to make kanzashi hair clips that are suitable for babies and girls. The flowers are made in a golden-lilac-cream color scheme. Beautiful hair clips are decorated with jewelry and elegant multi-layered flowers.
To model flowers you need to prepare 3 types of petals from the ribbon. The example shows how to make small silver sharp petals, four-layered sharp Kanzashi petals and flat parts in the shape of a rhombus.
Idea N1
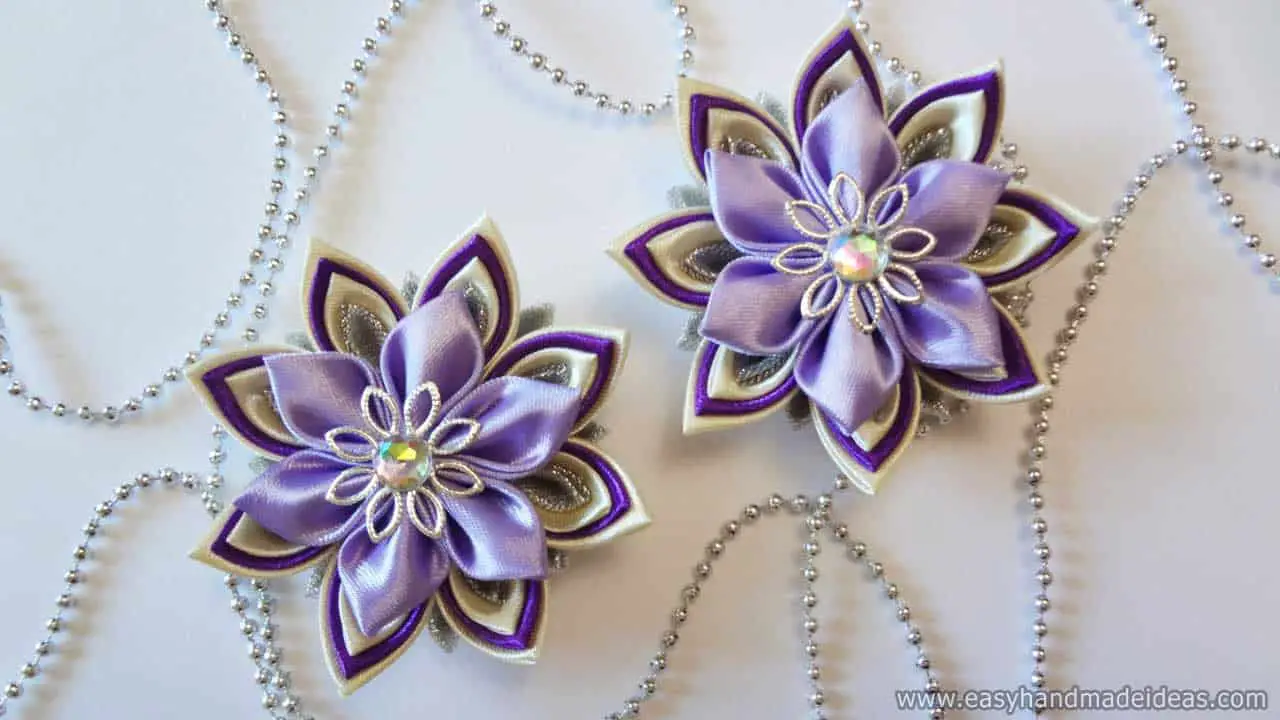
Kanzashi flower
Total Time: 50 minutes
Step 1: Prepare the pieces of ribbon
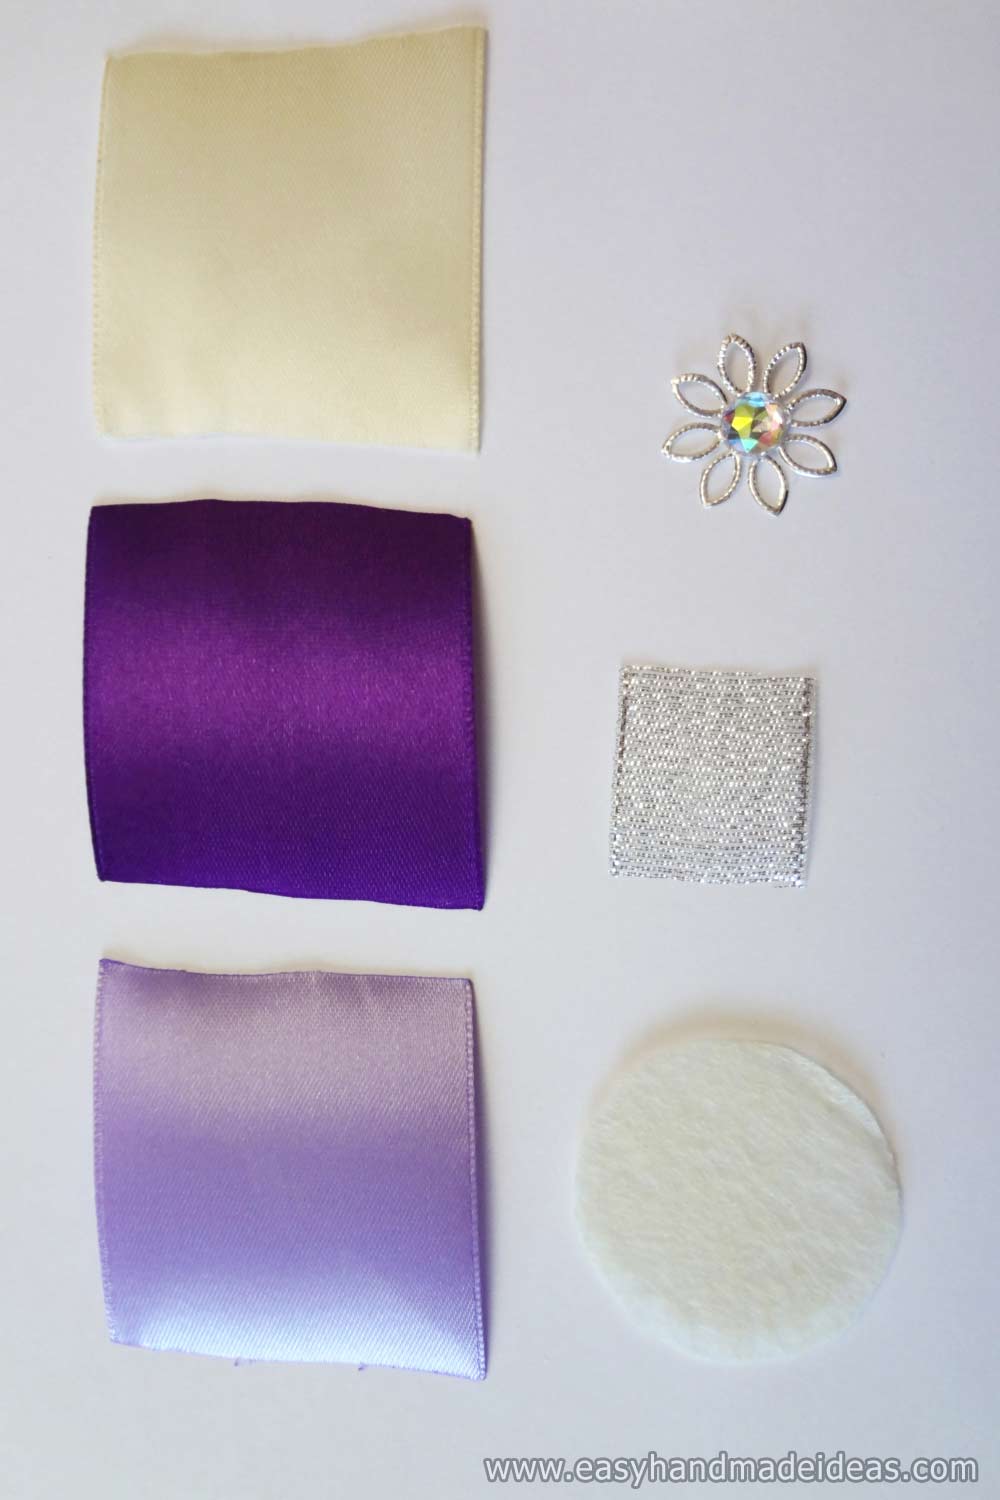
Singe all cuts in the ribbon to keep it from falling apart. Make four-layered petals from 5 cm squares in purple, cream and silver. Make unusual diamonds for the top layer from purple squares.
Step 2: Fold a triangle from a square
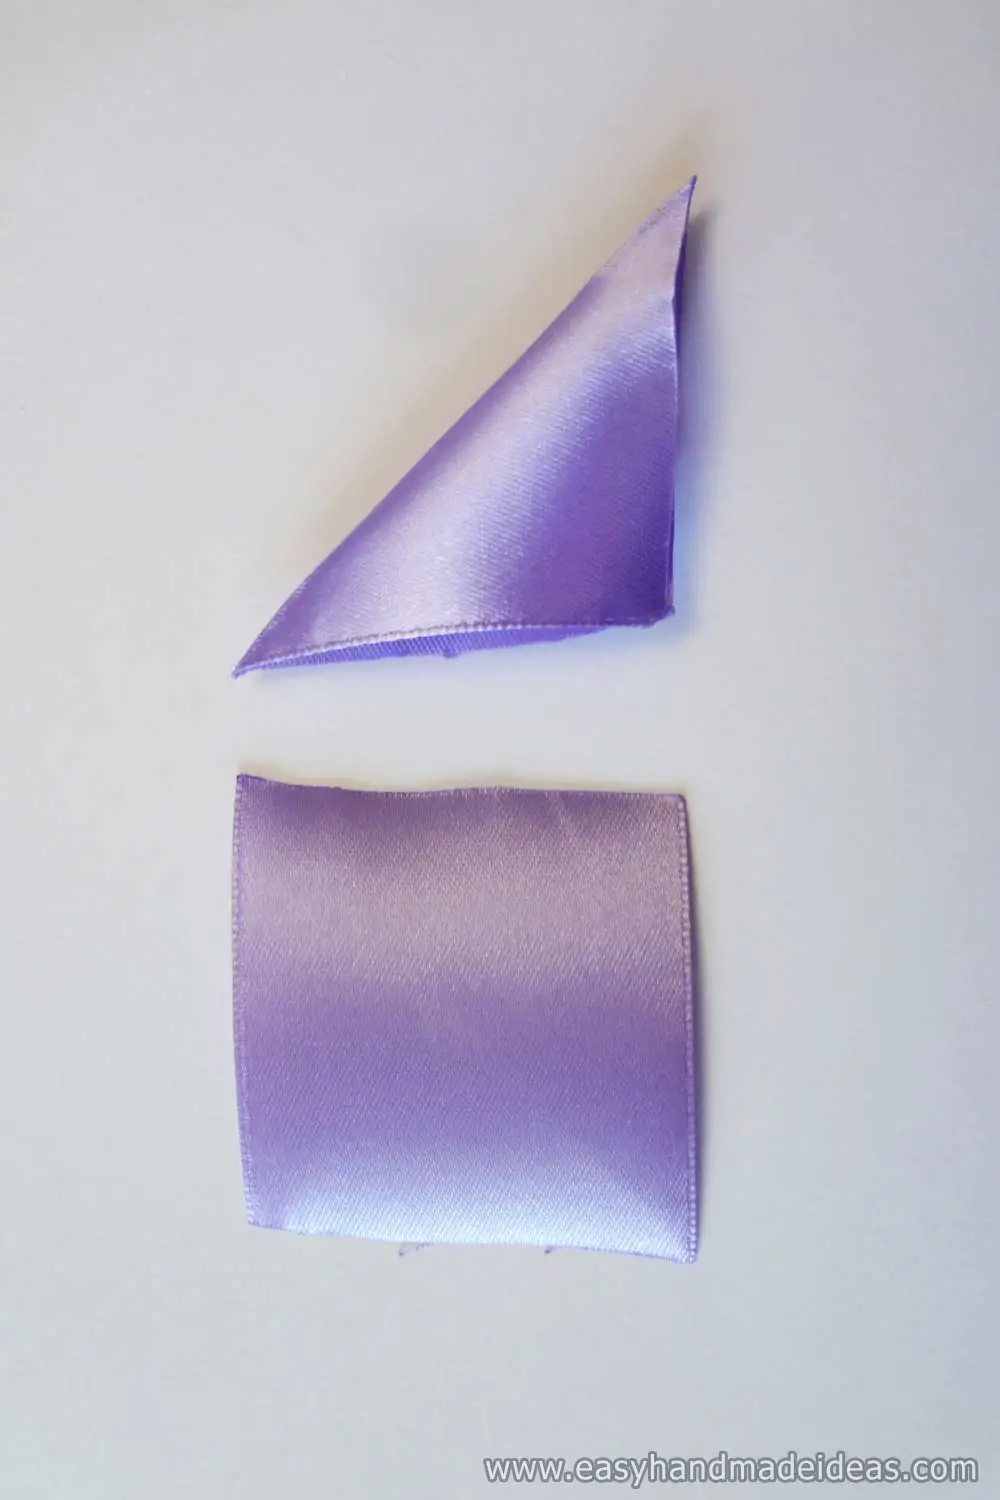
Fold in half of the purple squares (6 pieces) with a 5 cm side to make the top layer details.
Step 3: Make a petal from a triangle
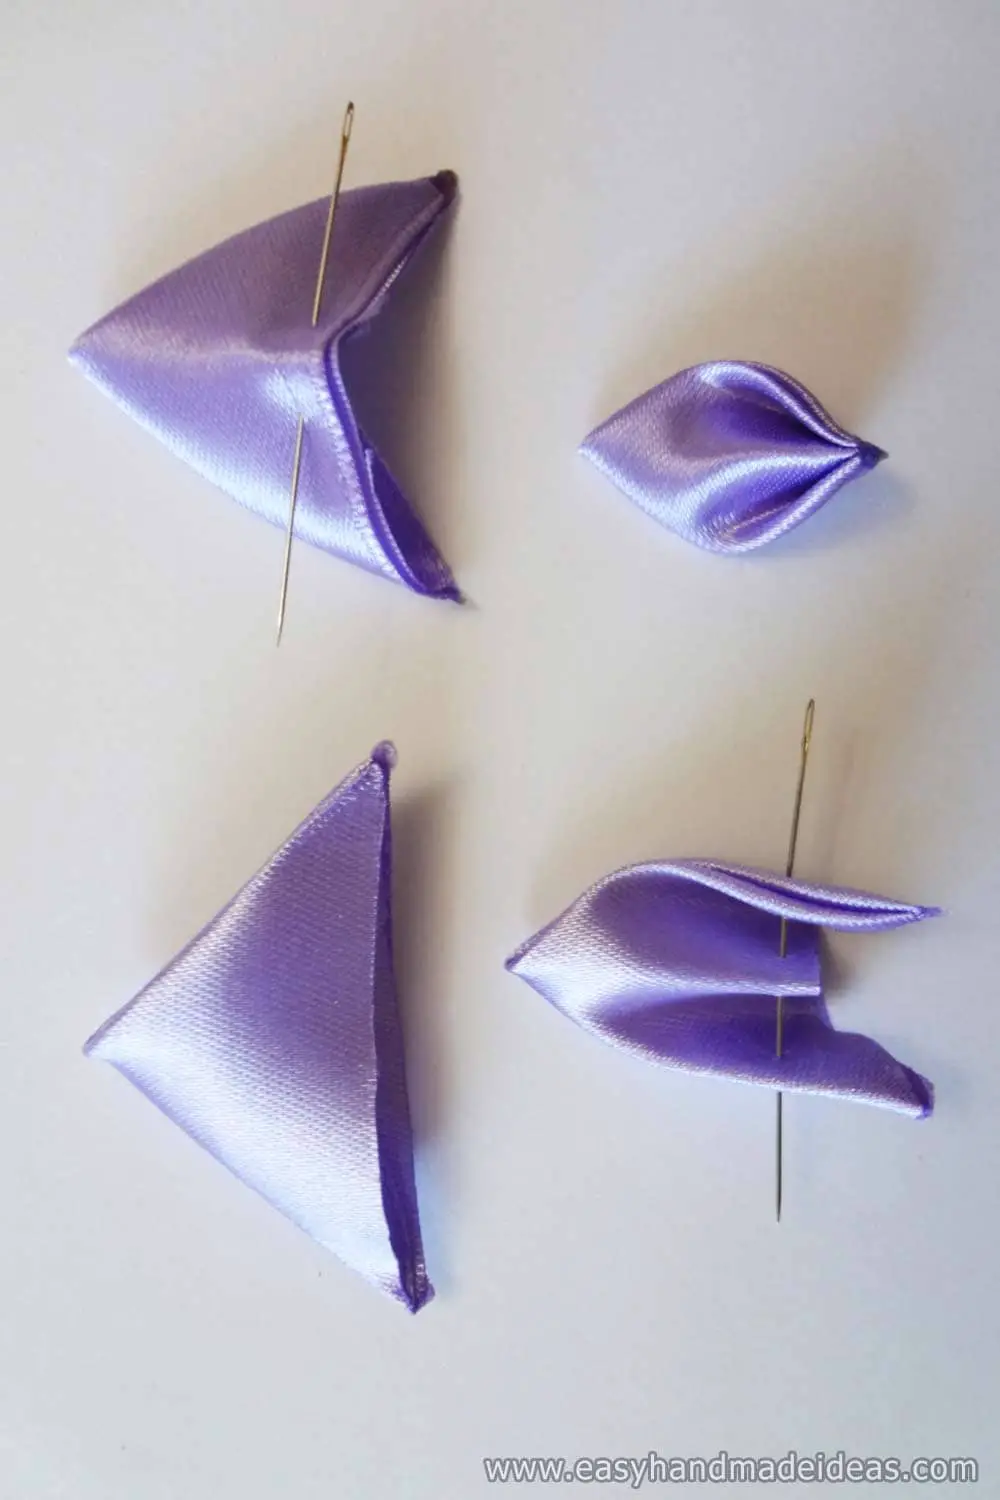
Fold the squares again. You should have triangles. Use your fingers or a needle to hold the middle fold in place and fold the side corners back to the front. Gather the petal at the bottom, press the bottom with your fingers, cut off the excess and glue. The folded volumetric blank is finished.
Step 4: Sew lilac petals for the flower
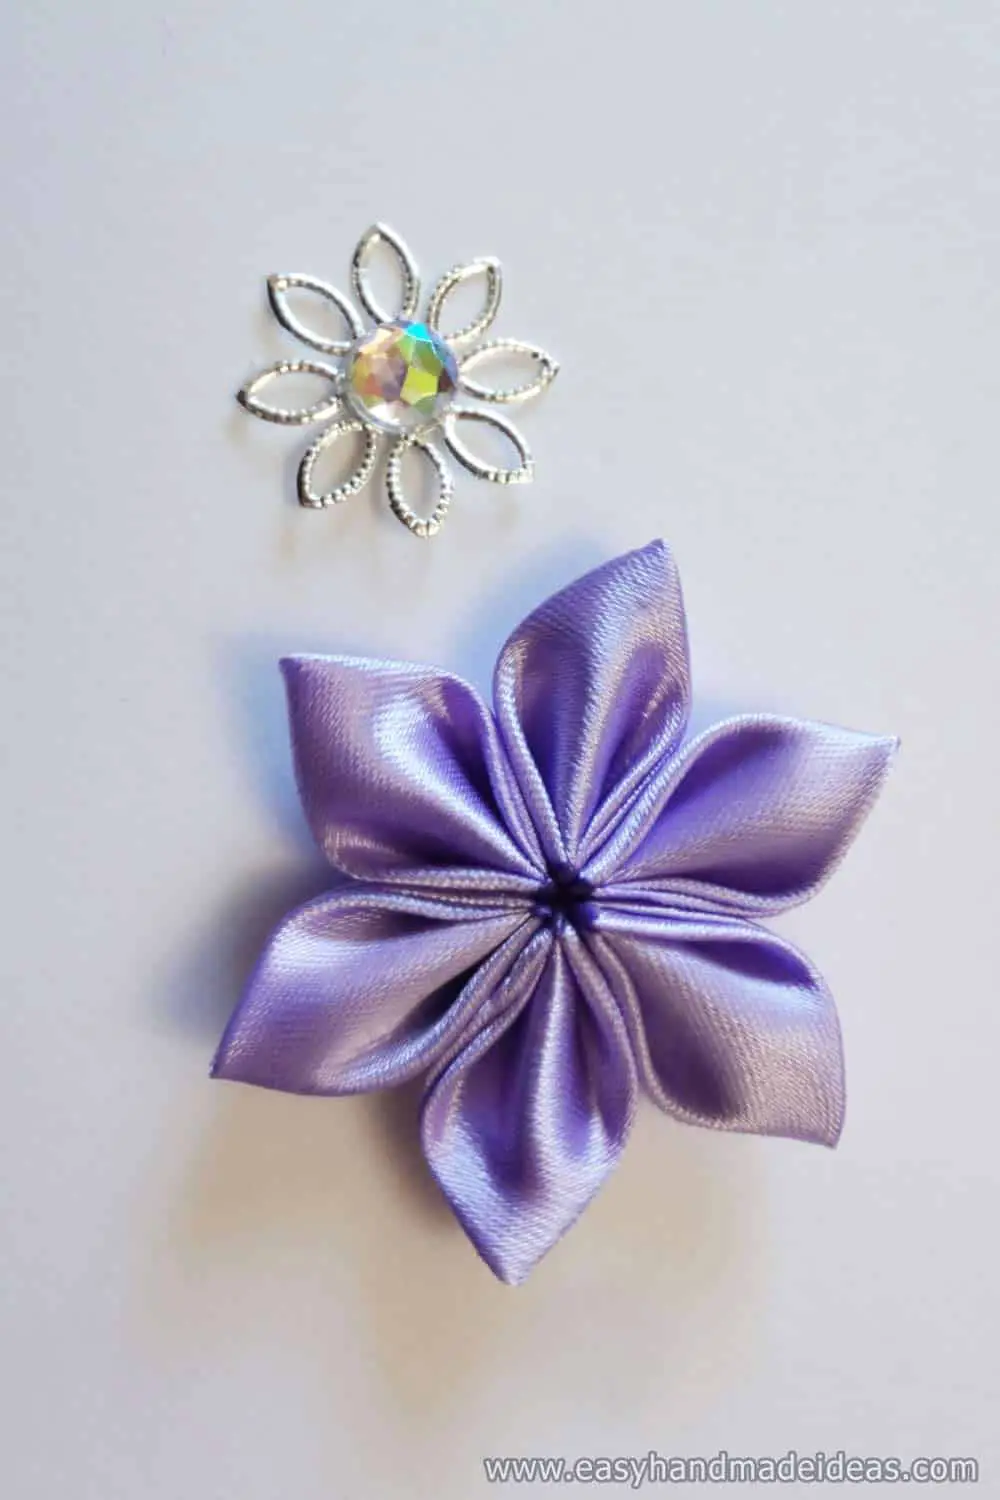
Collect 6 beautiful lilac petals on a string. Pick up a hugger with a chameleon. Decoration for the center can be different.
Step 5: Use cream and purple square pieces
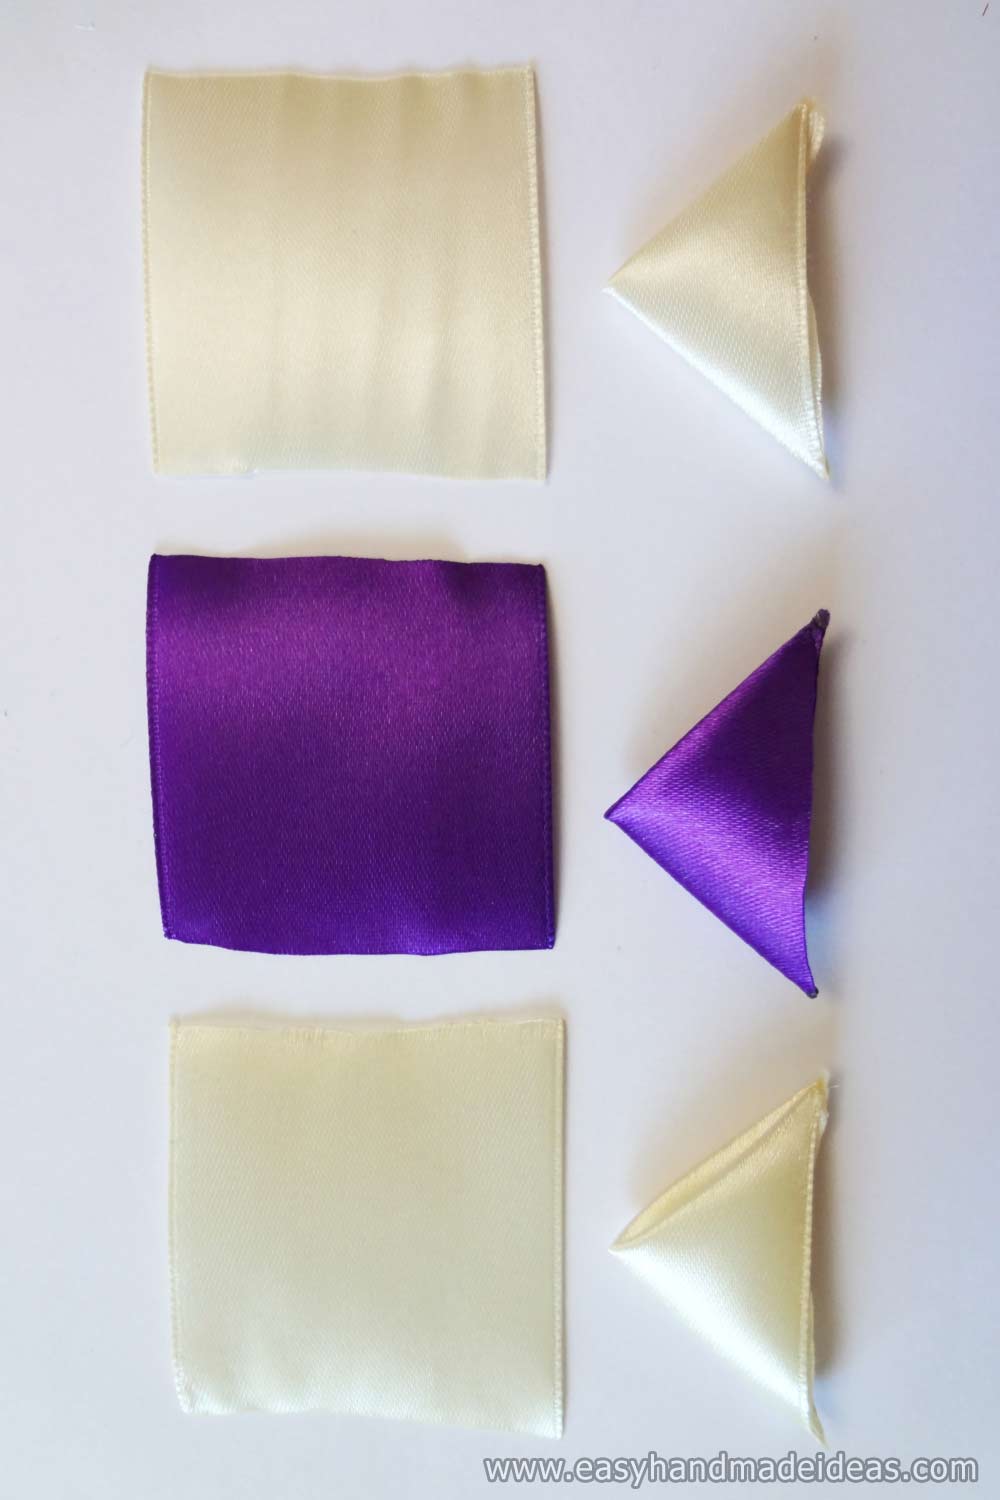
Fold three squares (2 cream and 1 purple) twice separately. You will get triangles.
Step 6: Make a multi-layer petal
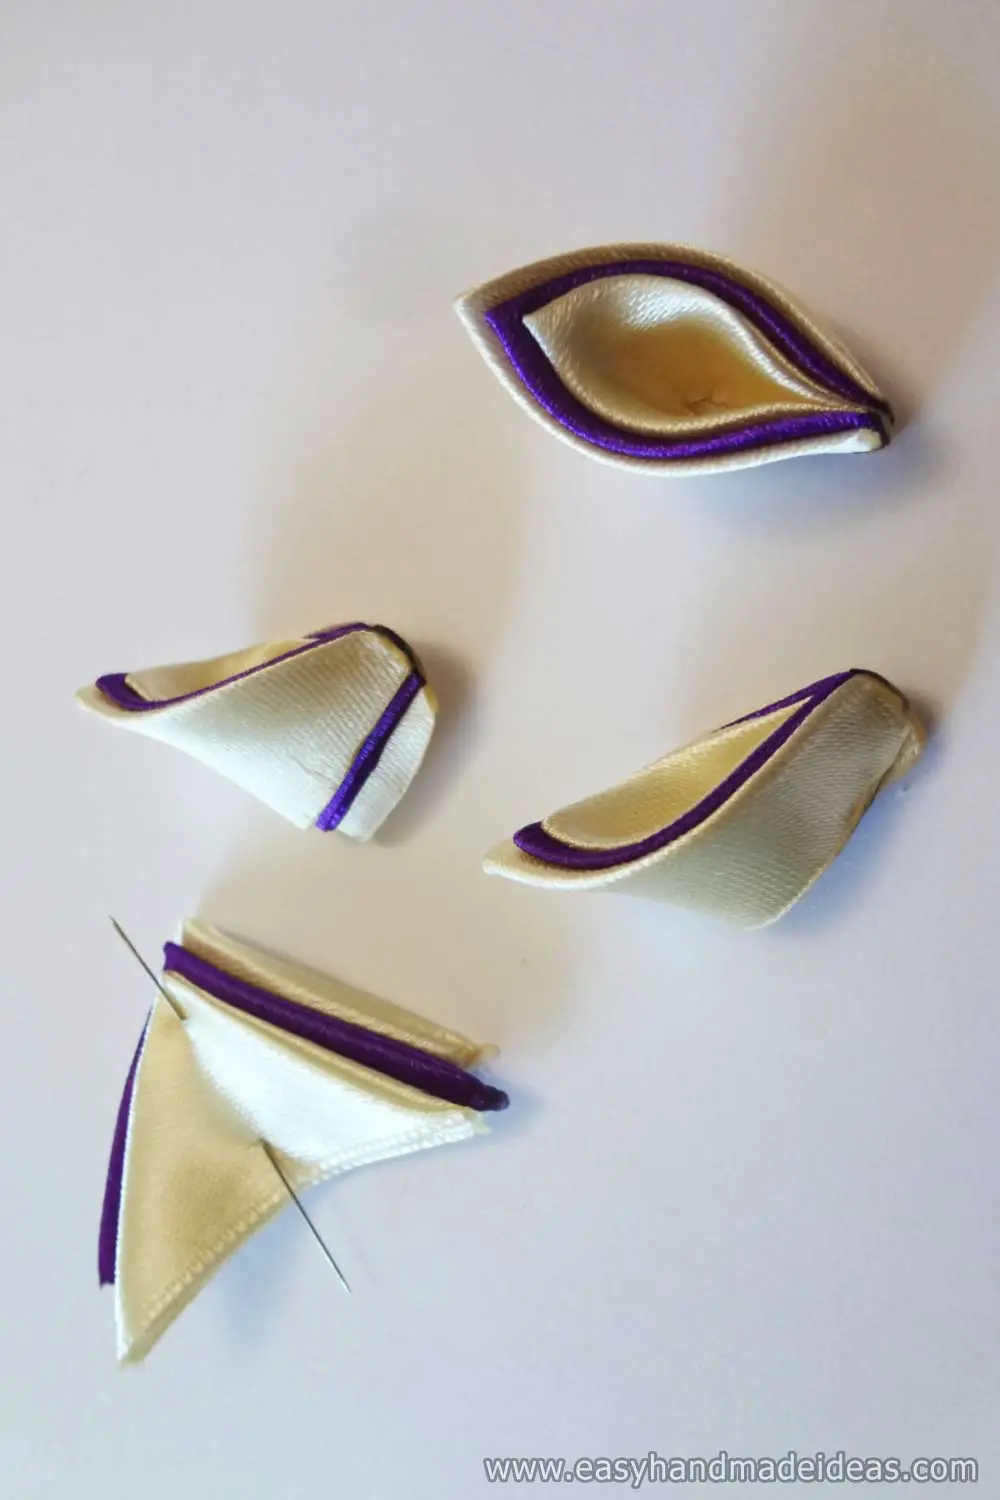
Layer one triangle on top of the other, leaving a dark detail inside. Close the corners. Cut off the bottom. You will have a boat-shaped petal with an acute angle.
Step 7: Create silver pieces
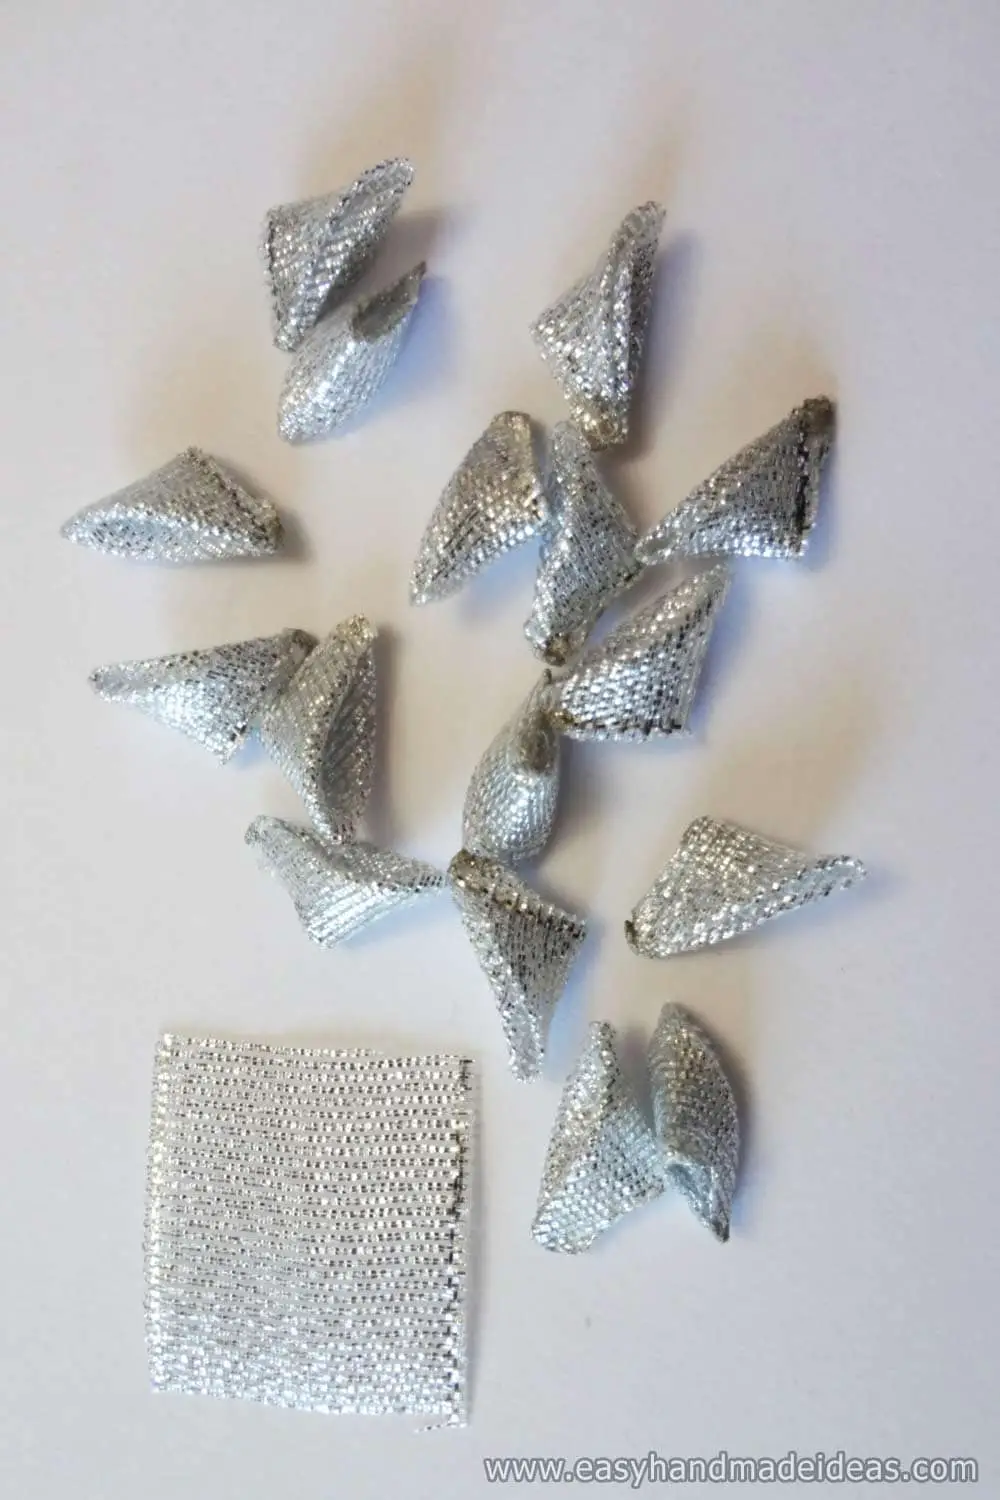
Make small silver brocade petals in the same way. Do not cut the bottom. You will need to make 16 petals.
Step 8: Assemble the pieces for a petal
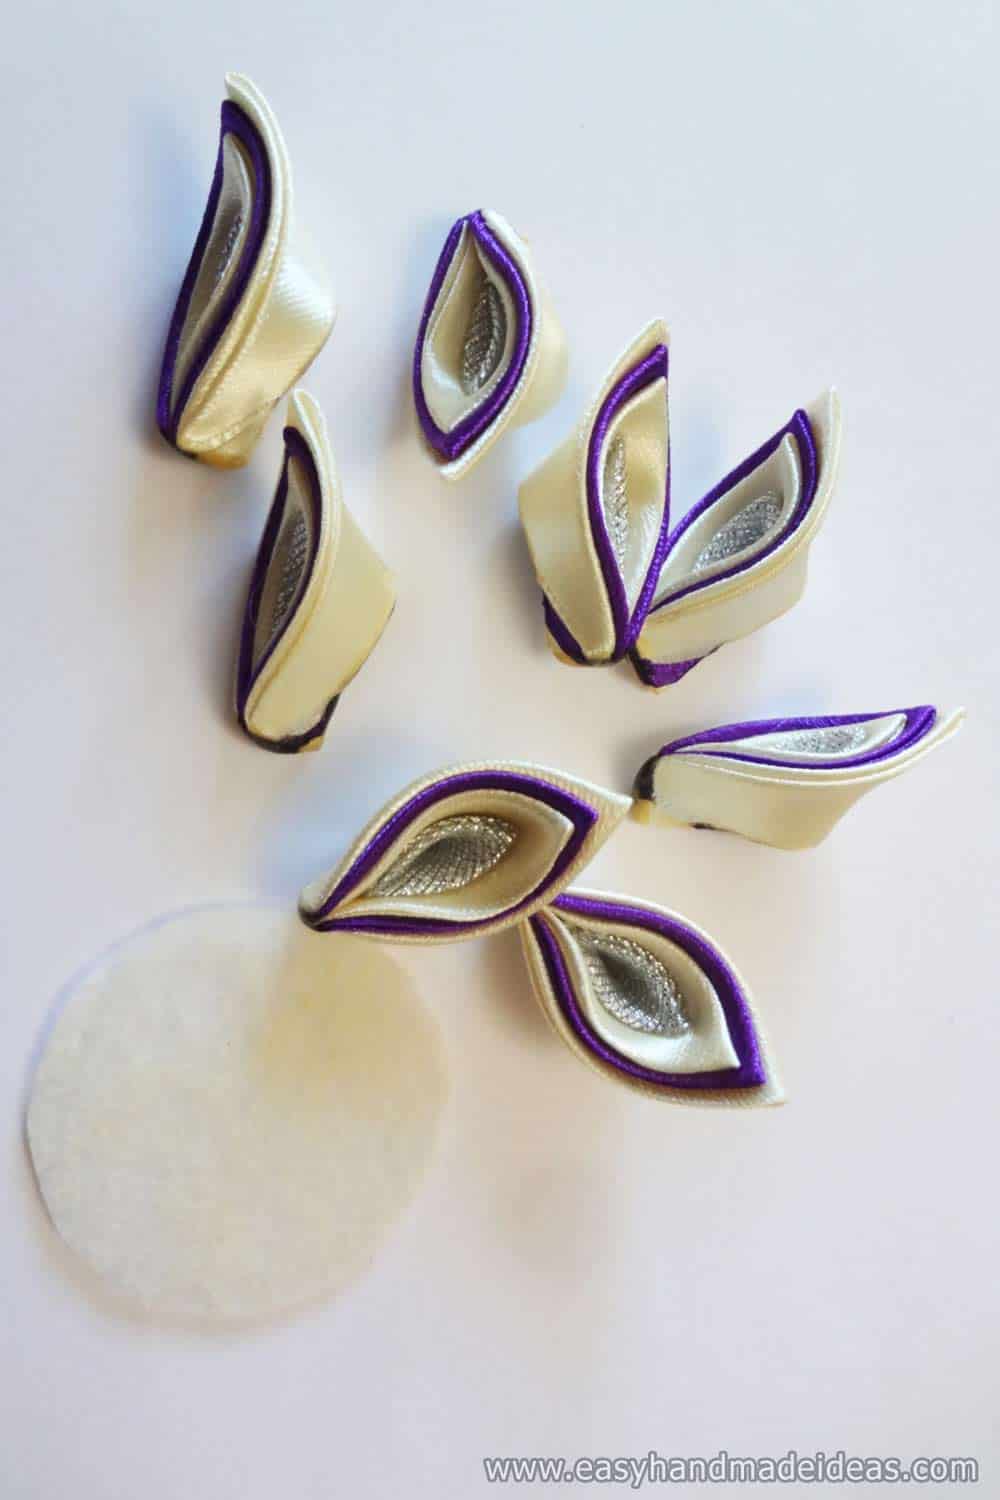
Place 8 silver pieces in the center of large cream-purple petals.
Step 9: Sew the petals together
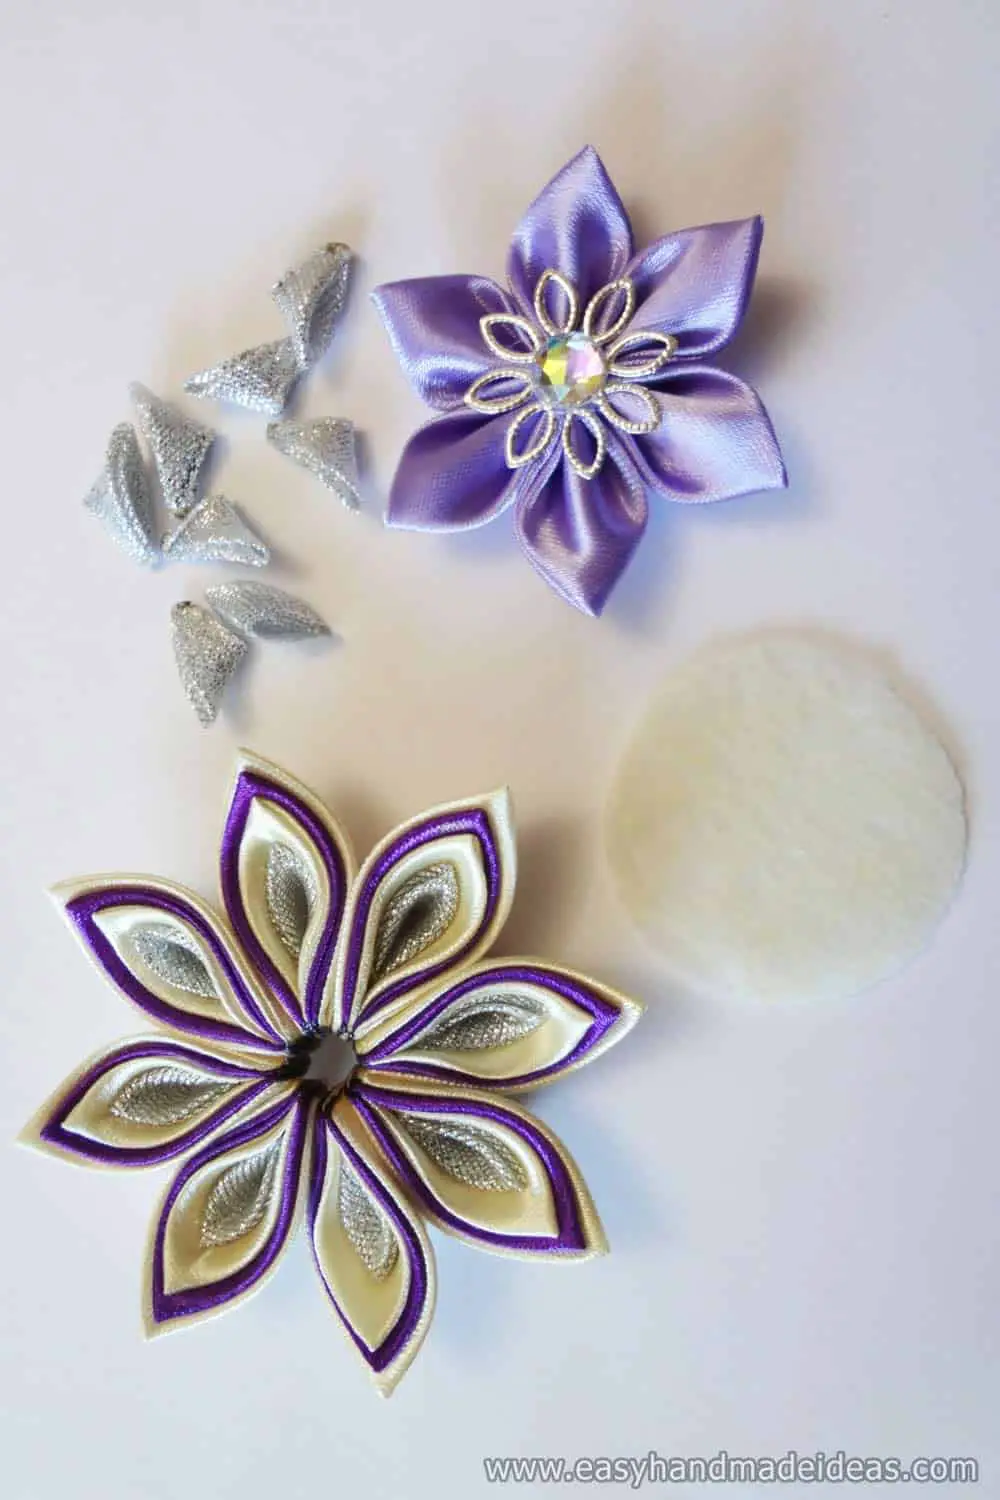
Sew the pieces together with thread. Leave the rest of the details for additional decoration.
Step 10: Glue all the parts for the flower
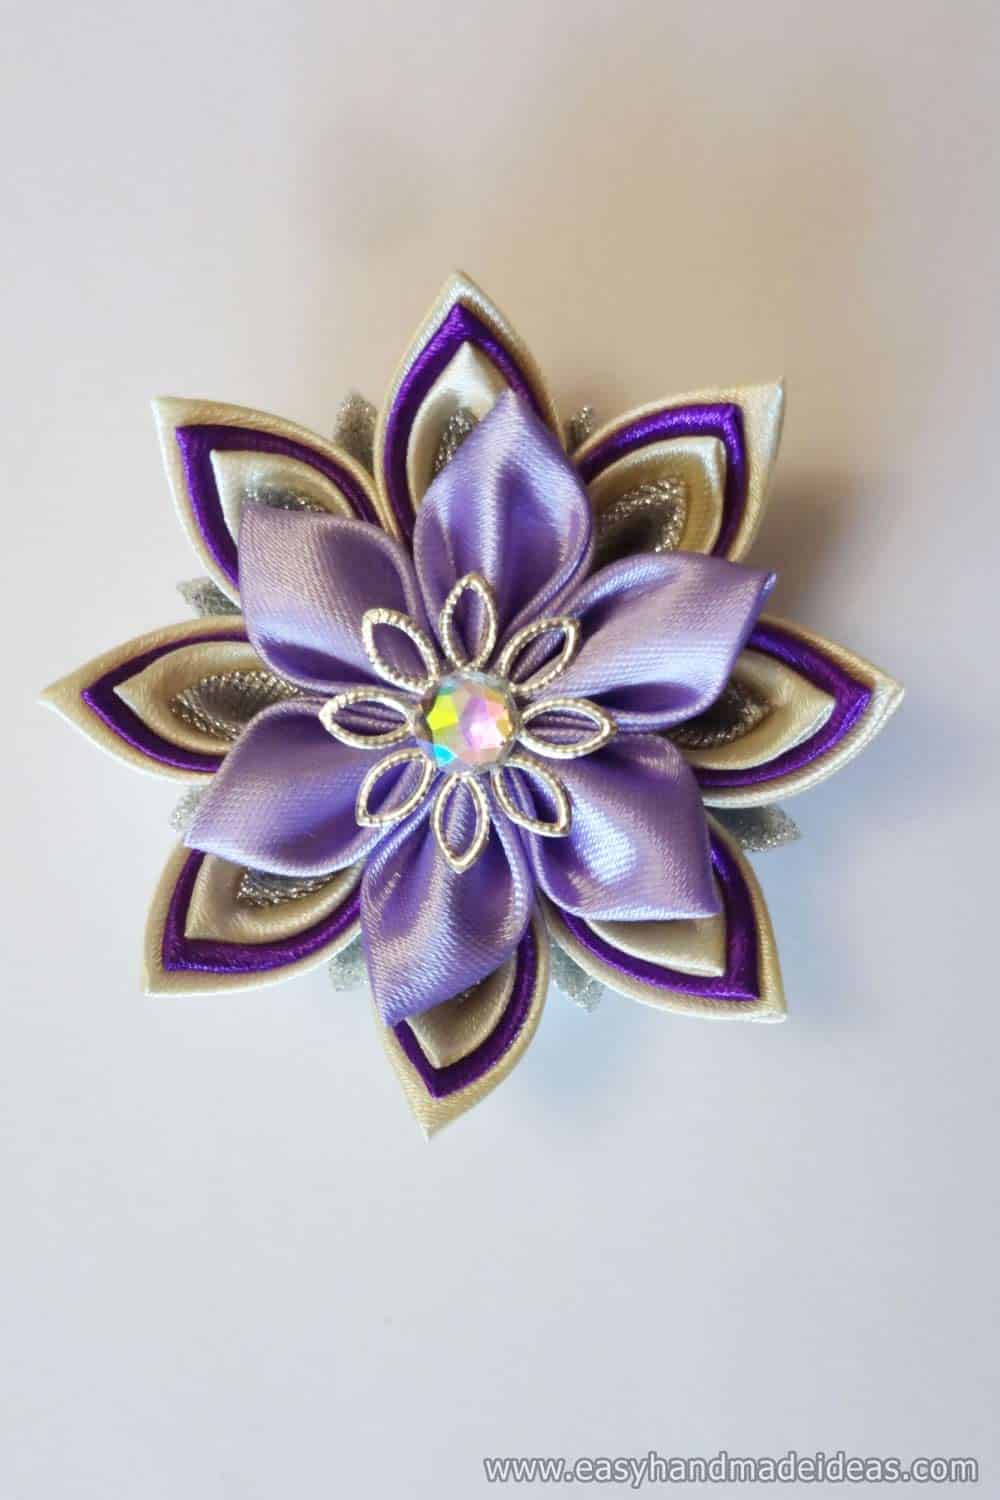
Glue a pretty flower. Stick a lilac flower with a center on top. Glue 8 silver pieces between the main petals.
Step 11: Process the reverse side of the flower
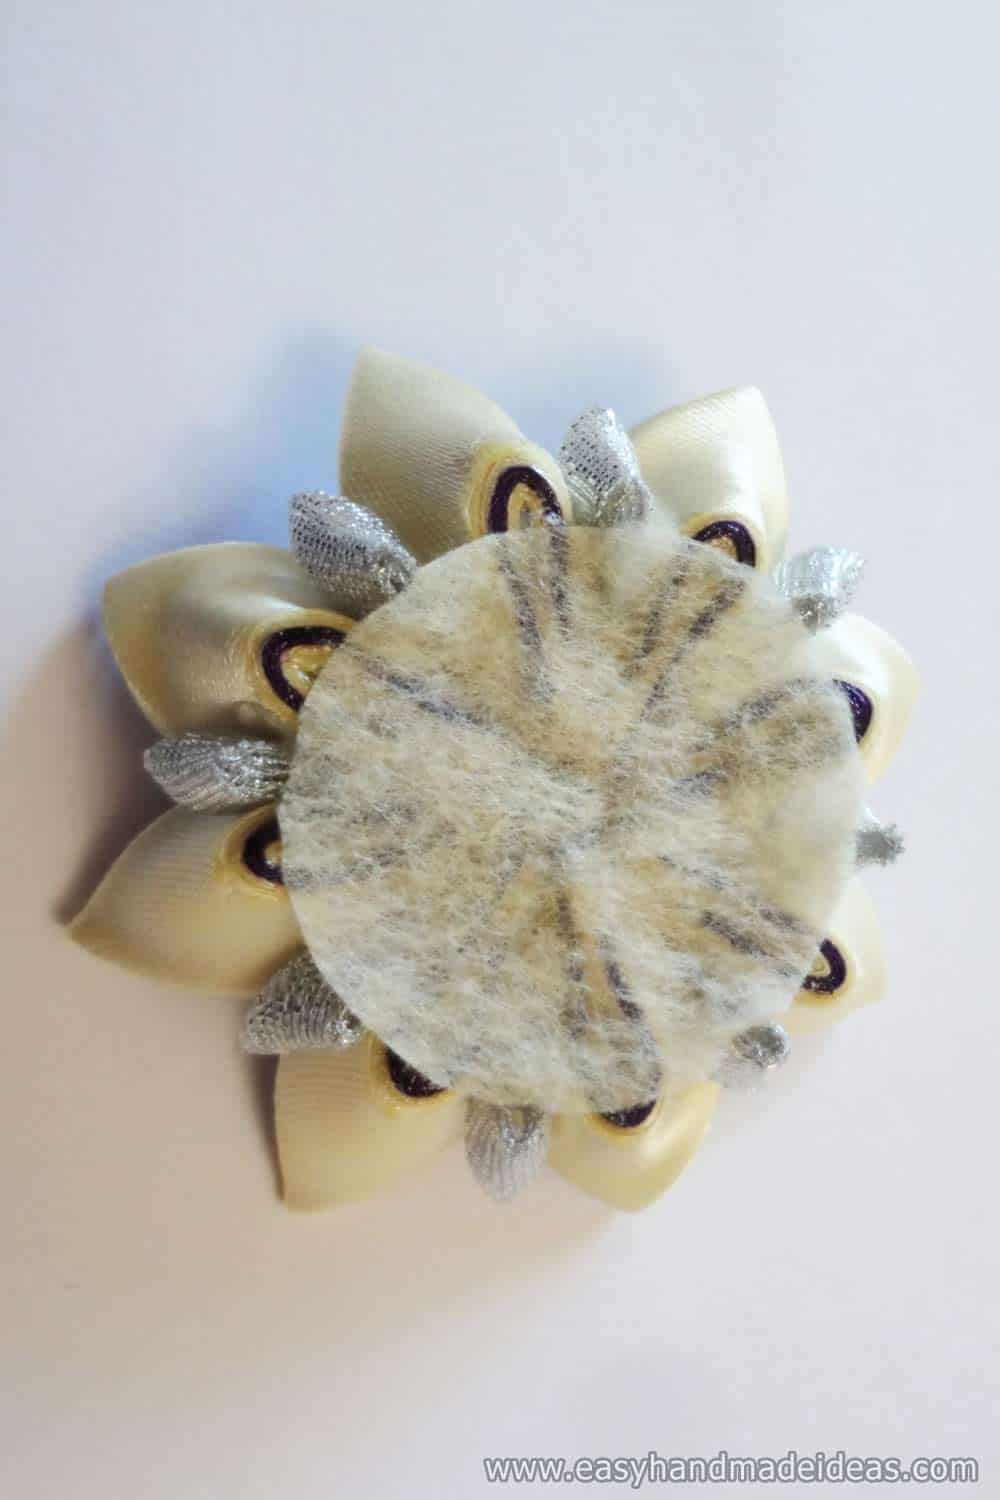
Glue a circle of felt to the back of the Kanzashi flower.
Supply:
- 6 pieces of delicate lilac ribbon – 5 * 5 cm (you can gather the petals made of such squares on a thread or glue them together);
- 16 pieces of delicate cream ribbon – 5*5 cm;
- 8 pieces of purple ribbon – 5*5 cm;
- 16 pieces of silver brocade-2.5*2.5 cm ( you need to make simple sharp petals from these squares, but do not cut the petals from the bottom);
- cream or white felt base, 4 cm in diameter;
- silver-colored hugger with a diameter of 2 cm (accessories for jewelry);
- synthetic crystal chameleon with a diameter of 0.8 cm.
Tools:
- elastic band or clip;
- lighter;
- ruler;
- scissors;
- glue gun;
- tweezers.
The flowers are completely finished. All you need to do is find a hair clip and attach a Kanzashi flower to it.
Idea N2
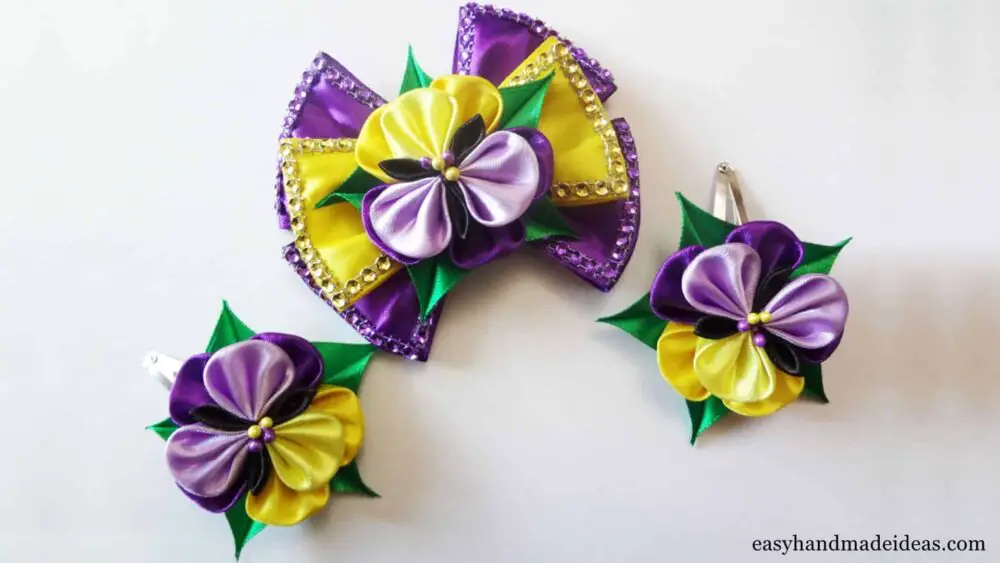
The accessories presented in this master class are a wonderful set consisting of two small click-clack hair clips decorated with violet flowers and a bow decorated with the same flower. For the bow you can add to the list of accessories four purple cuttings of 5*10 cm and a bar of the same color, 2 gold cuttings of 5*9 cm and a bar of the same color, 1 cut of gold ribbon of 1,2*12 cm. The resulting bow can be used as a brooch, as a decoration for a headband or perfectly placed on a sash. The set looks summery and festive, so every girl will be happy to try it on.
Total time: 20 minutes
Supply:
- 3 pieces of purple ribbon – 5*5 cm;
- 2 pieces of gold ribbon – 5*5 cm;
- 3 pieces of black ribbon – 2,5*2,5 cm;
- 1 piece of yellow ribbon – 4*4 cm;
- 2 pieces of lilac ribbon – 4*4 cm;
- one double-sided stamen of yellow and lilac color;
- 5 pieces of green ribbon – 2,5*7 cm;
- felt circle of green color 3,5 cm;
- click-clack hair clip or rubber band.
Tools:
- scissors;
- matches or a lighter;
- sewing needle;
- hot glue.
Step 1: Get all the materials
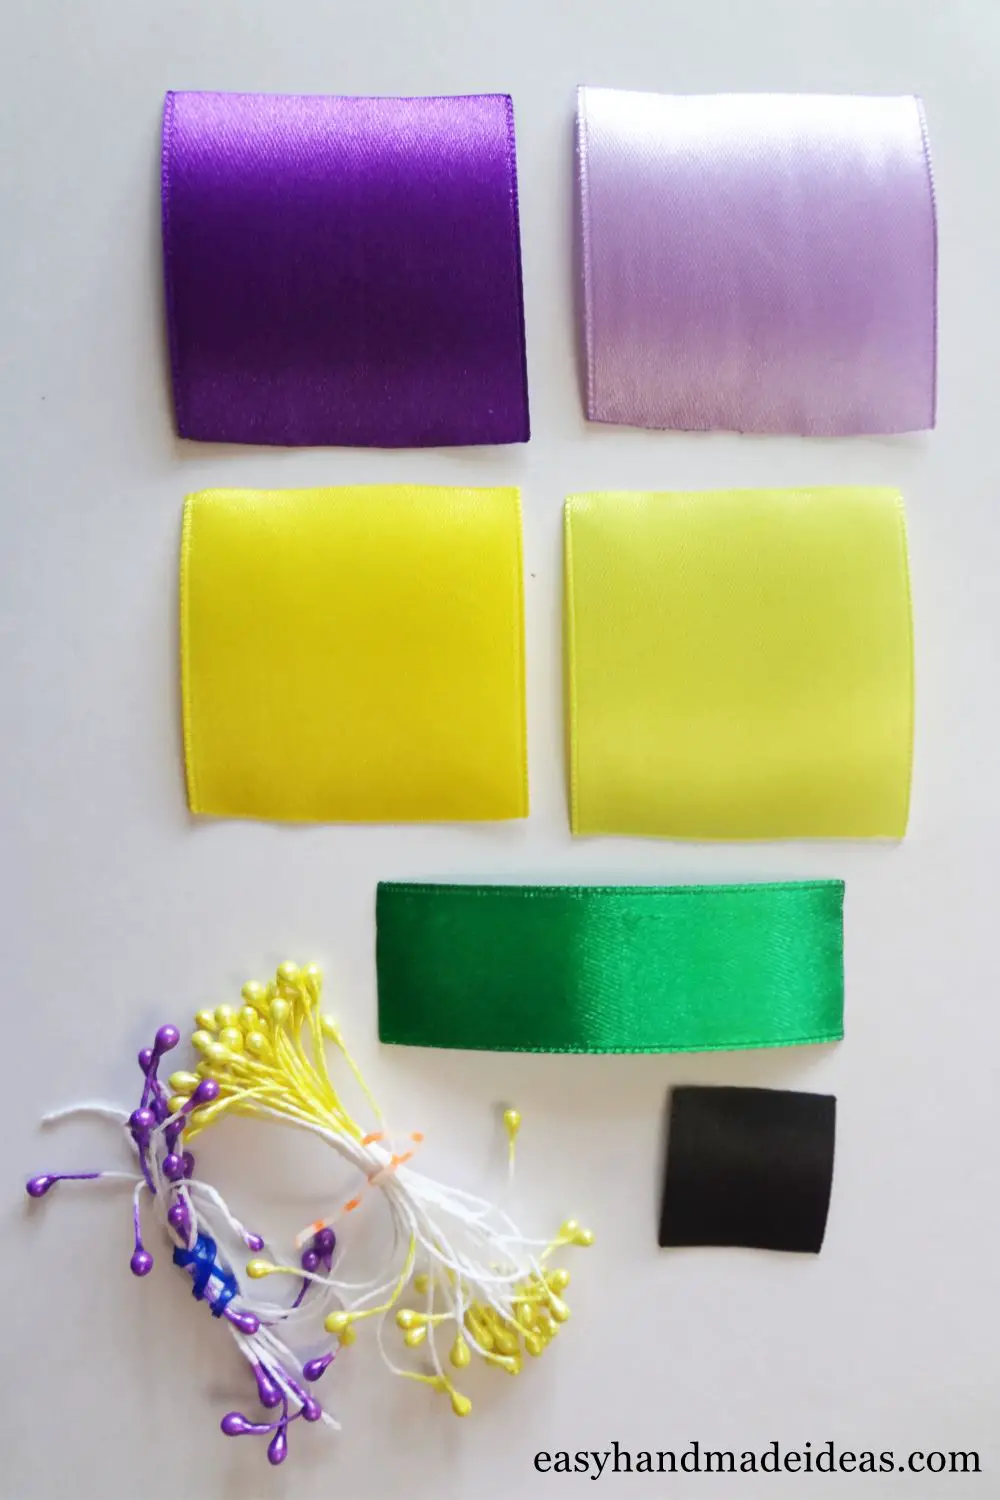
Prepare pieces of ribbon of the specified colors and sizes, burning all cuts with a match or lighter. Violets are made of round petals in one fold. Each flower will consist of two layers: the first layer – 5 petals gathered on the thread, the second – 3 large rounded and 3 small sharp black.
Step 2: Make a triangle from the square
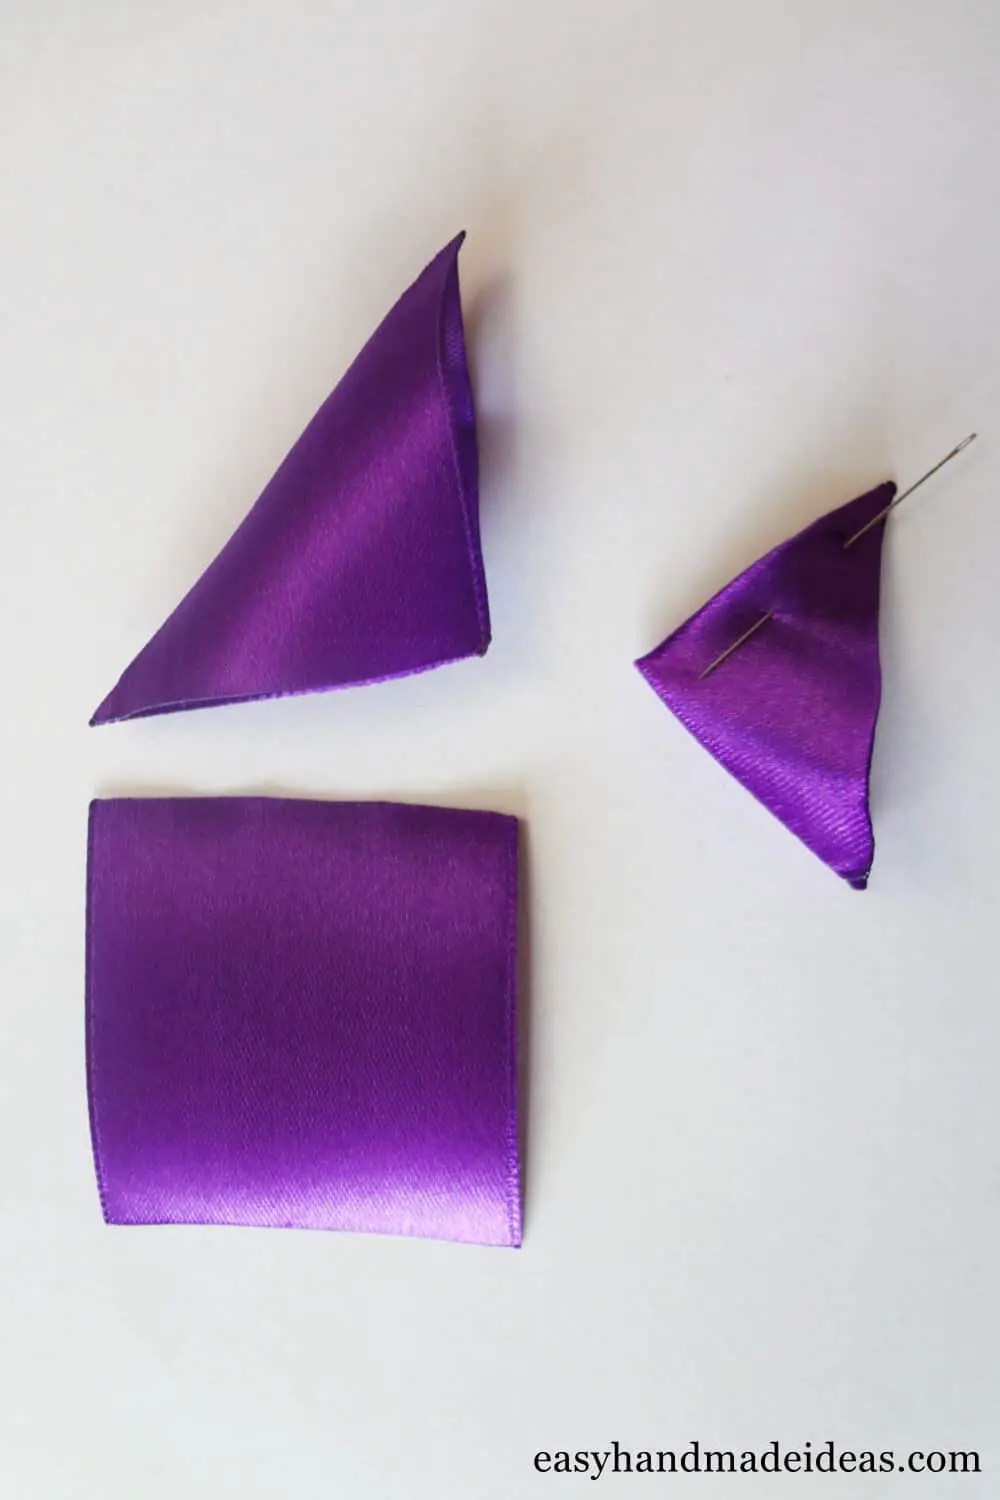
To make a petal, fold the scorched squares diagonally in half and then in half again.
Step 3: Unfold the triangle
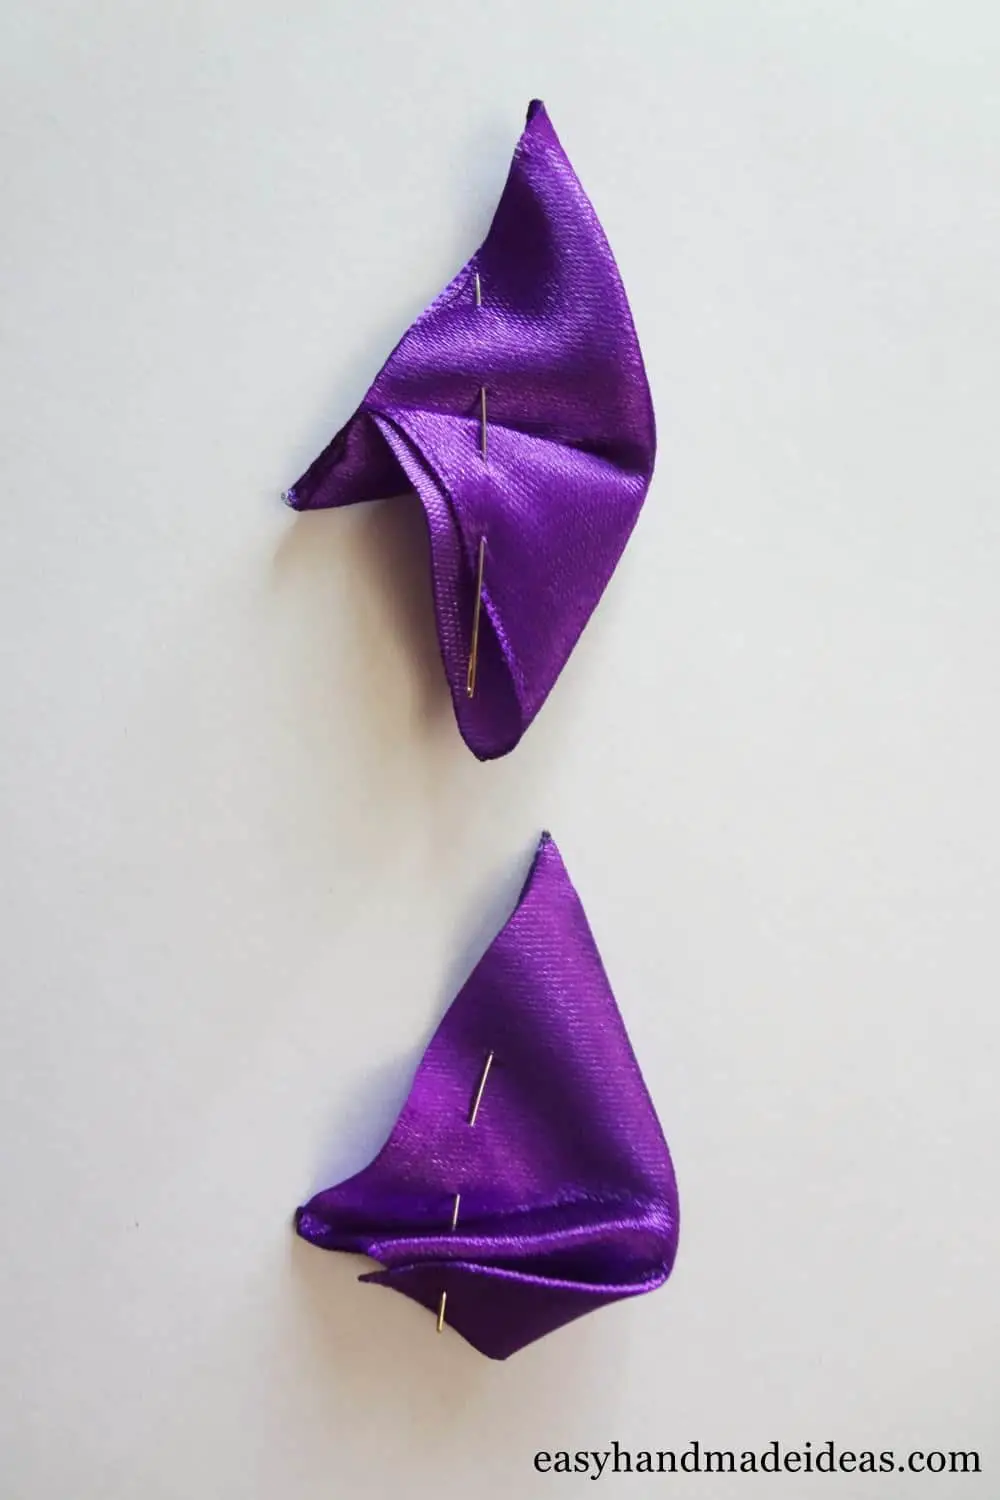
Fold one corner of the resulting layered triangle toward the center, then fold the second corner toward the center to create the center fold.
Step 4: Use a needle to fix
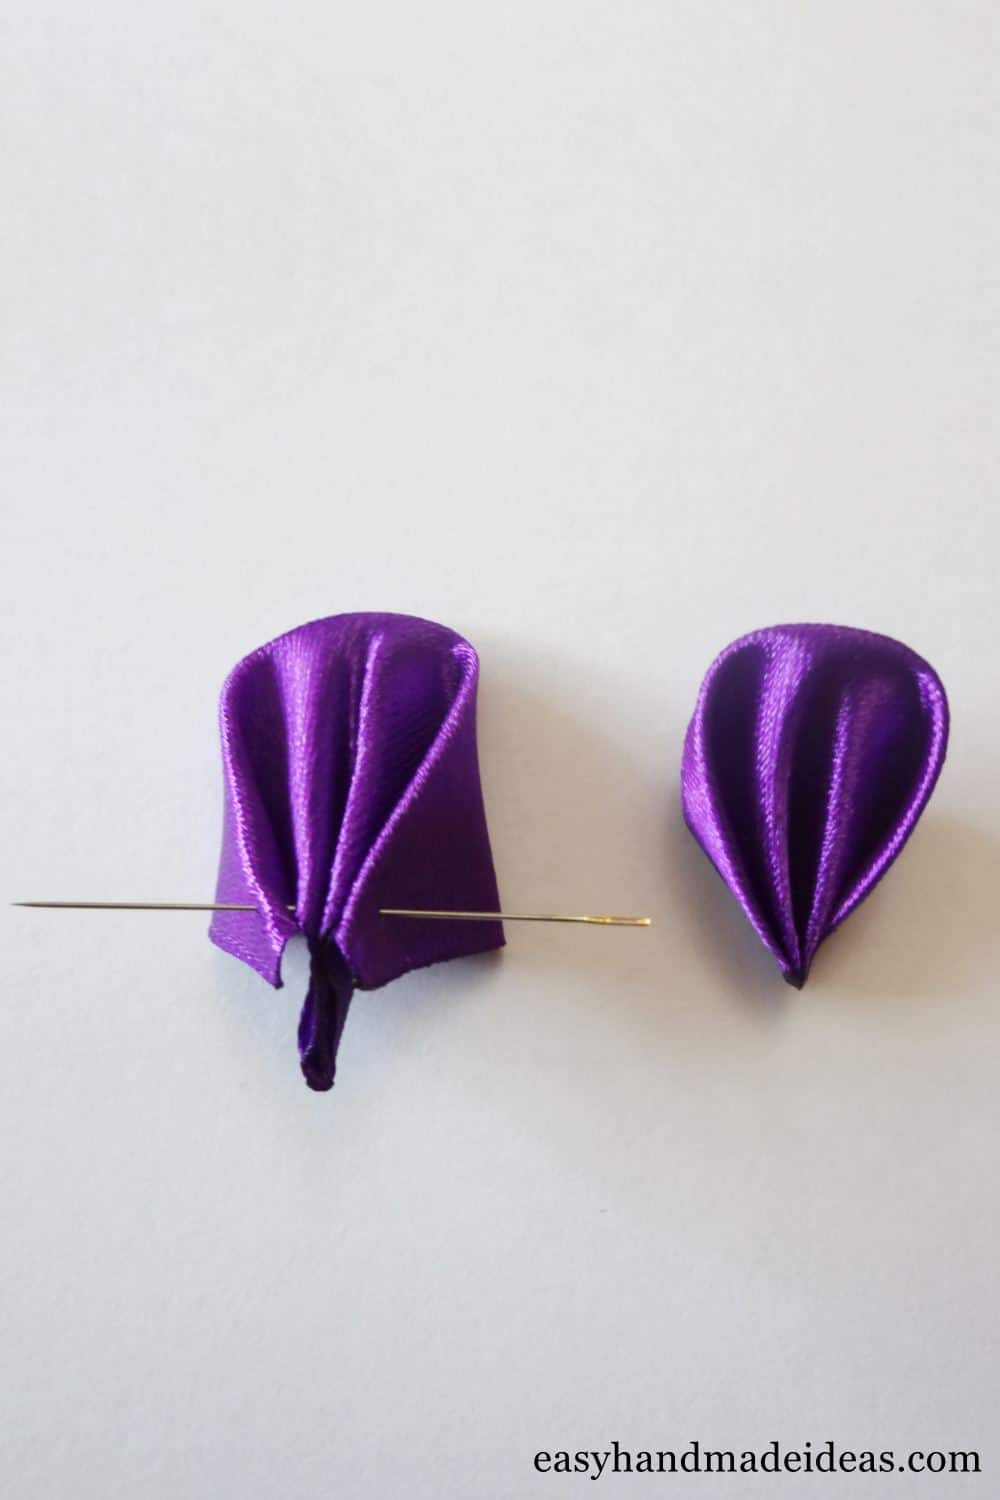
Gather each petal at the base to form a rounded drop with a fold in the center. Secure the blank with a sewing needle by piercing the blank.
Step 5: Make triangles out of a black square
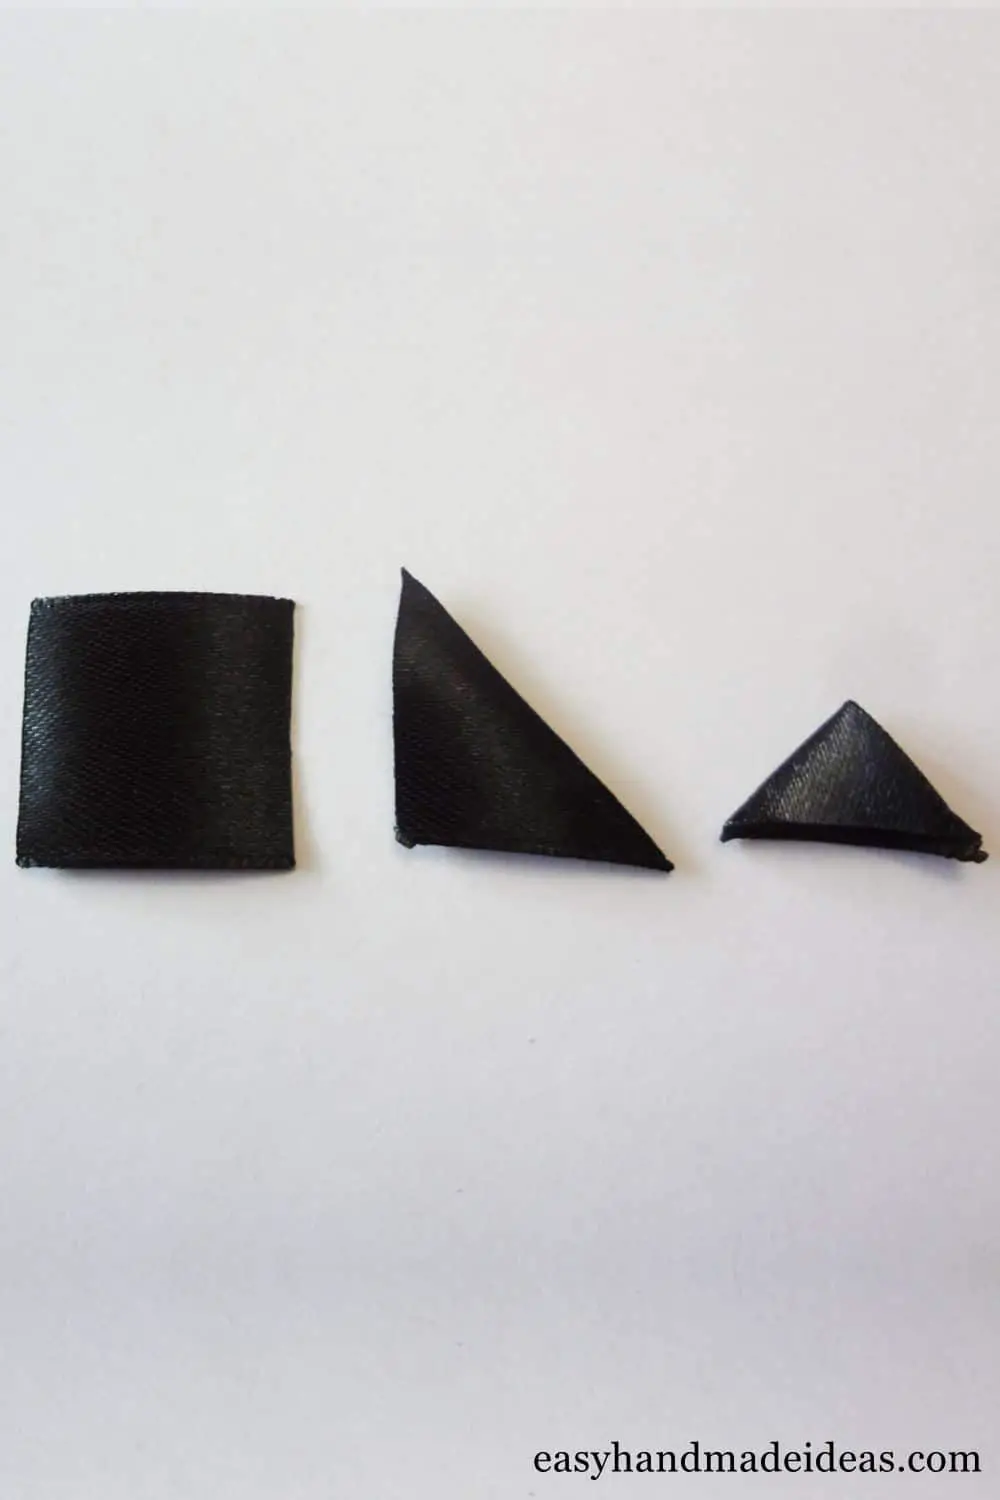
For the top layer, make small pointed petals in black. Fold the square in half diagonally and fold a second time.
Step 6: Connect the edges of the triangles
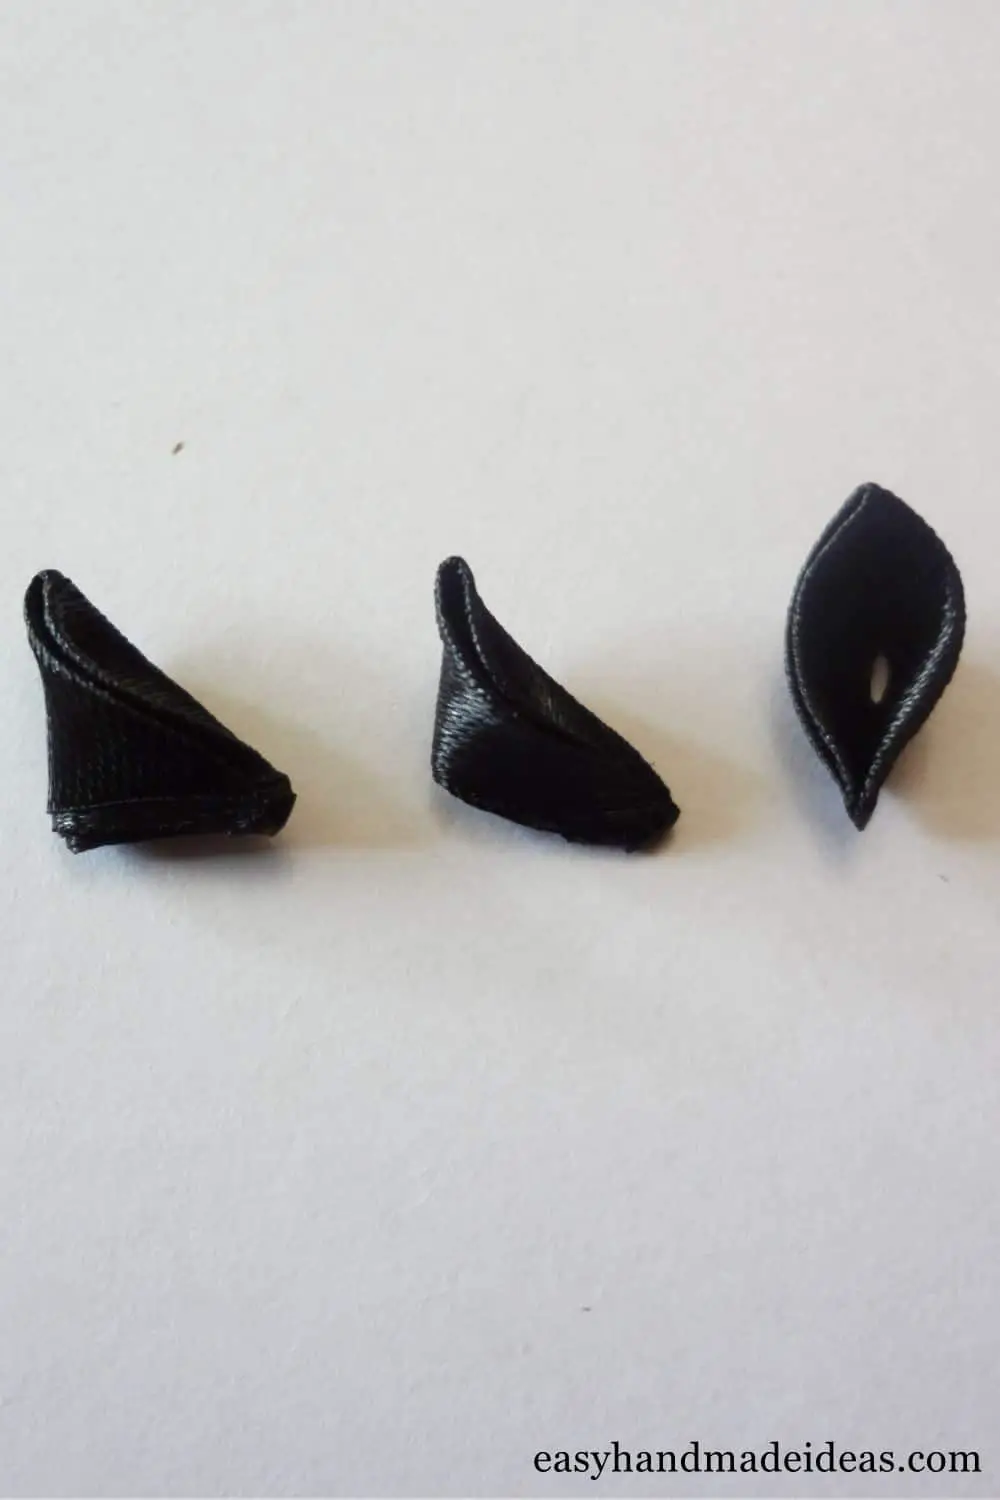
Assemble the squares according to the pattern shown in the photo. Fix with hot glue or lightly touch with a lighted match (if you can).
Step 7: Repeat the previous steps with the required colors
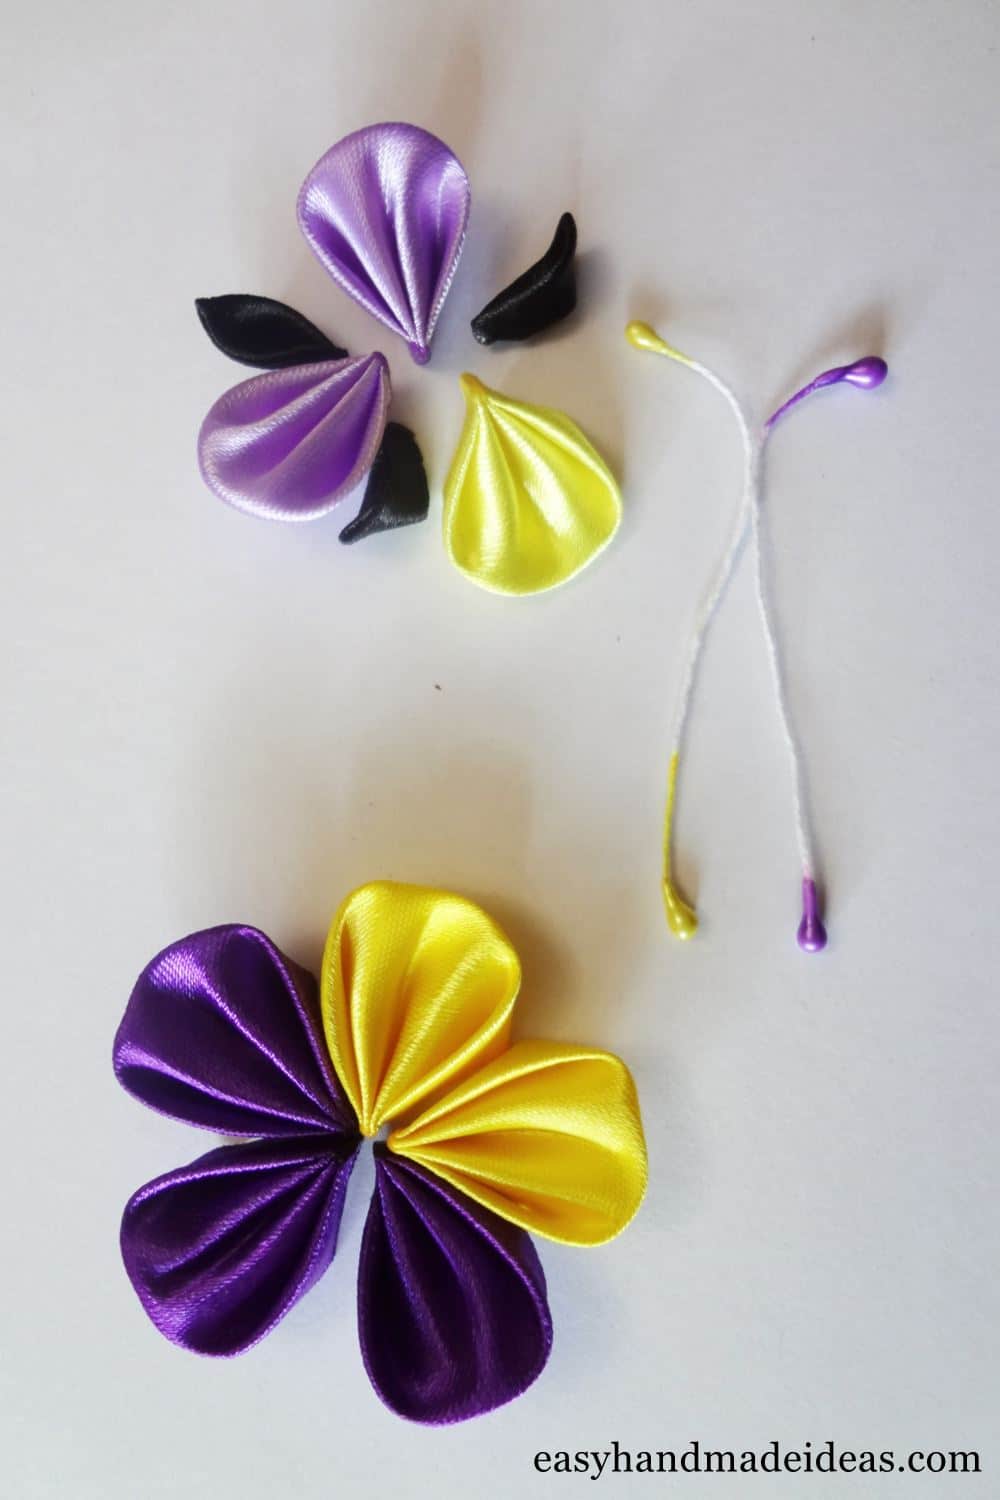
Prepare 2 gold and 3 purple rounded petals (5 total) for the bottom layer, 1 gold and 2 lilac petals, 3 small black petals for the top layer. You will also need a pair of stamens – purple and gold.
Step 8: Make the main part of the violet flowers
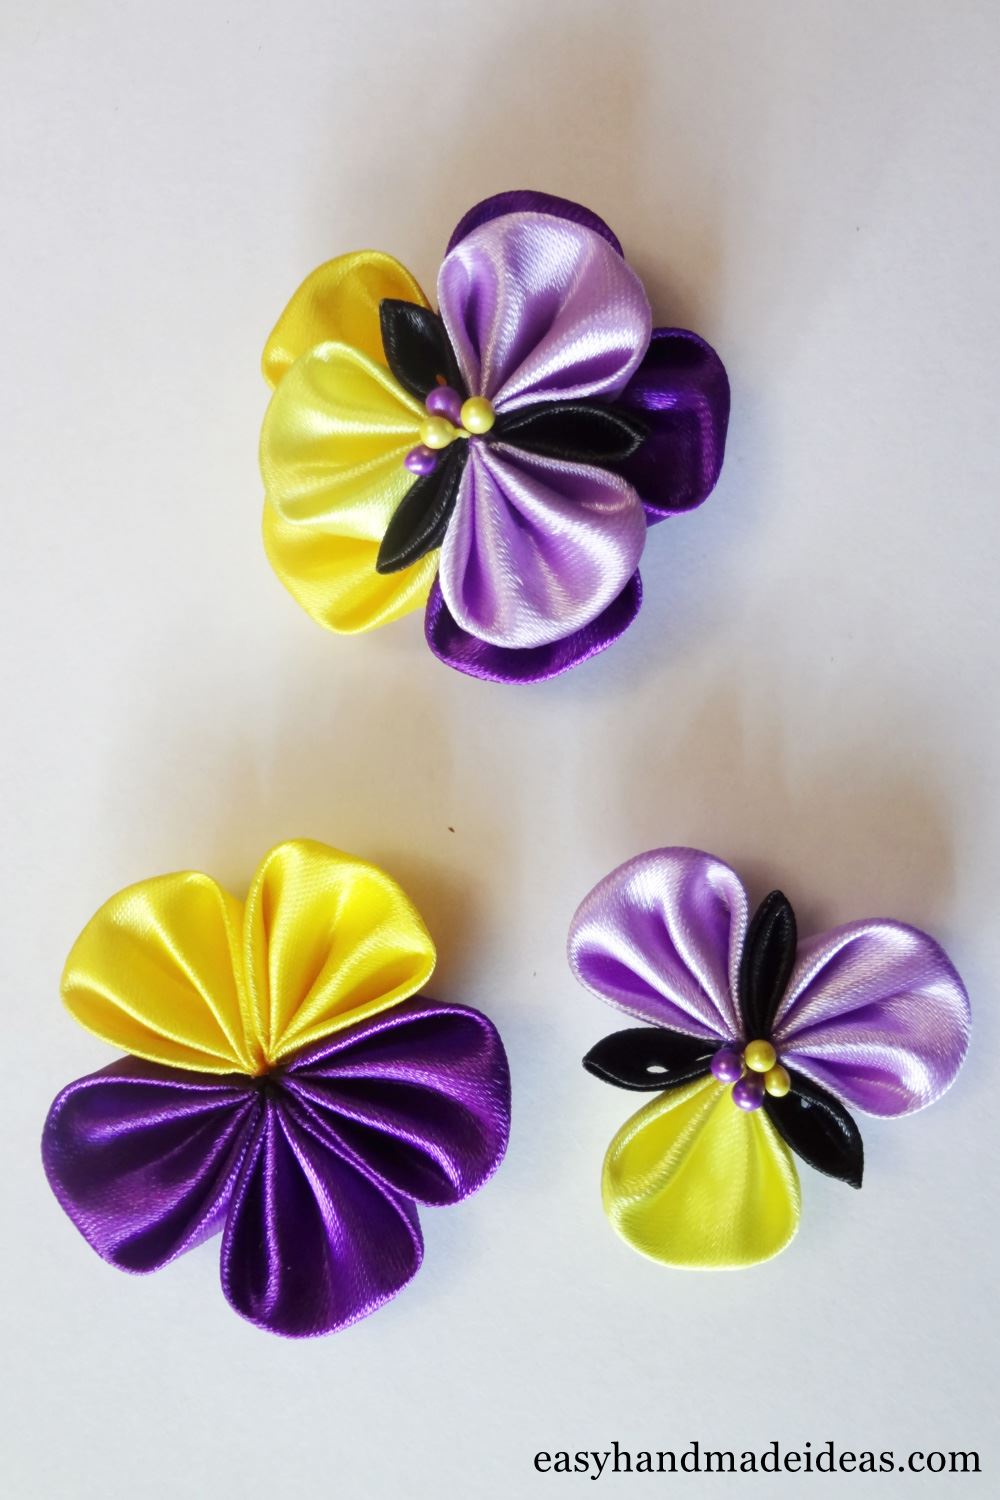
Glue all the petals together. The lower layer consists of the previously mentioned parts. For the upper one – glue the petals in a fold with simple sharp, evenly alternating them, adding stamens. Then glue one layer on top of the other.
Step 9: Take the green details
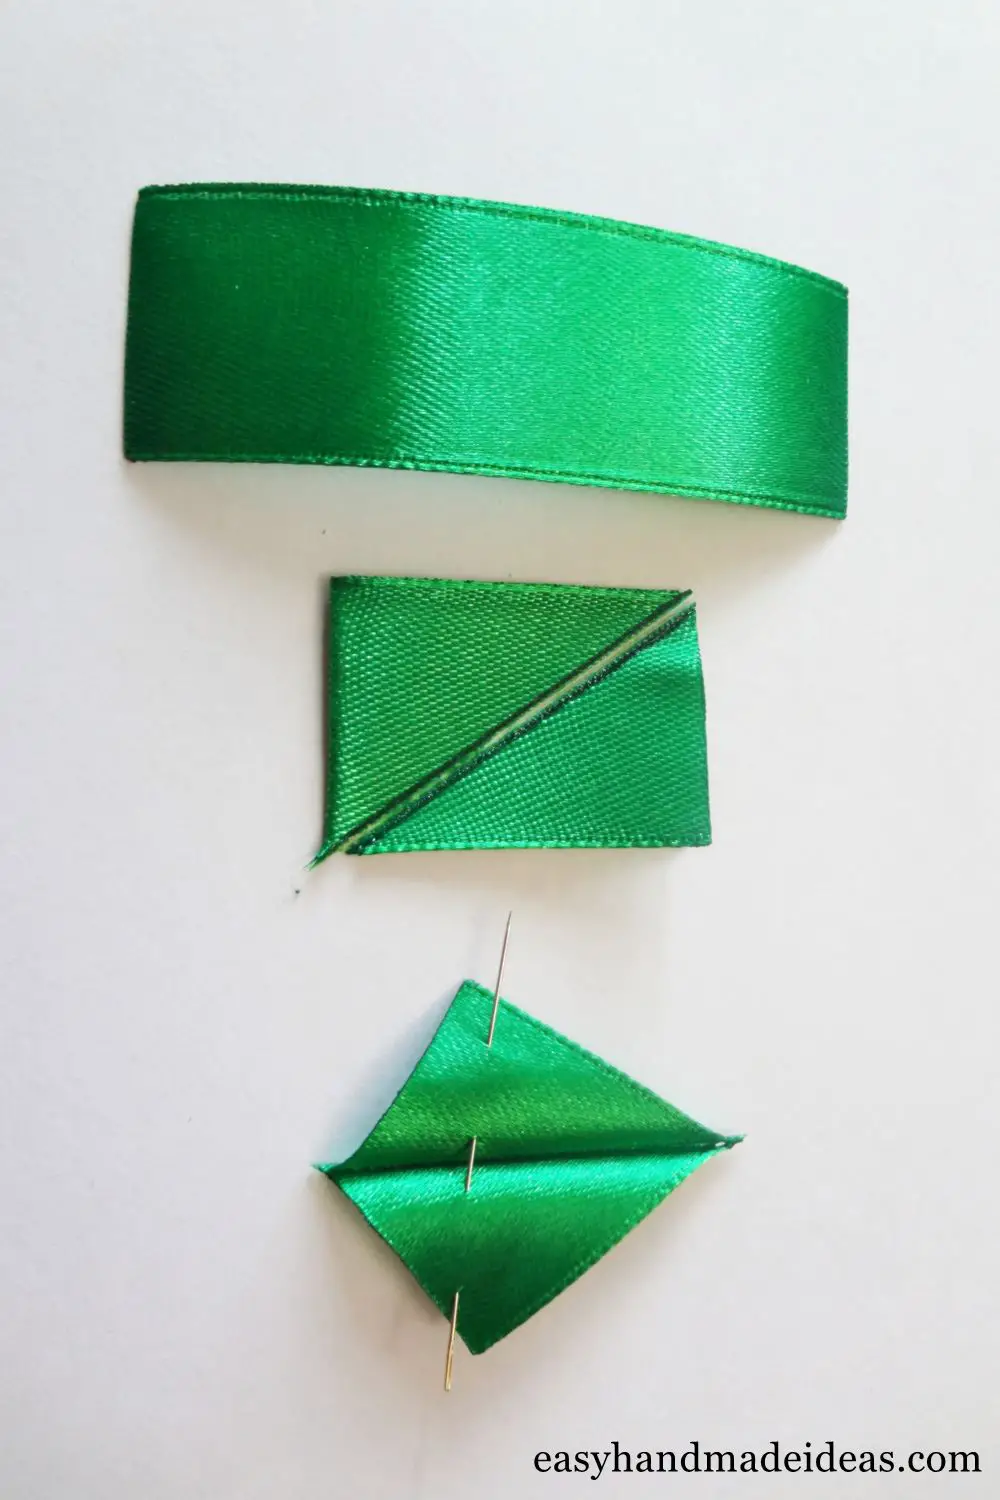
Use pieces of green ribbon to make leaves. Fold the ribbon in half and cut diagonally. If you do this with a heated metal (such as a heated metal part of a pair of scissors), the pieces will come out stapled in the center (with a fold).
Step 10: Glue the leaves to the violet
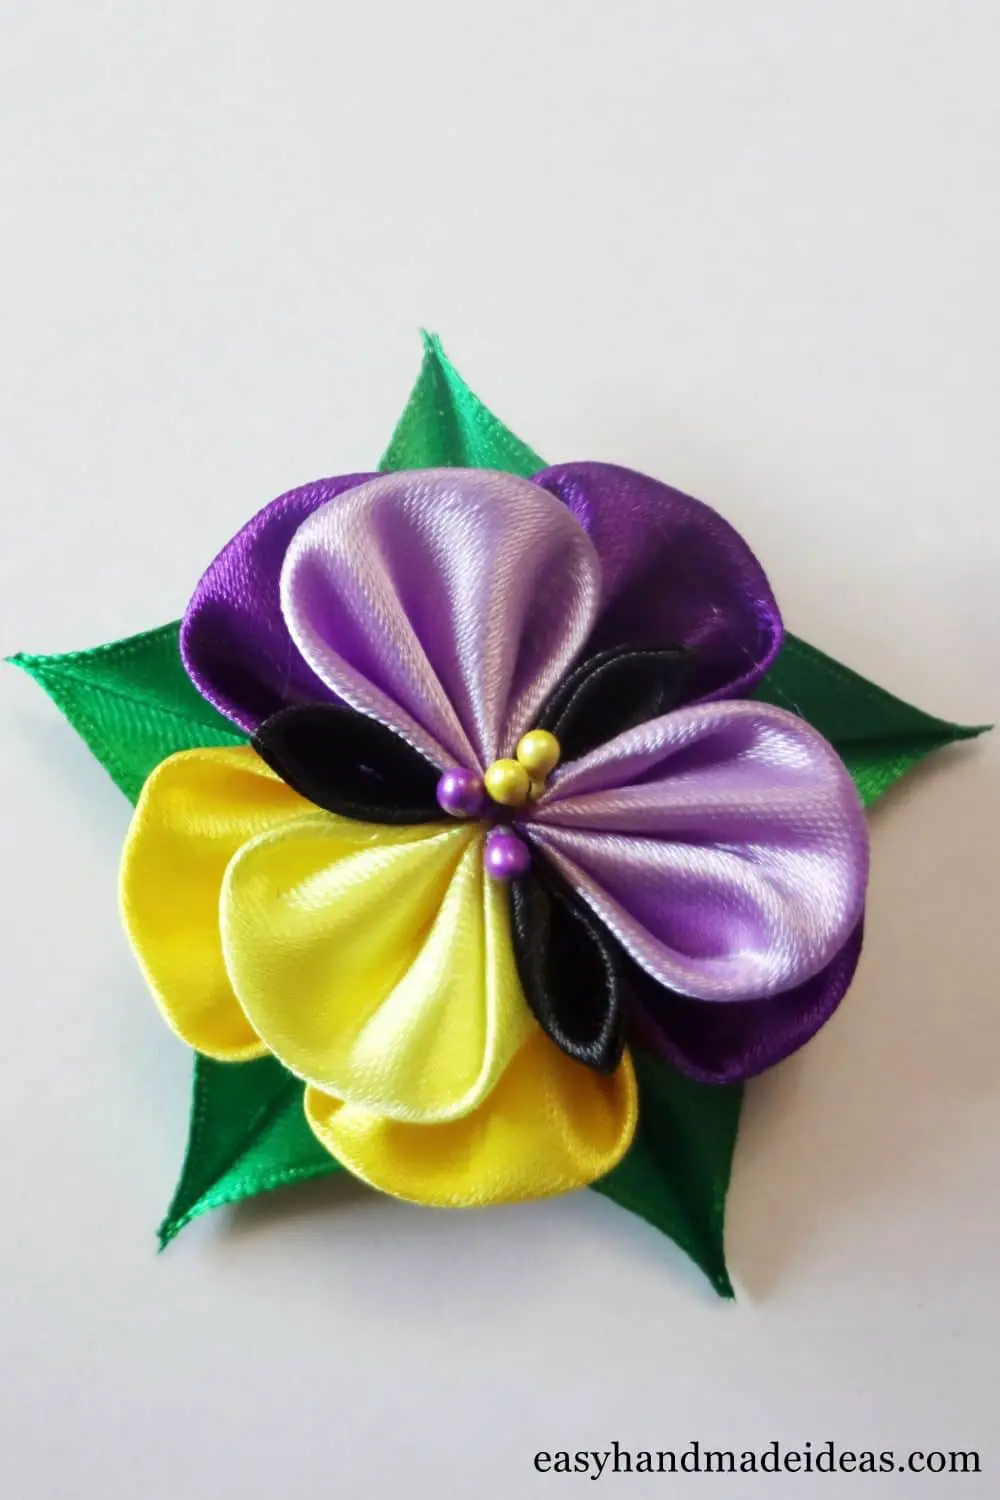
Glue 5 green leaves with sharp ends to the other side of the violet.
Step 11: Get the hair clips
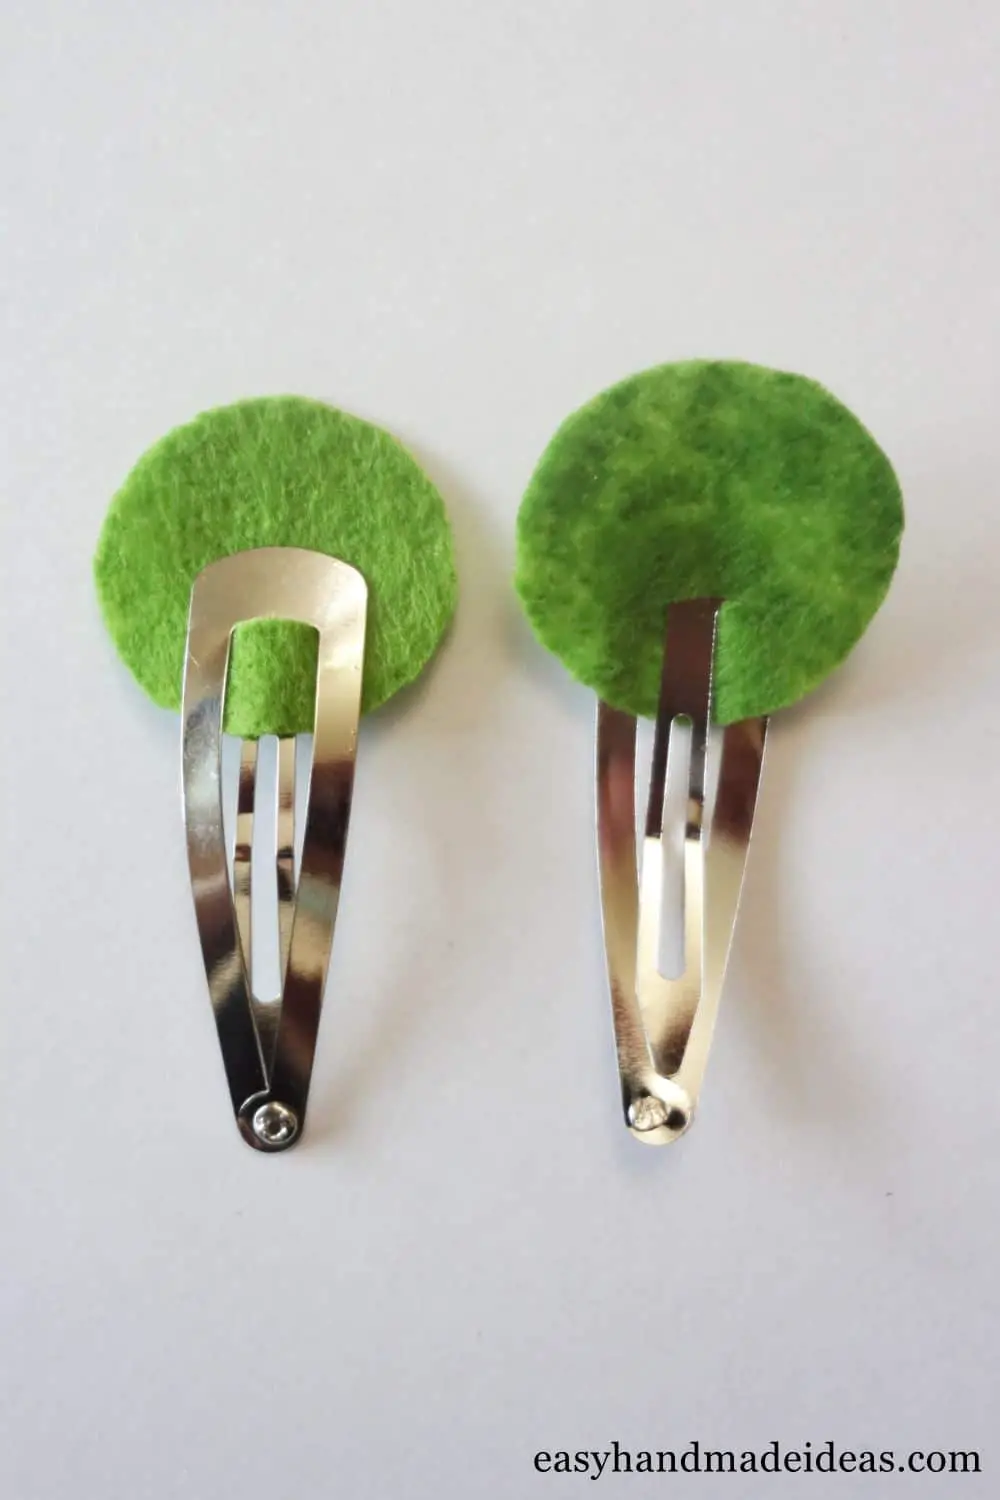
Prepare small green felt circles and click-clack hair clips. Make notches in the circles and insert the tongues of the hair clips into them.
Step 12: Glue the hair clips to the flowers
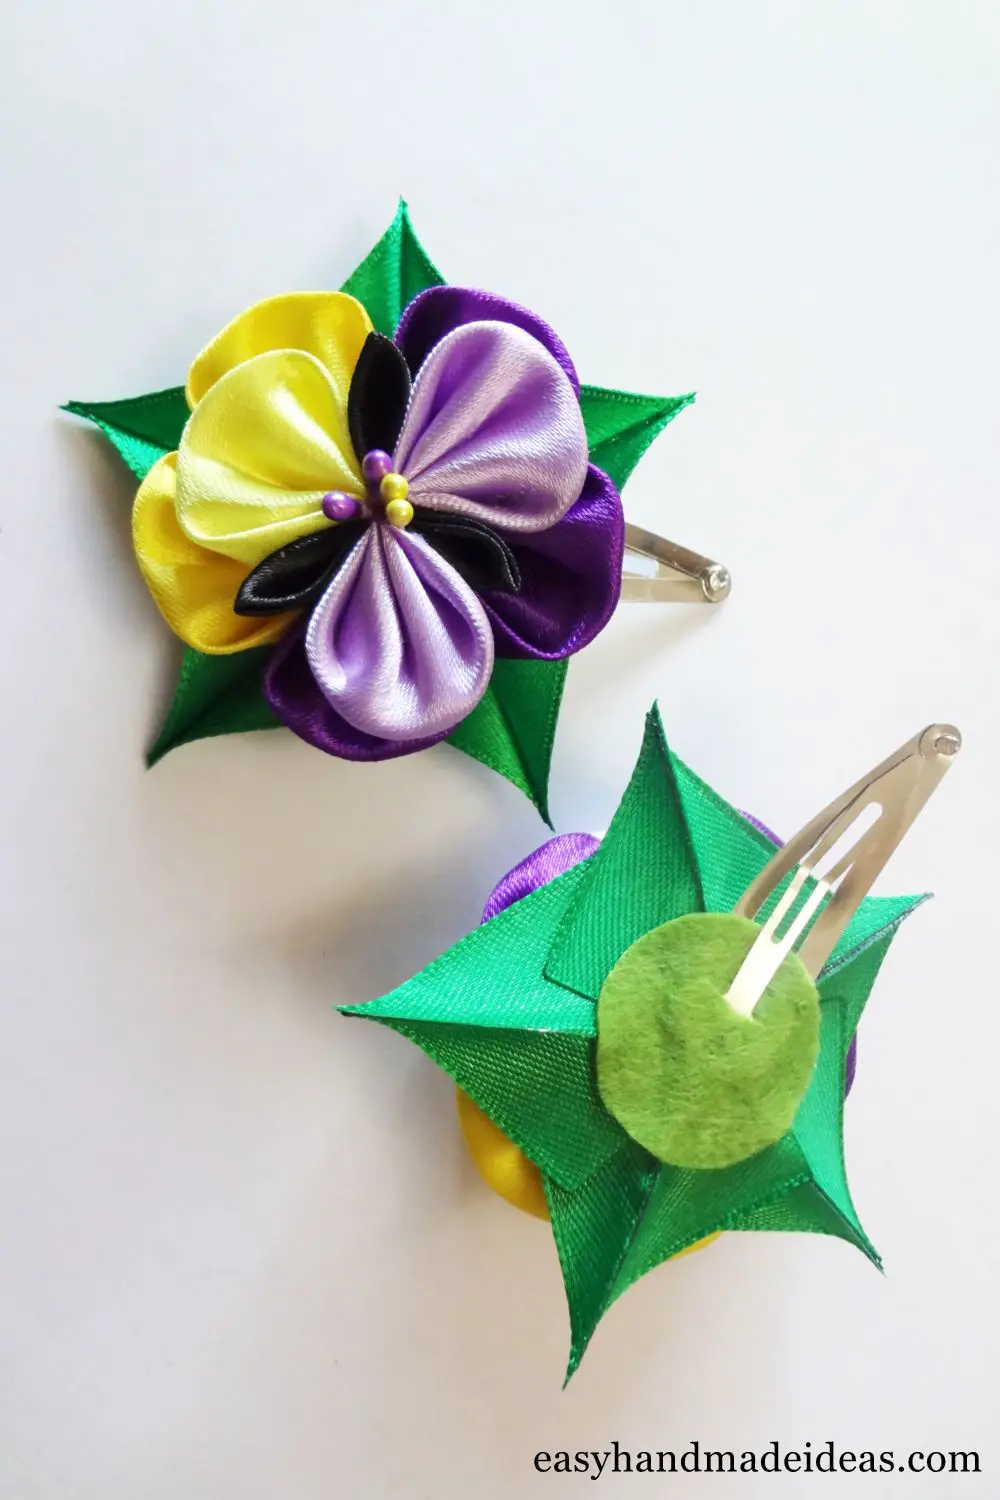
Glue the violets on the hair clips.
Step 13: Prepare 5*10 cm of violet strips for the bottom layer of the bow
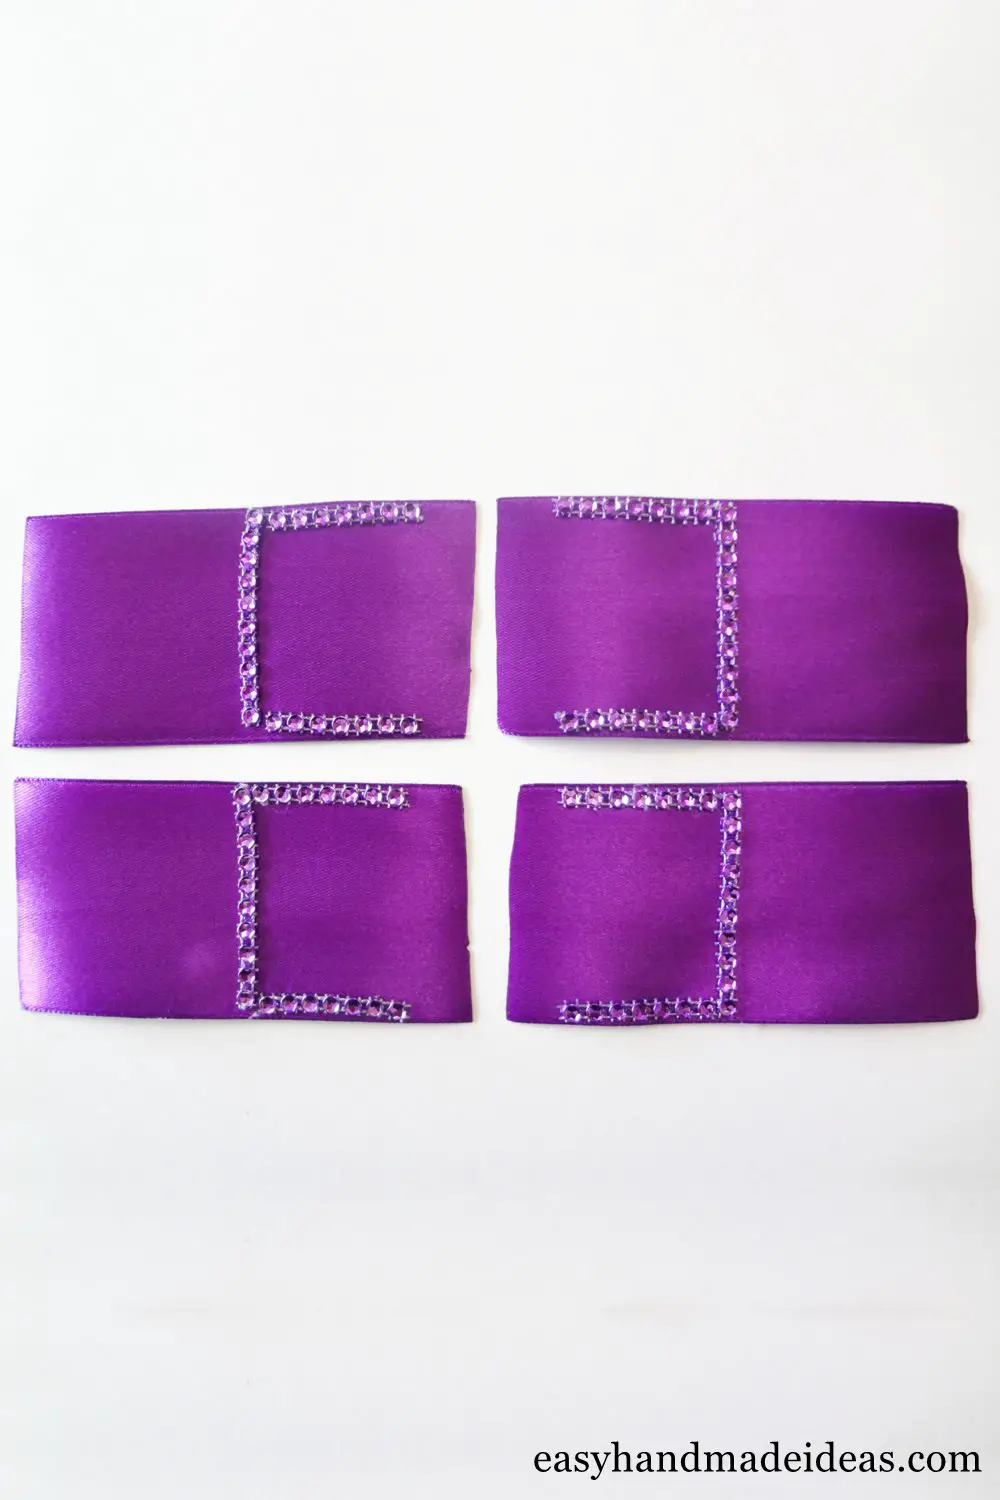
Glue a tire on one side of the strip in the form of an arc.
Step 14: Make purple blanks
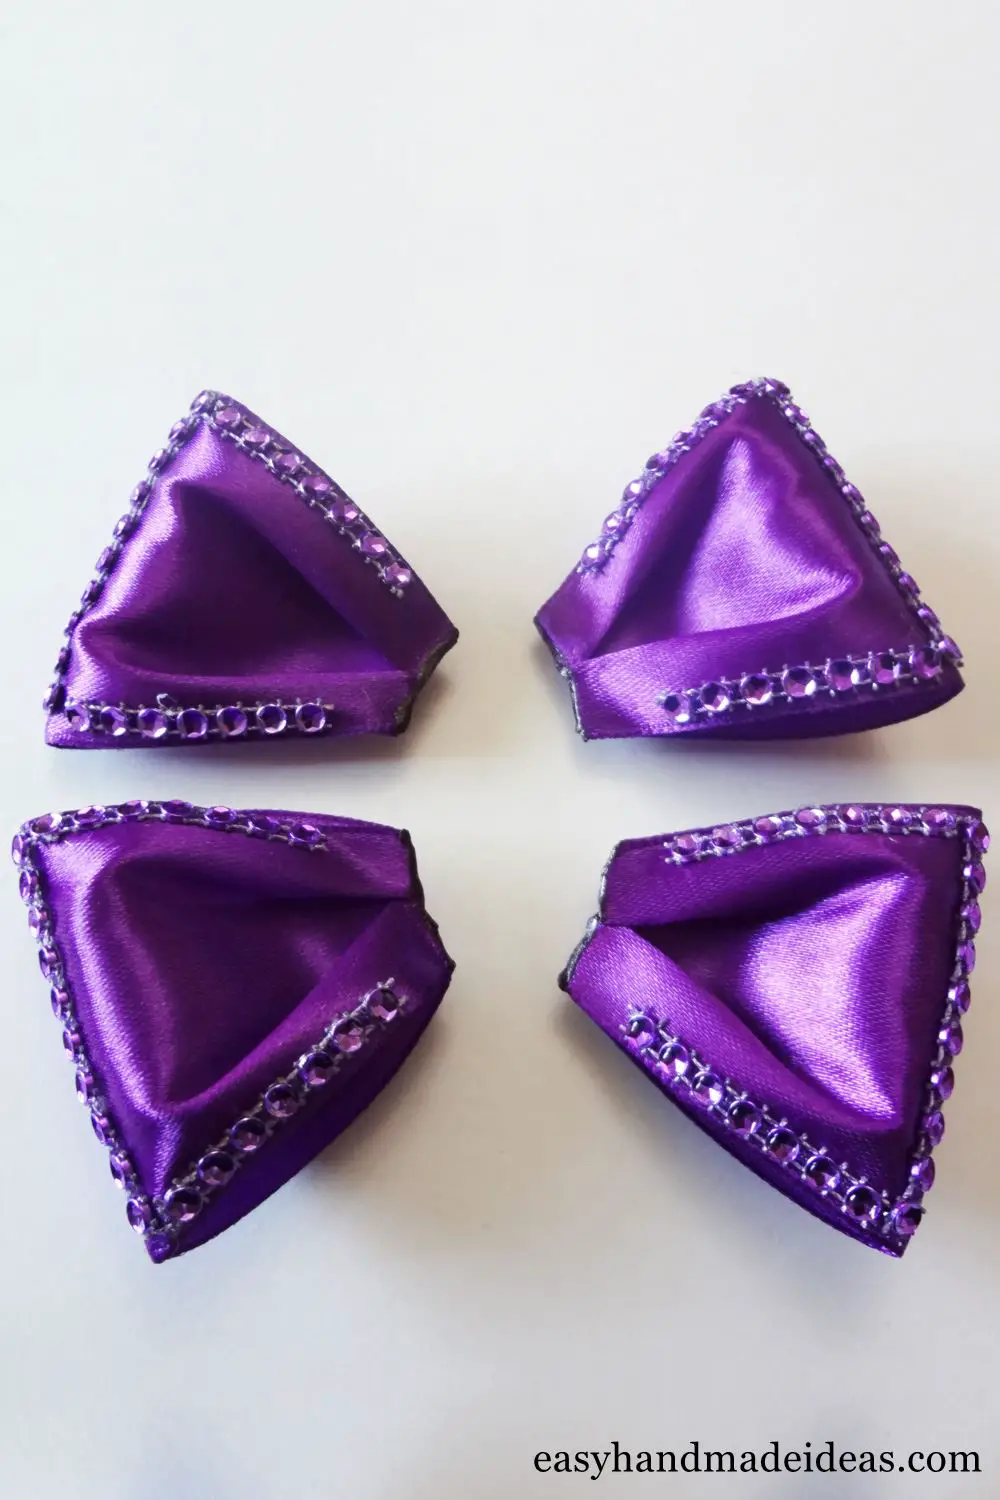
Fold each strip in half. Make a double fold where the two opposite ends meet. Lightly burn the joined edges.
Step 15: Glue the four purple blanks together
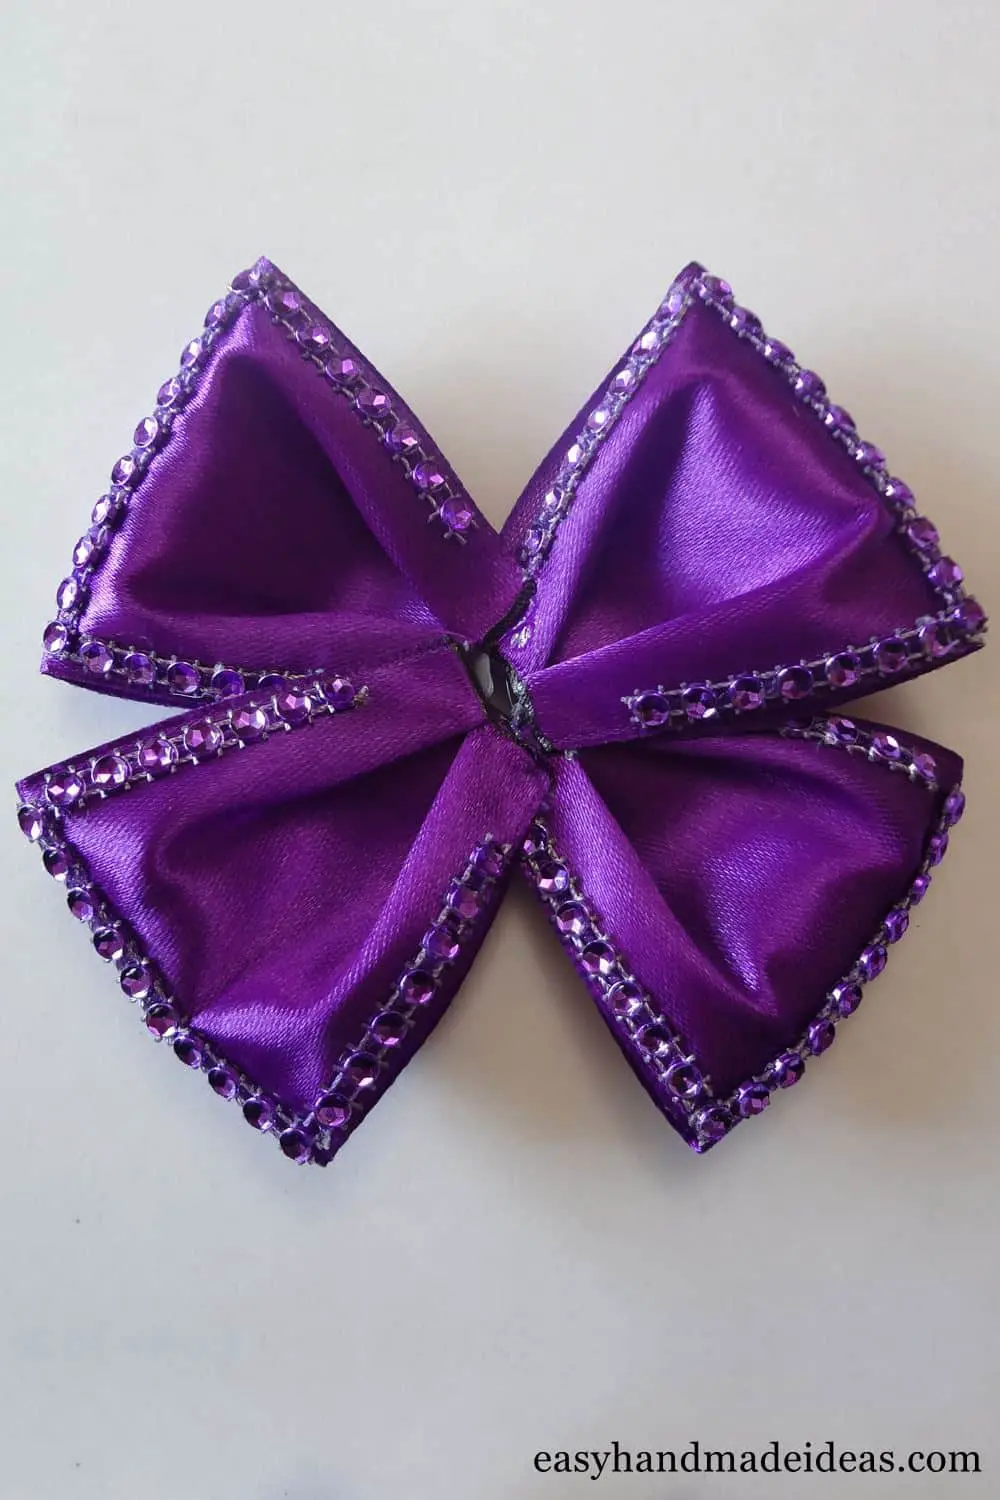
Glue the bow from the purple pieces.
Step 16: Repeat step 13 with gold ribbon
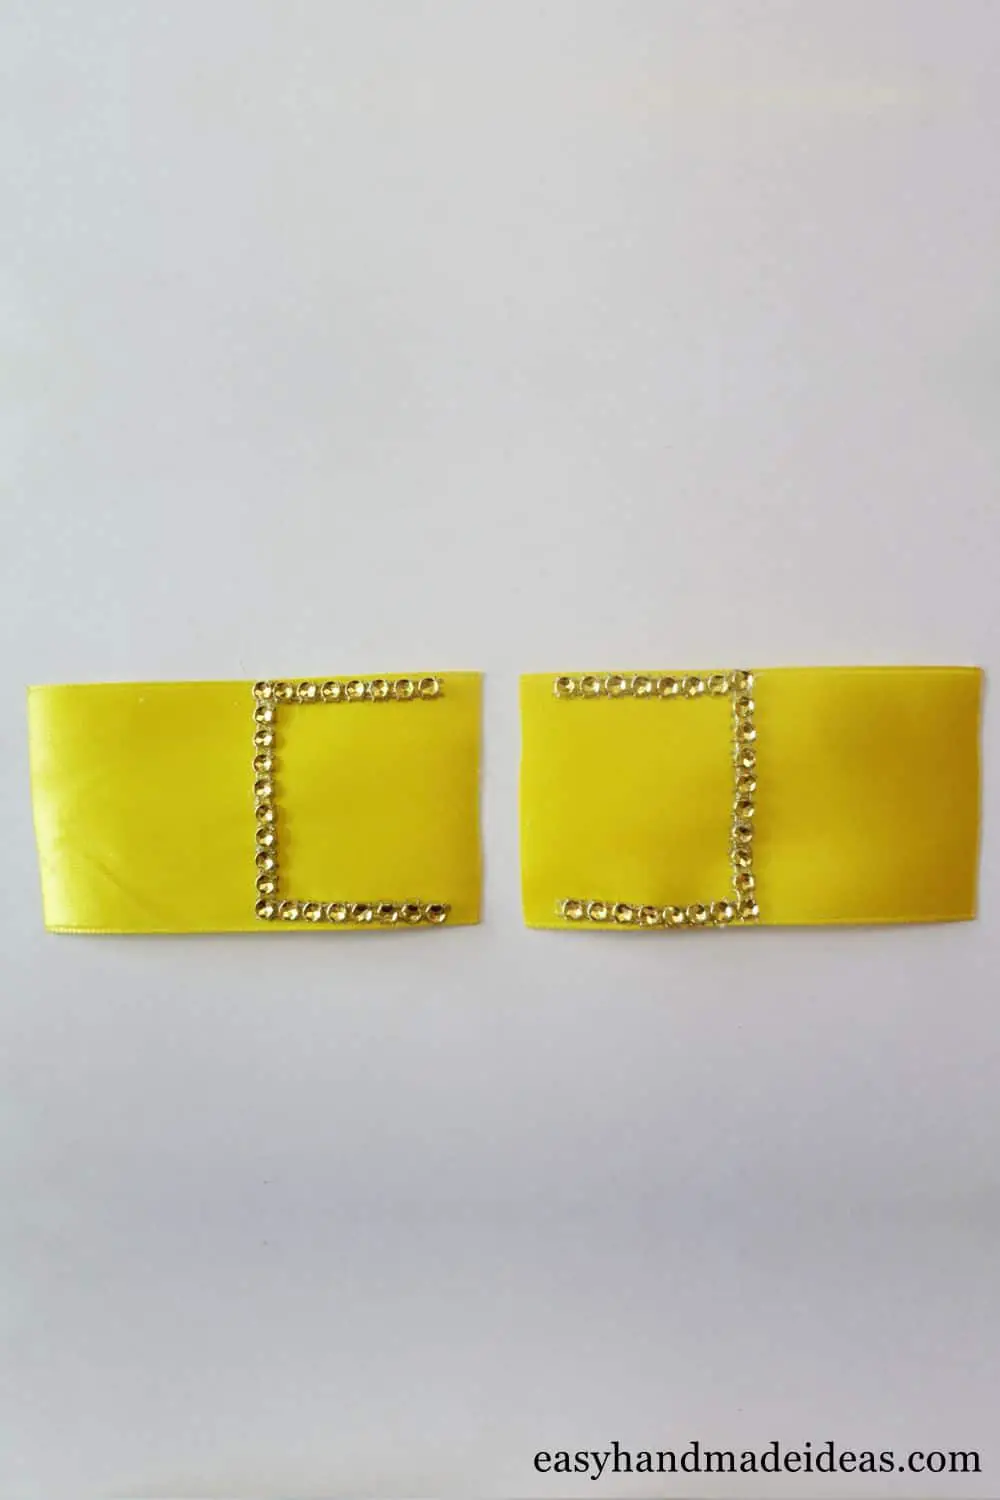
Prepare 5 x 9 cm gold strips similar to the purple strips that will decorate the tire.
Step 17: Repeat step 14 with gold ribbon
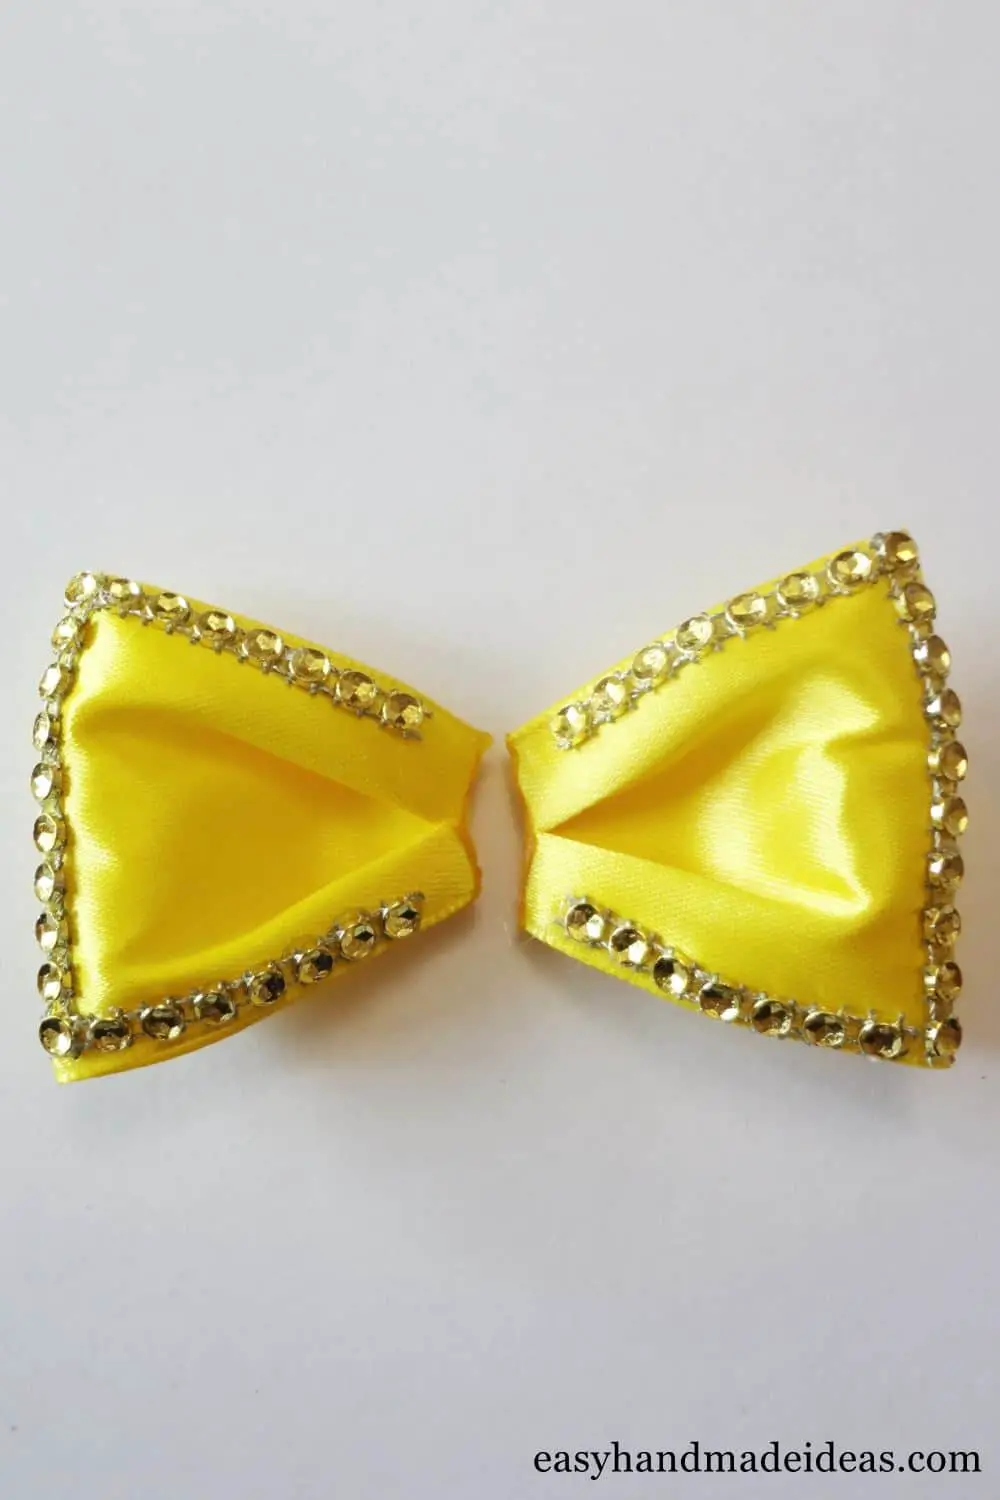
Assemble the voluminous loops, similar to the previous items.
Step 18: Connect the purple and gold details
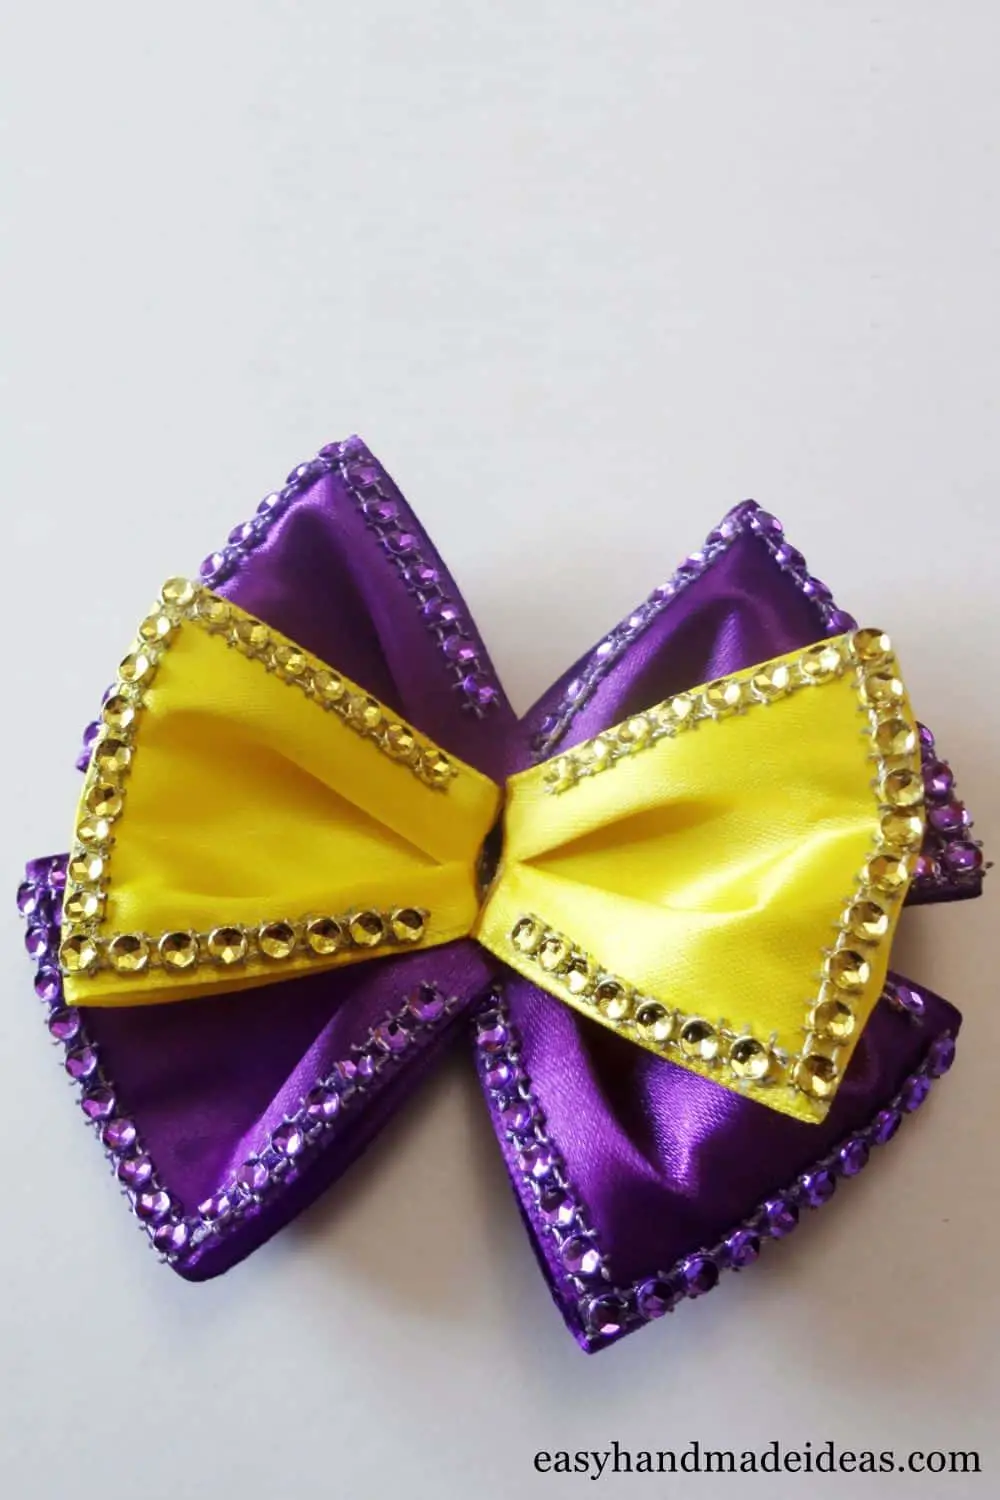
Glue the gold pieces on top of the purple pieces to make a nice shiny bow.
Step 19: Hide the ugly center of the flower with a thin ribbon
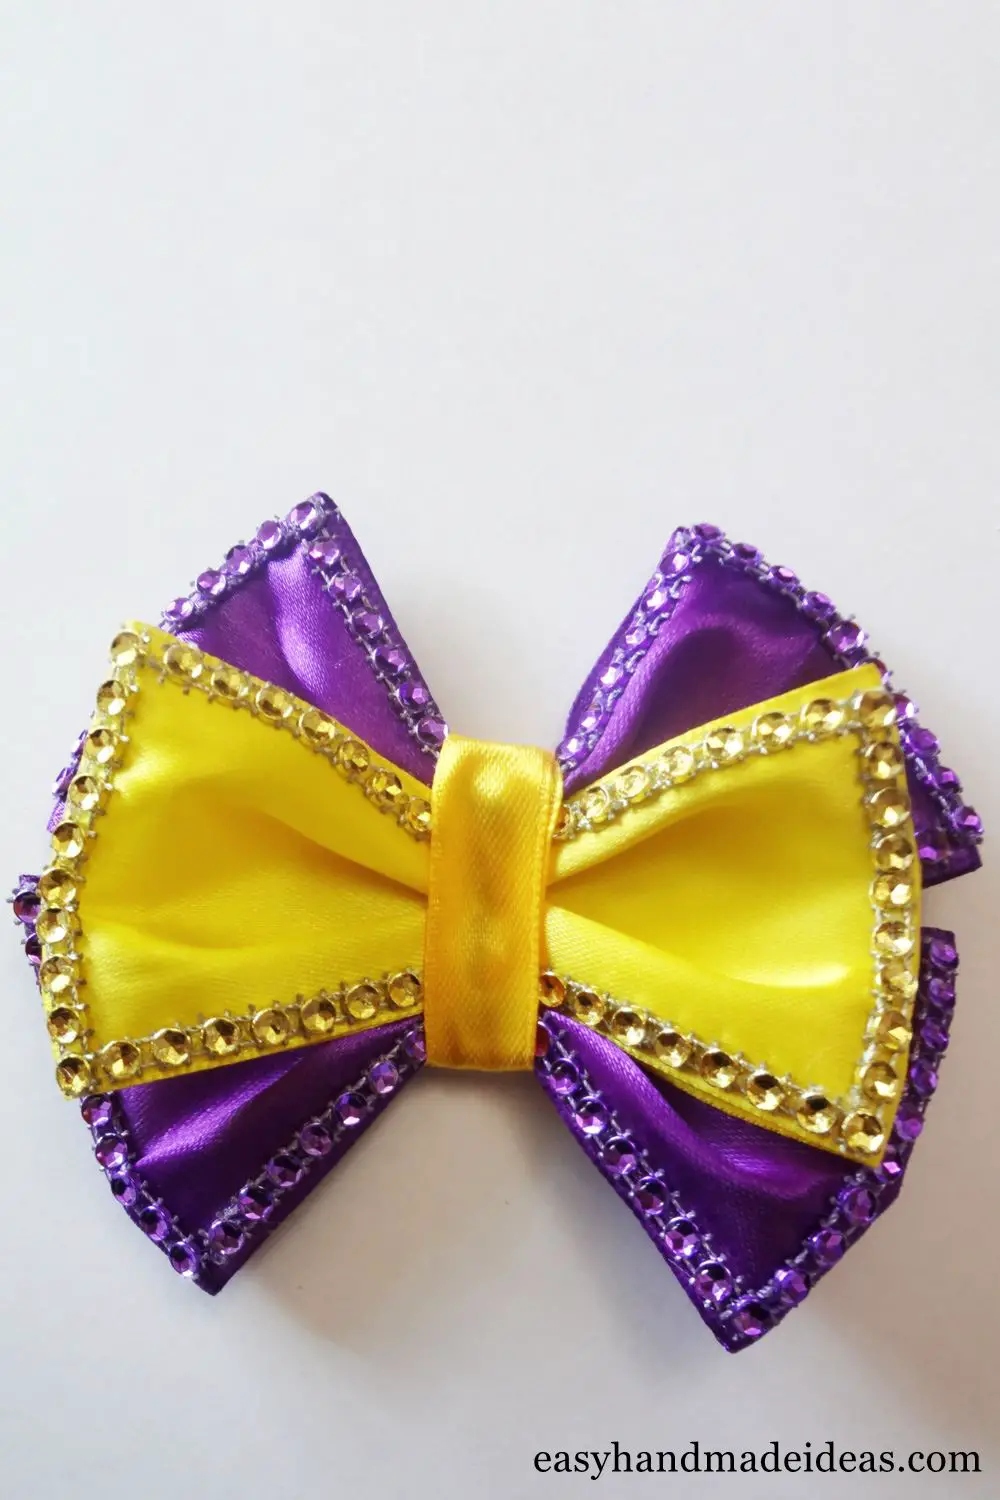
Wrap a thin strip of gold satin ribbon around the center of the flower. Fix with glue.
Step 20: Glue the top of the flower to the violet
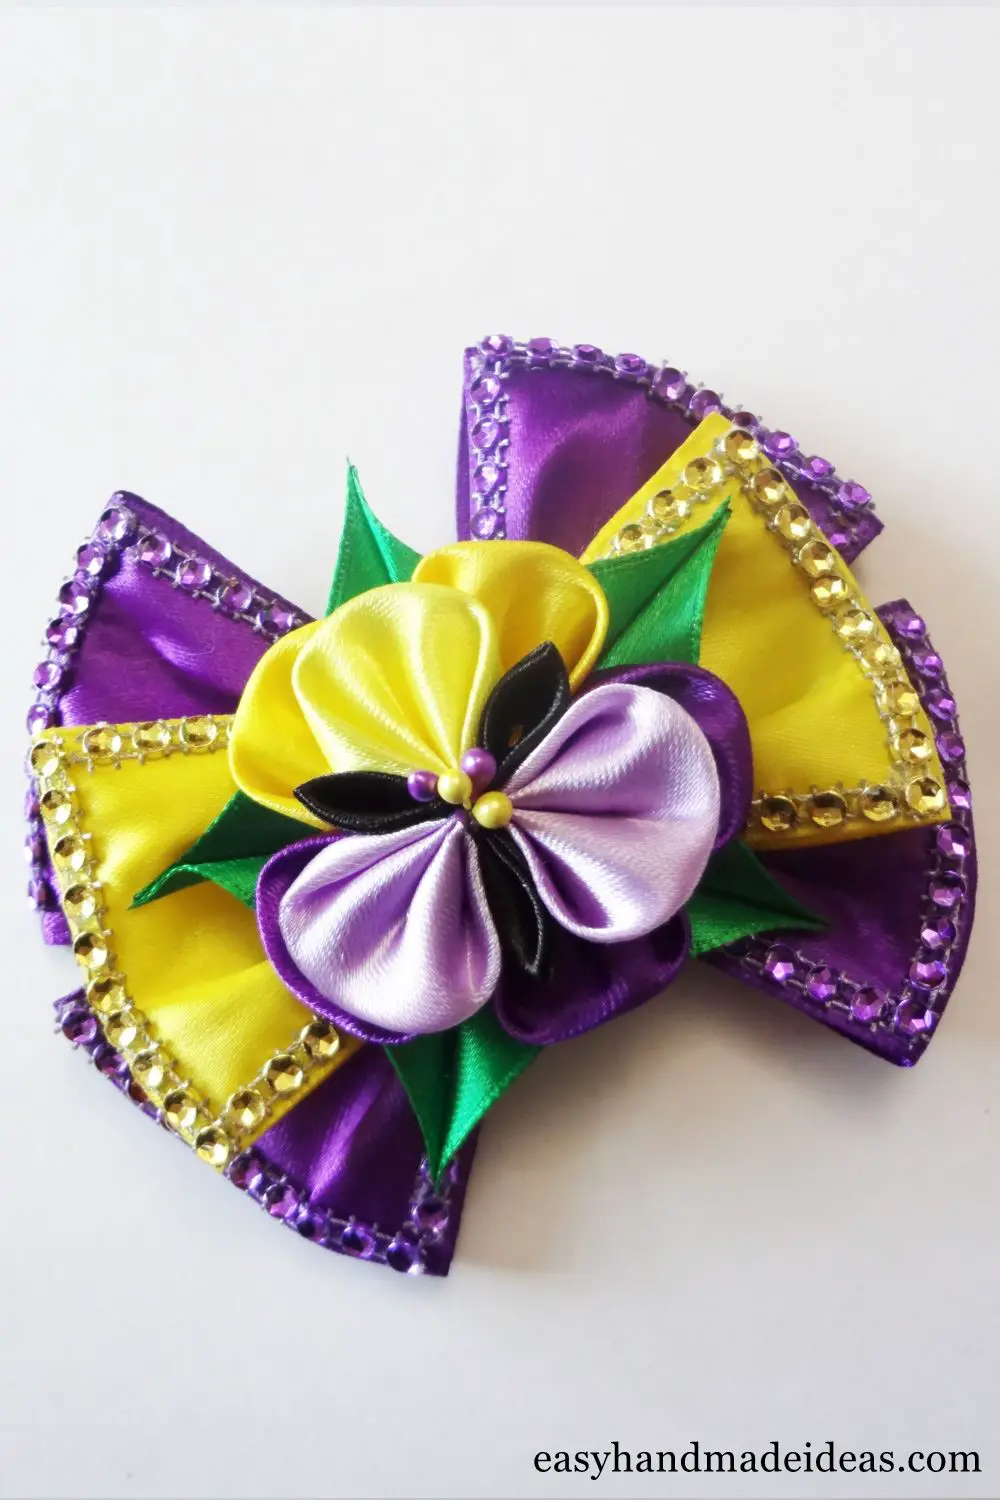
Connect all parts, including the hair clip.
A set of Kanzashi accessories – beautiful satin ribbon violets are ready. They look like living plants, will never wither, and will even give off a delicate fragrance if you spray them with perfume.
