Crafting earrings does not always involve the use of full beads. In my master class I will show you a simple way how to make quilling earrings from paper strips. And the suggested photos will be helpful in this.
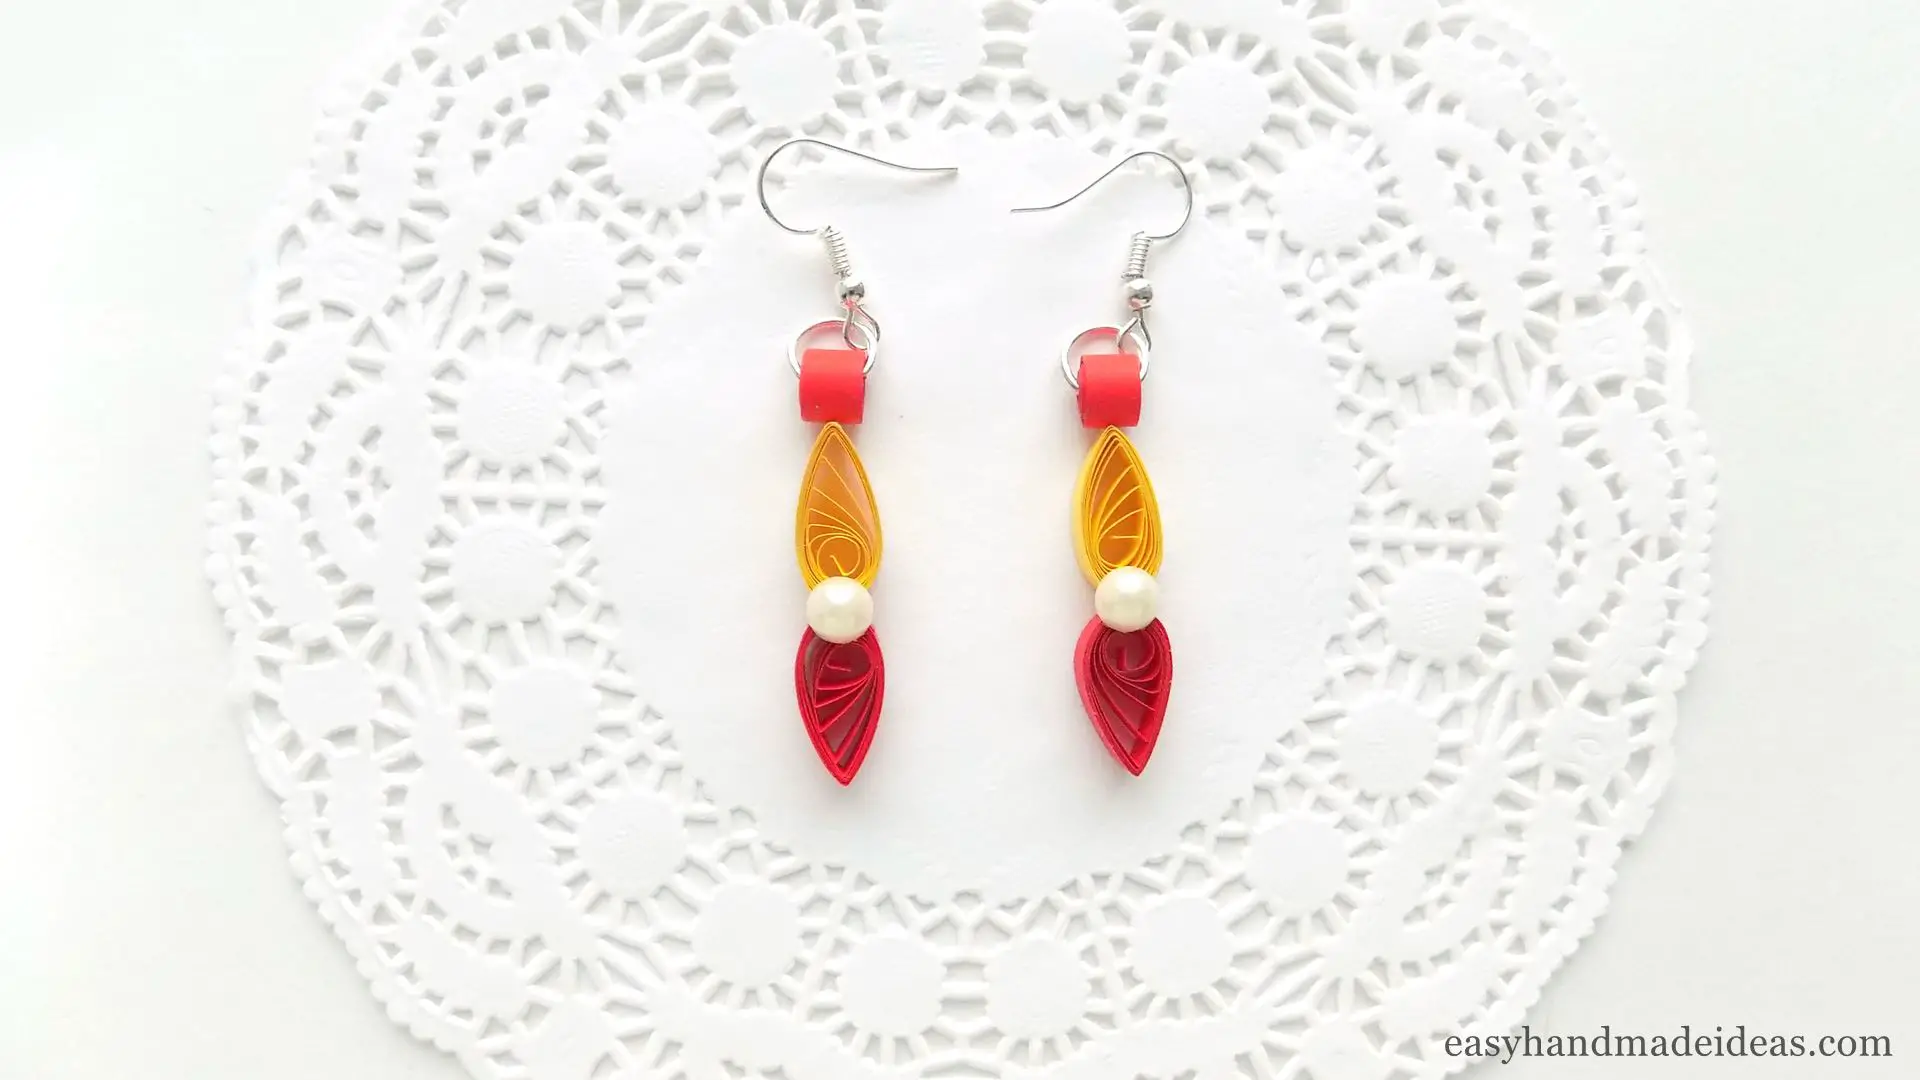
Quilled earrings
Total Time: 20 minutes
Step 1: Get the materials
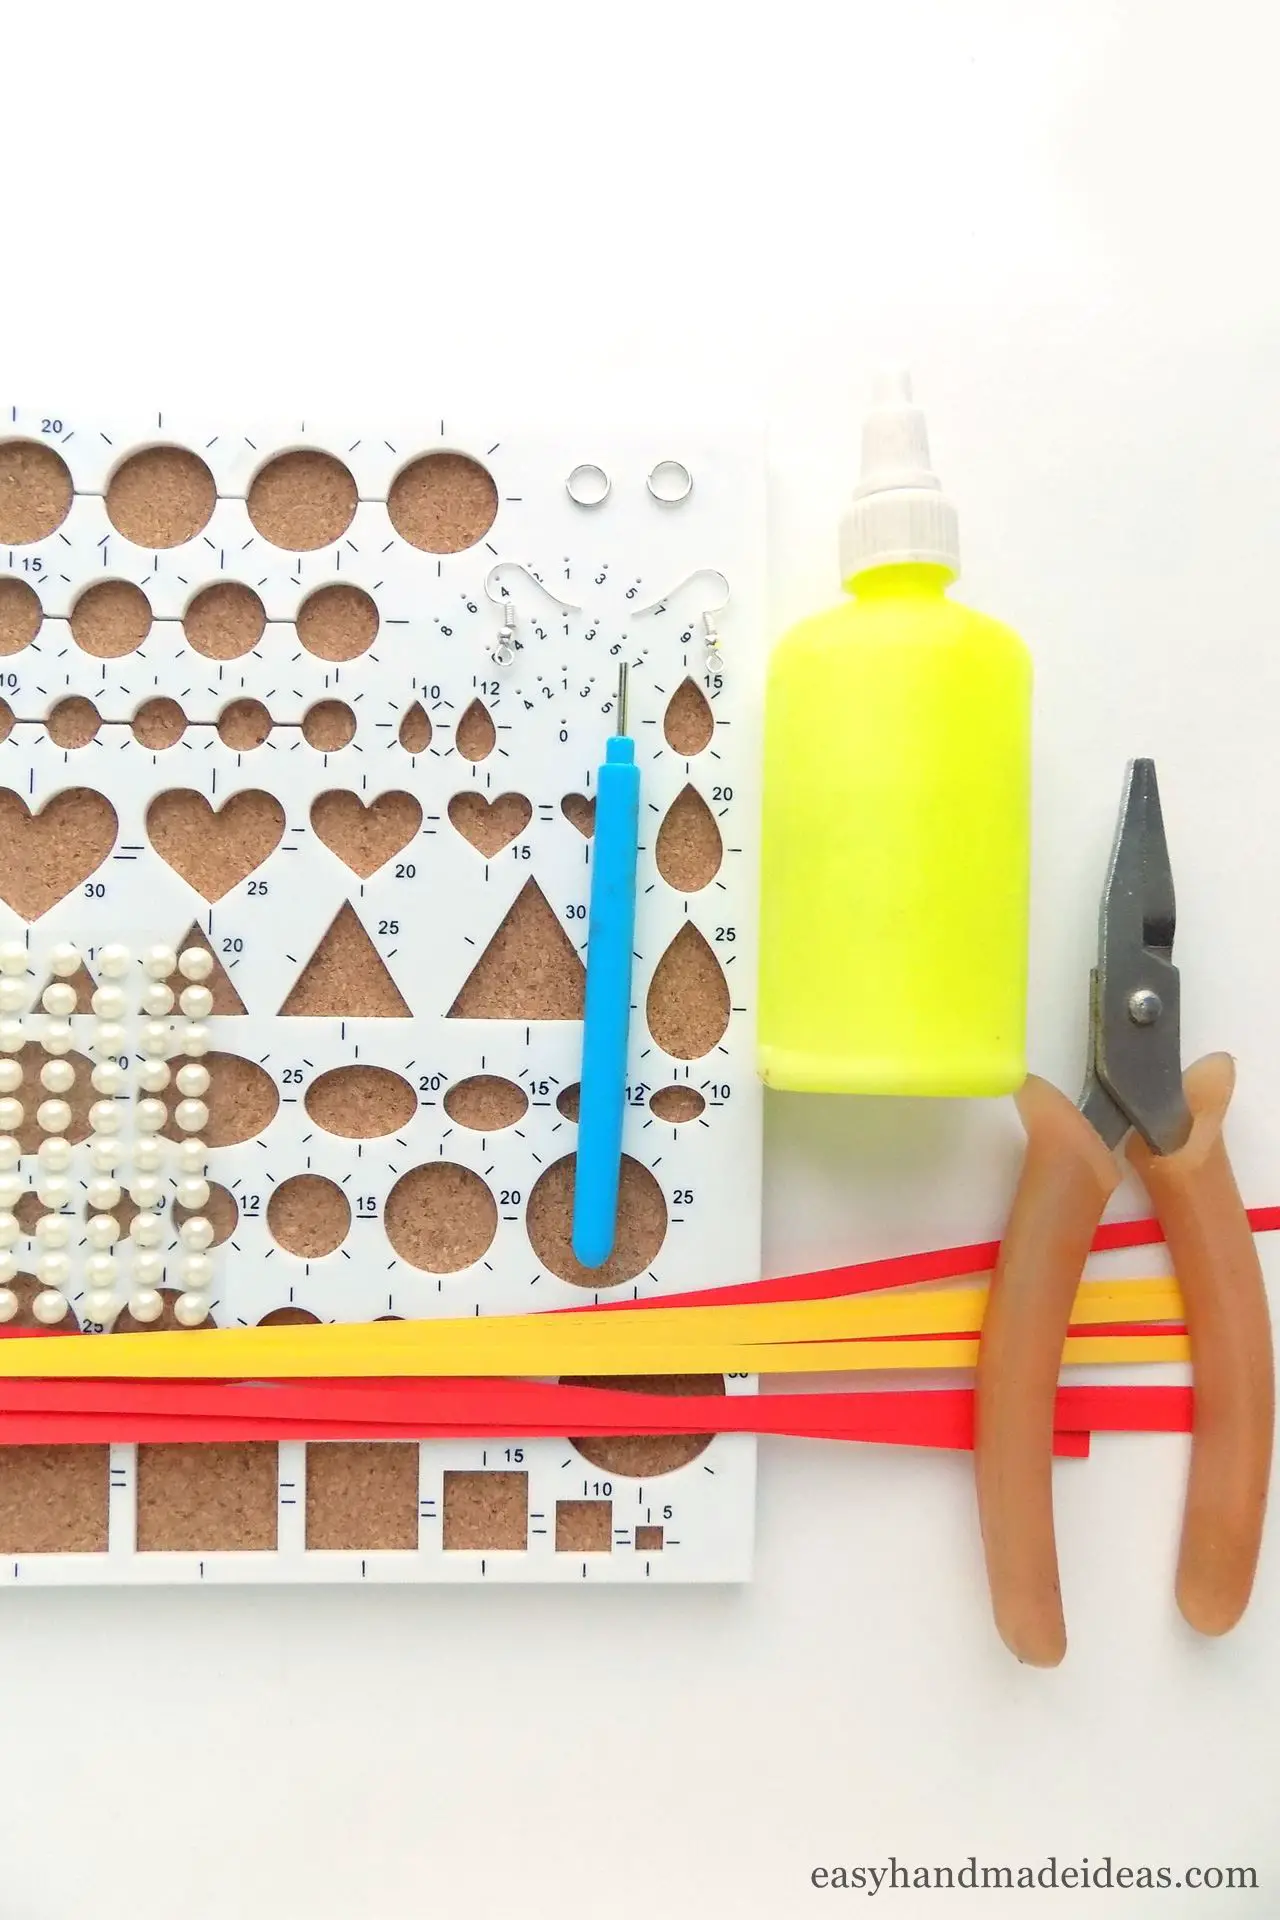
Prepare paper strips in the color you like. In my case it is yellow and red. You can also use any other shape of rhinestones.
Step 2: Make the loose coil
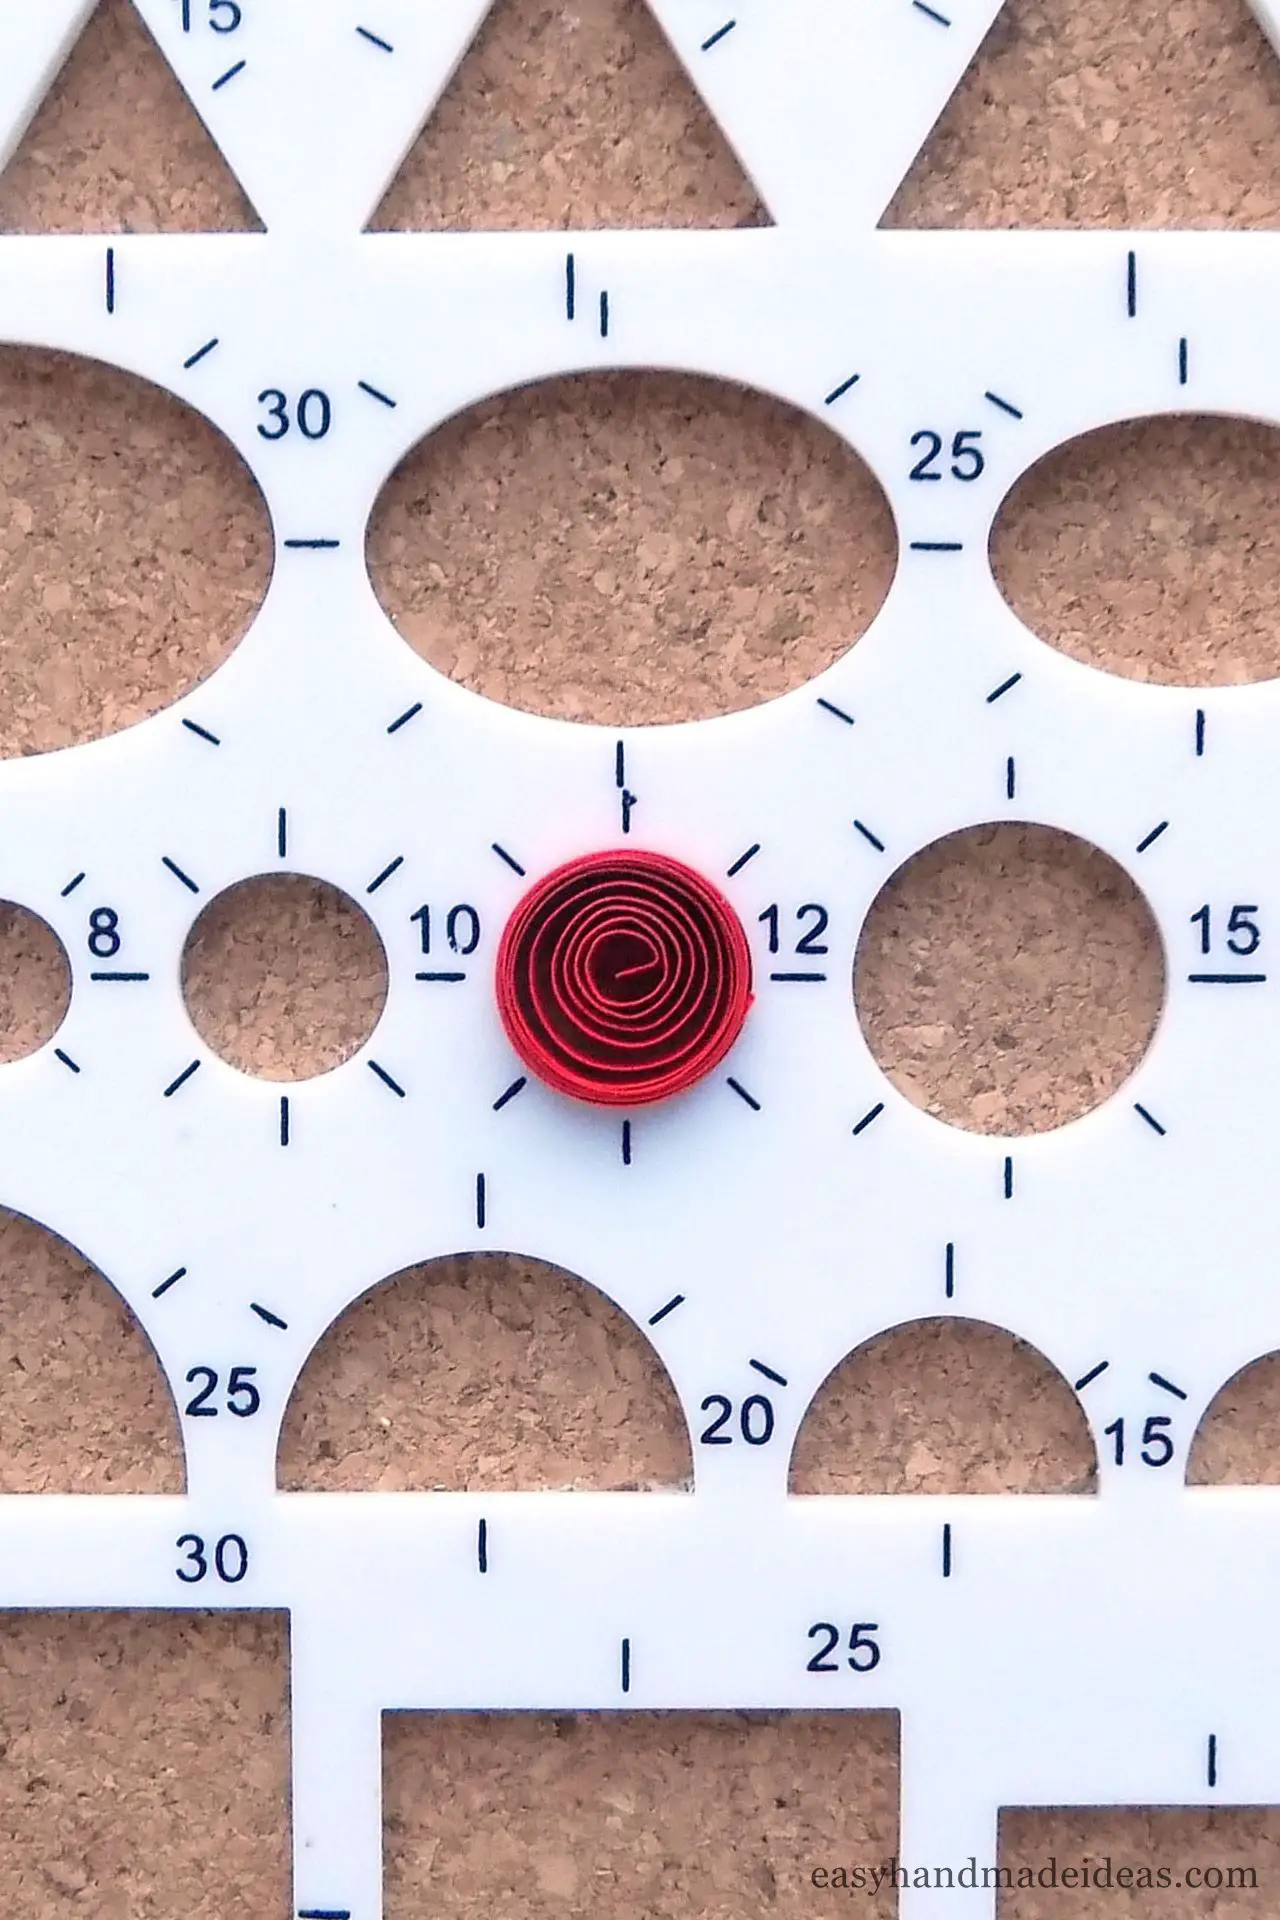
First take a red paper strip, roll it with a quilling tool, and then place it in a 12mm diameter quilling board.
Step 3: Fix the tip of the loose coil with glue
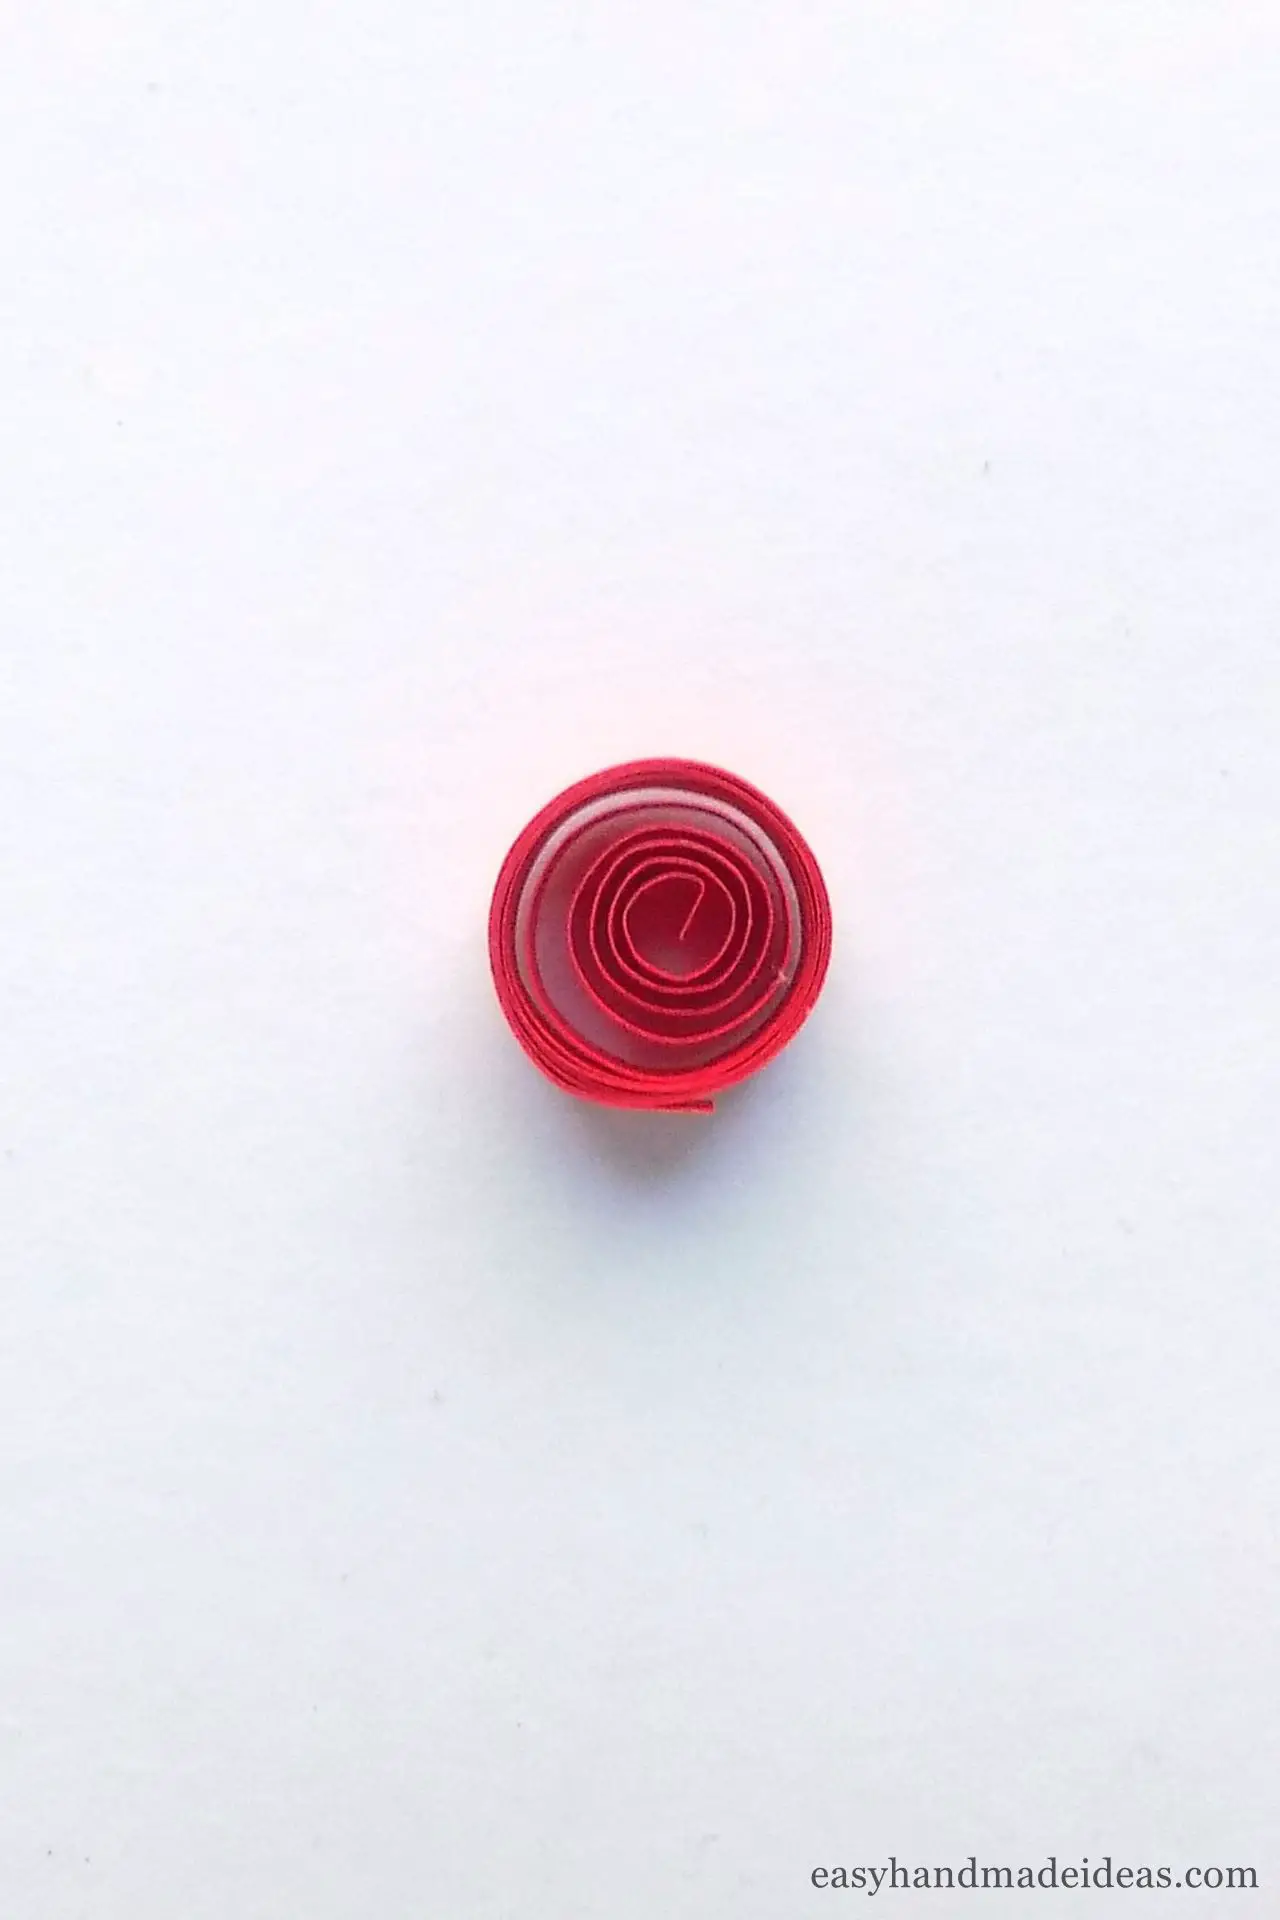
Carefully pull out the resulting coil, and fix the tip of the strip with PVA glue.
Step 4: Make a second loose coil
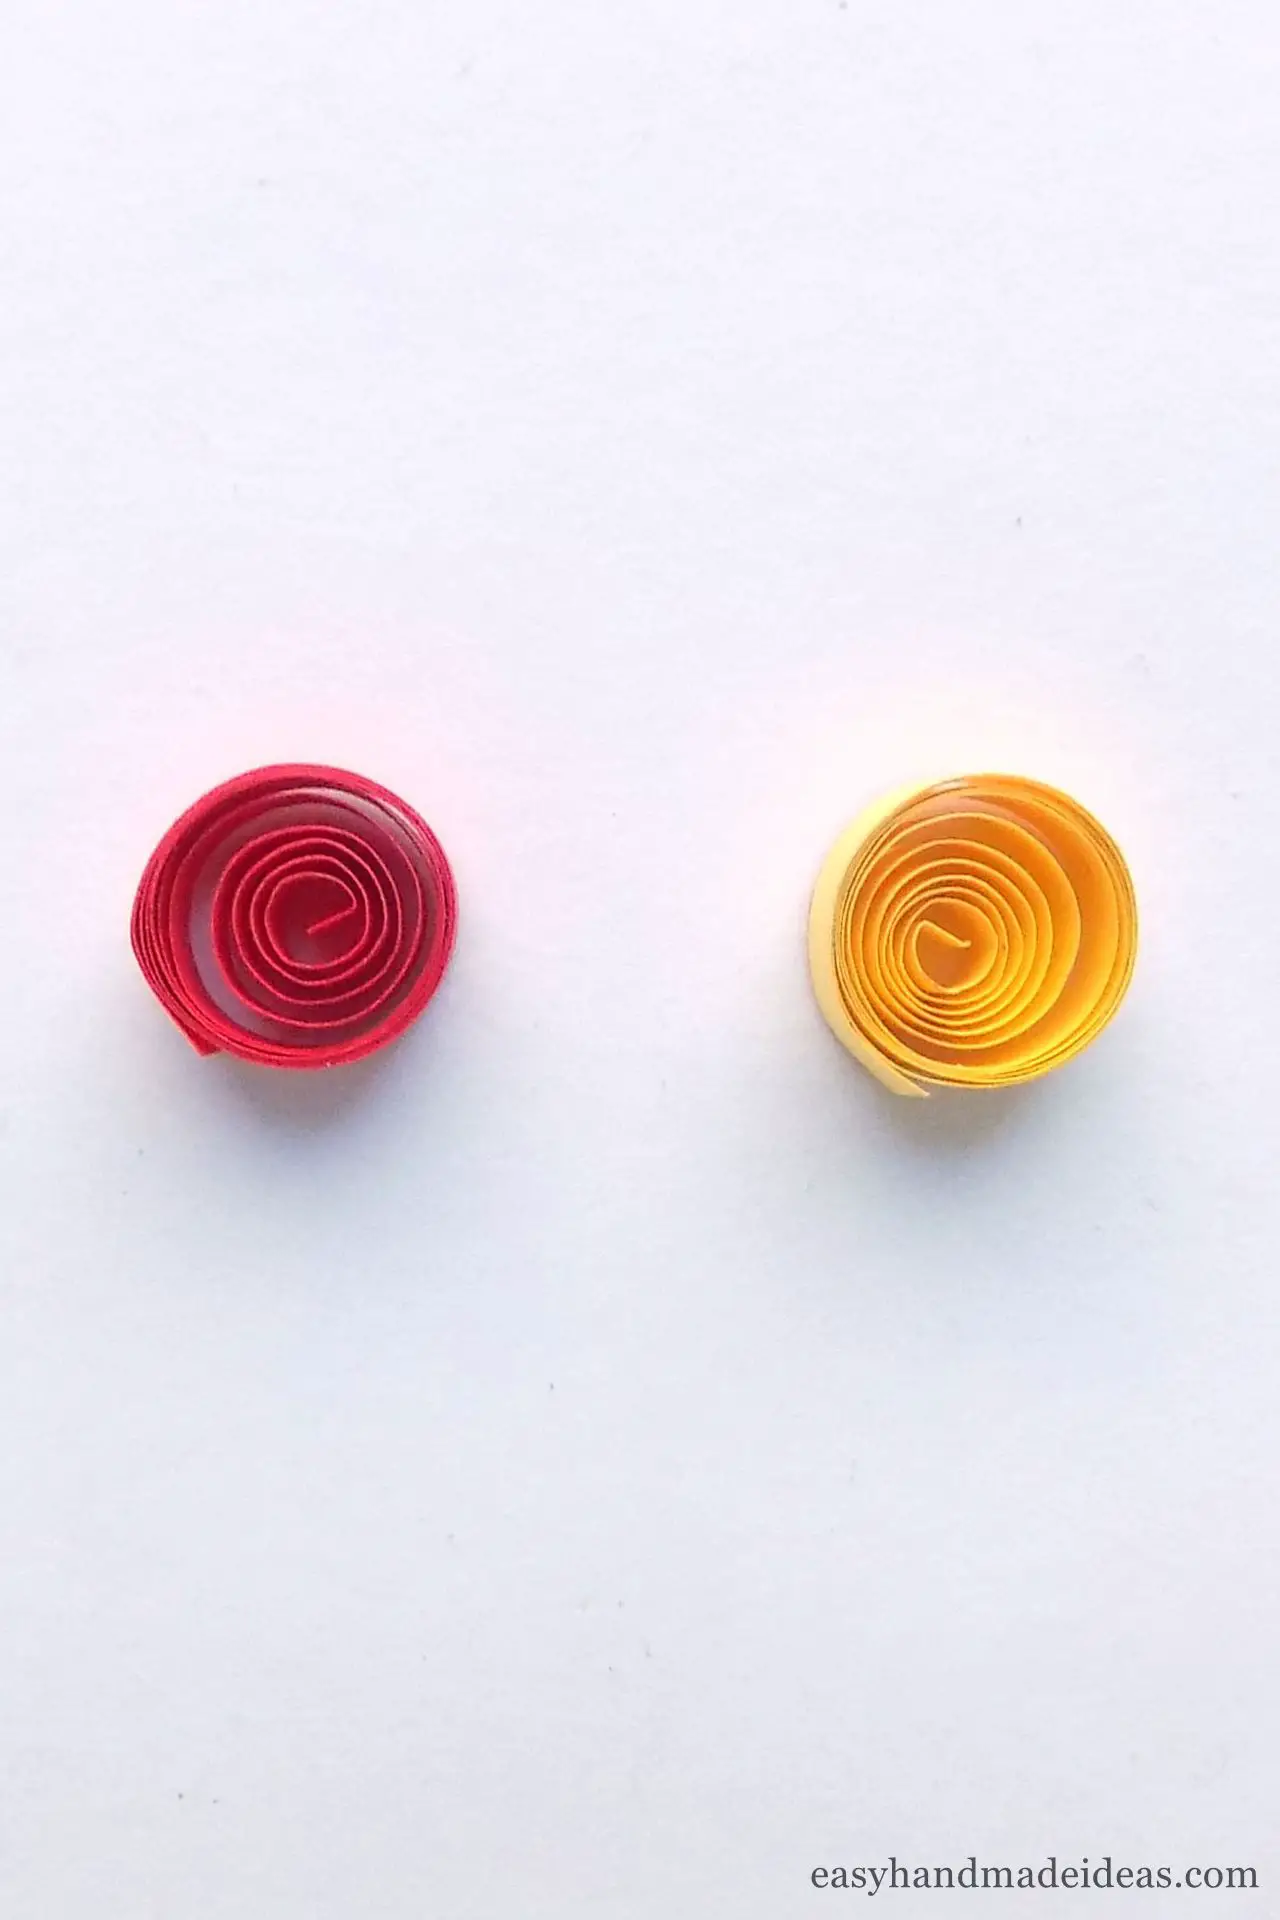
Make a second loose coil from the yellow paper strip in the same way. Use the previous steps to do this.
Step 5: Make two drop coils
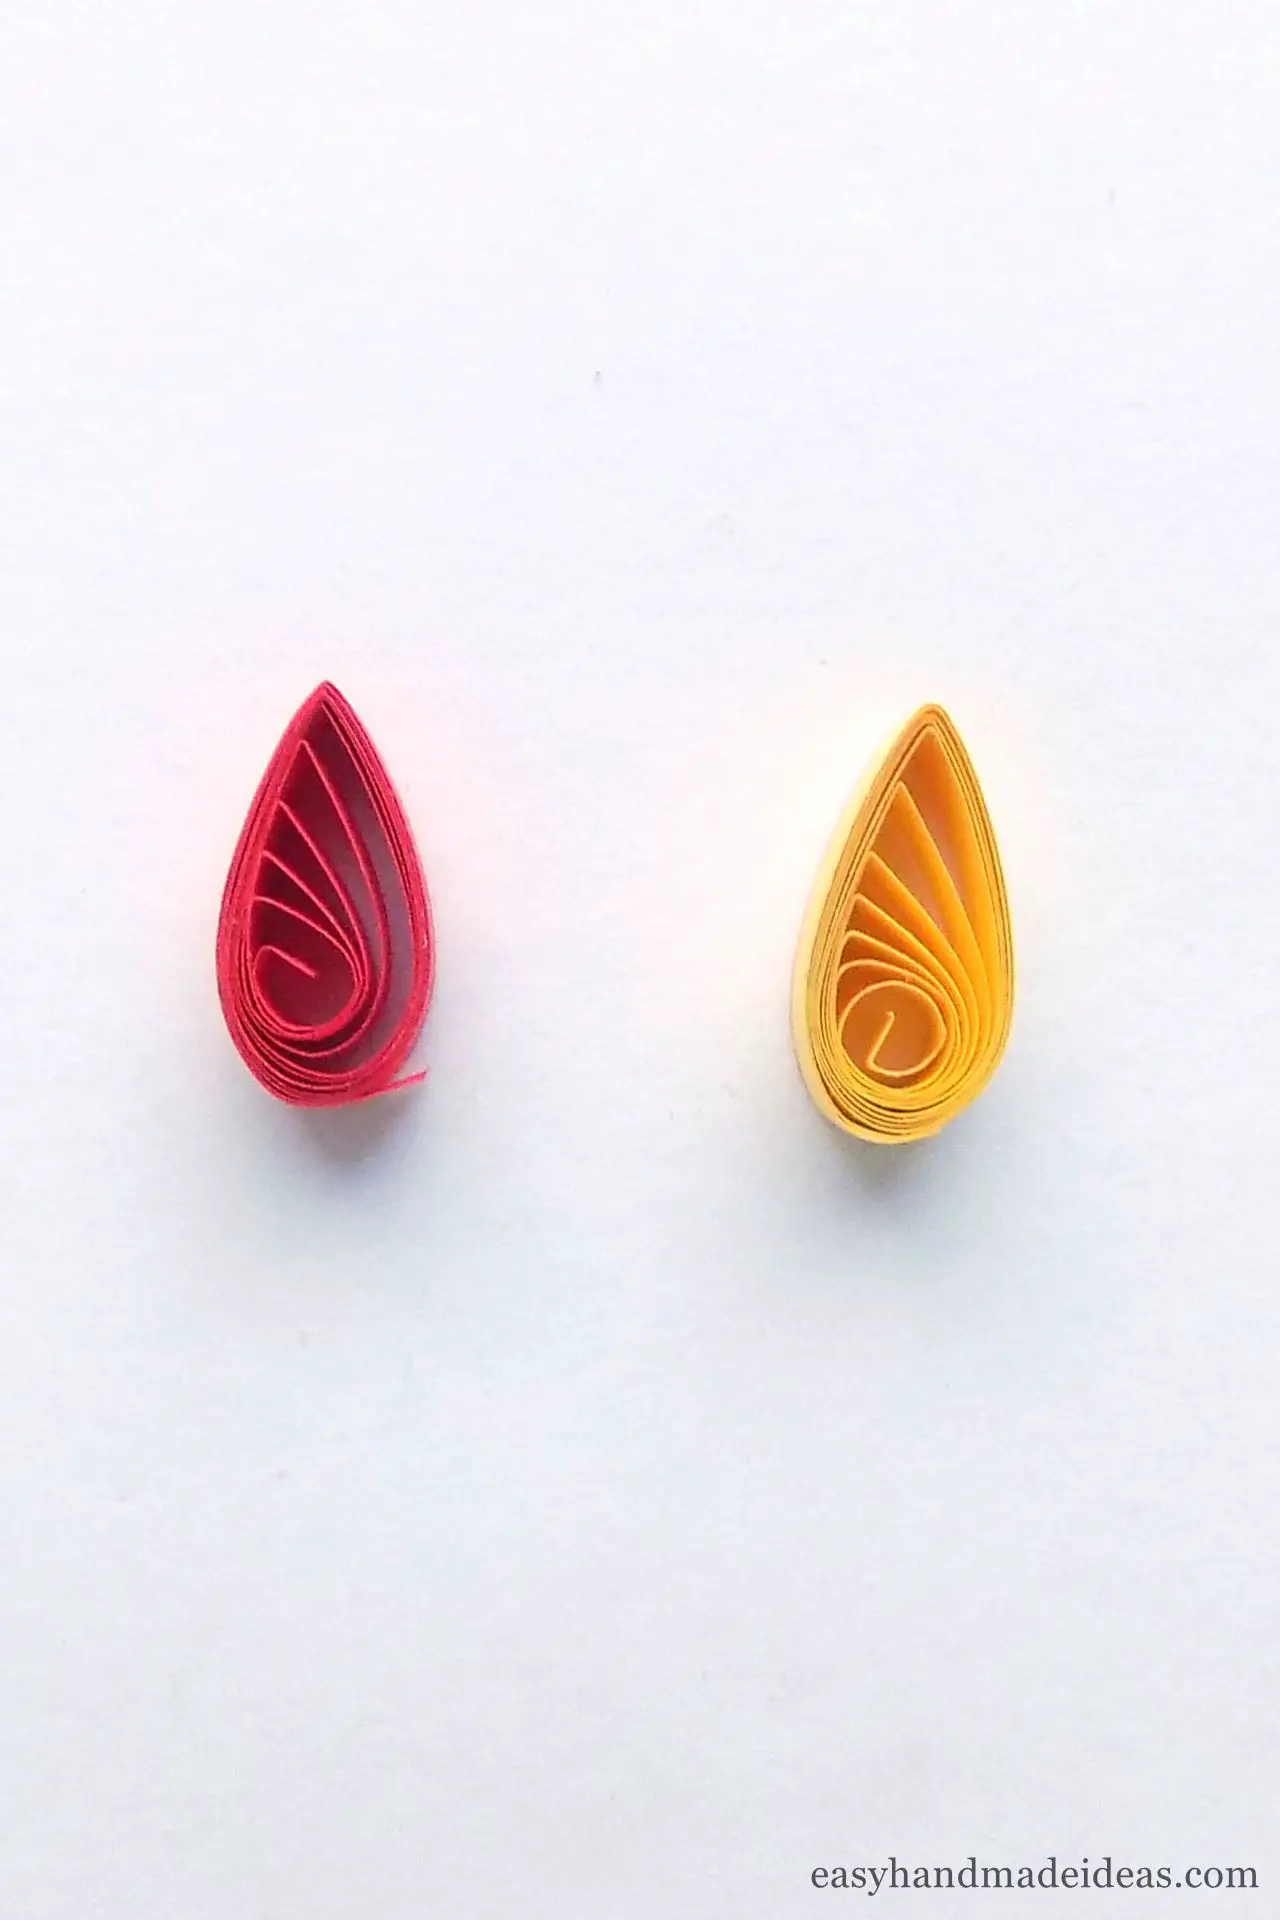
Now use your fingers to pinch each coil on one side to give them a drop shape.
Step 6: Roll a tight coil
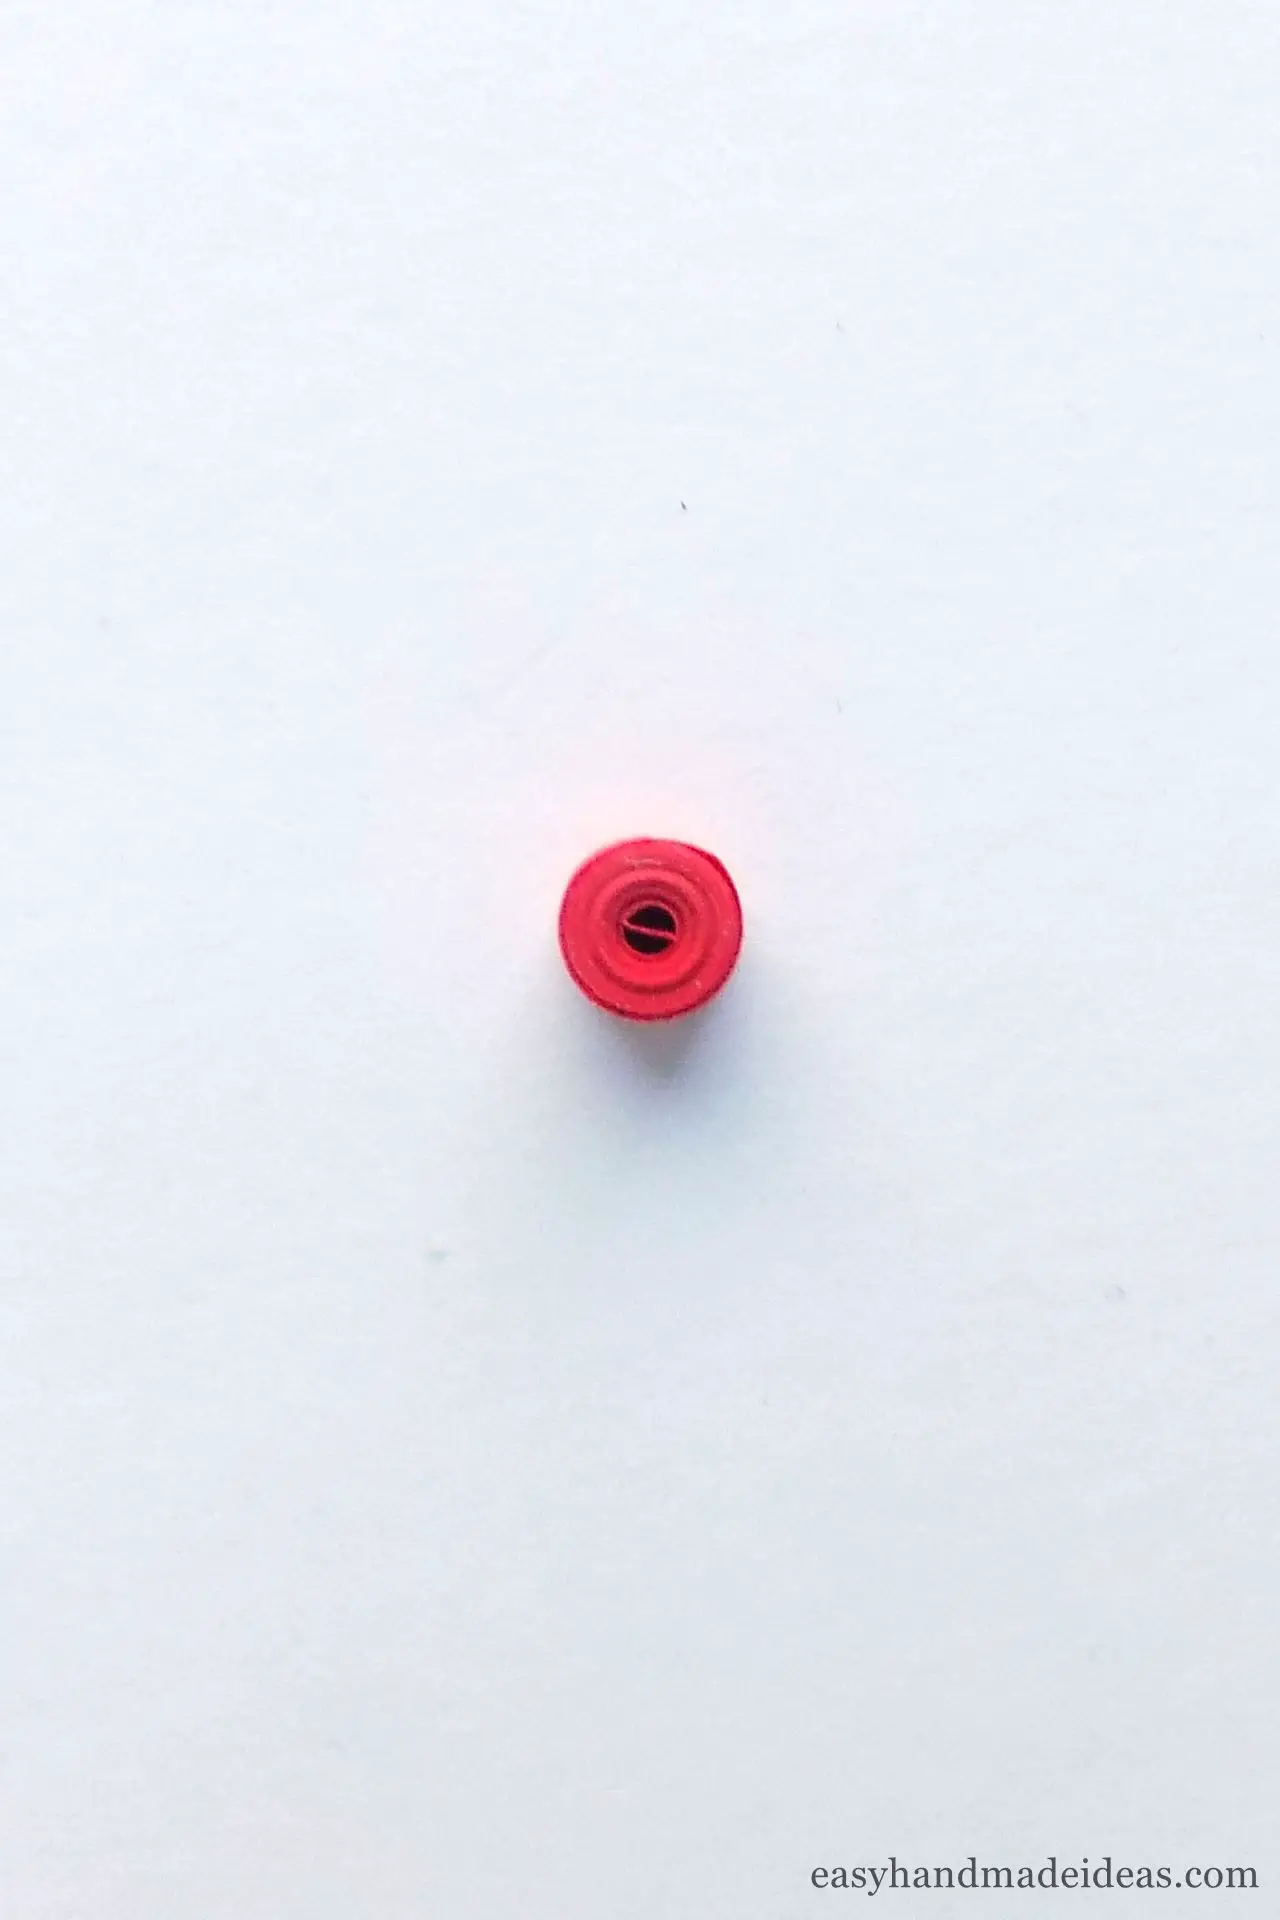
To create the connecting element, take another red colored paper strip and roll it tightly. You’ll have a tight coil (or tight roll) shape. Don’t forget to glue the tip.
Step 7: Connect the 2 drop coils
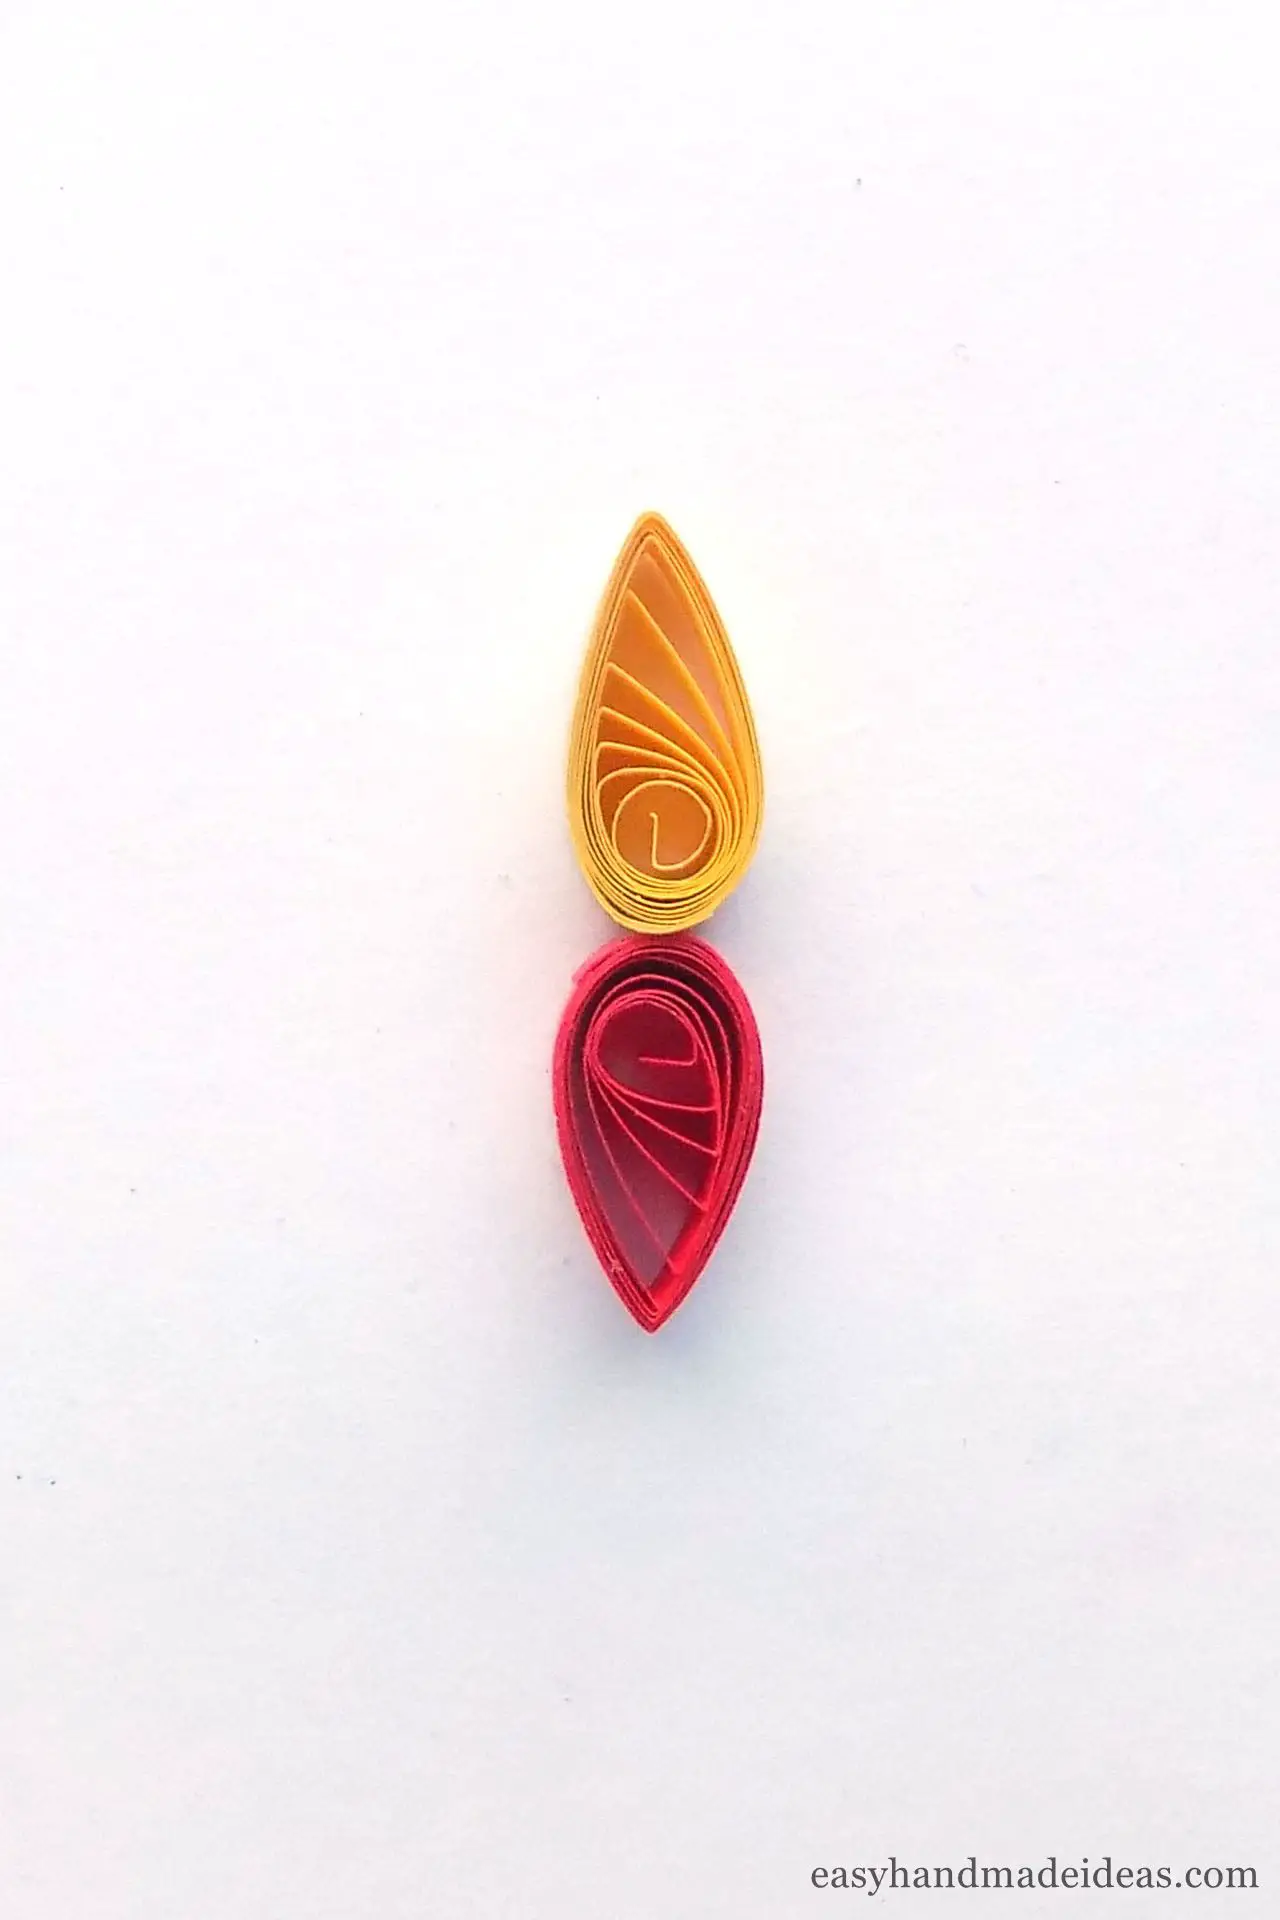
Using a drop of PVA glue, join the red and yellow drop coils with their round sides together.
Step 8: Connect the jump rings and tight coil

Using pliers, unclip the metal jump rings and insert them into the tight coil.
Step 9: Connect the jump rings and fishhook earwires

Add fishhook earwires, then gently reconnect the ends of the jump rings.
Step 10: Assembling the earring
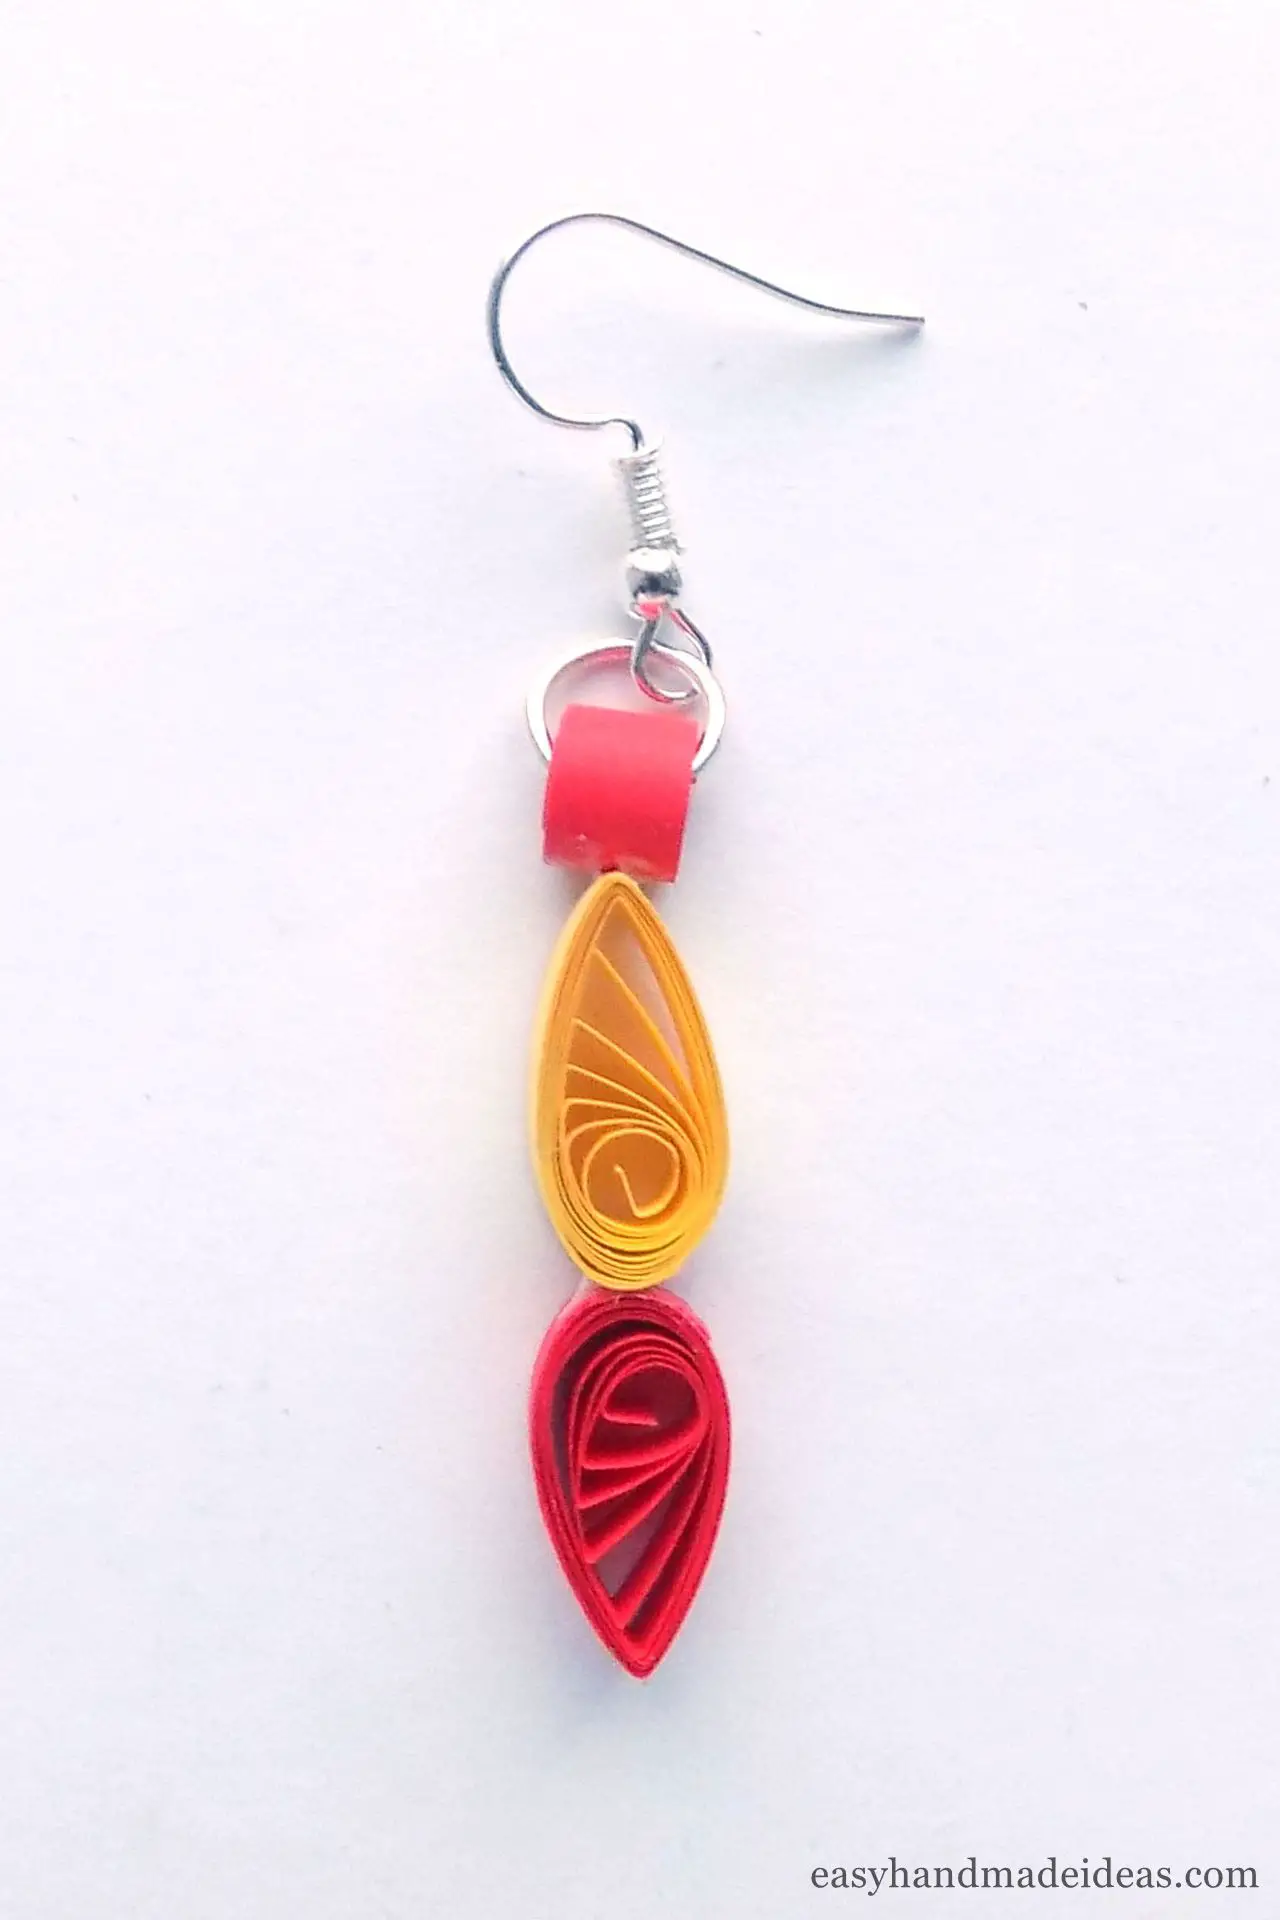
Now glue this piece to the glued drop coils you made earlier.
Step 11: Decorate your earring with a rhinestone
All you have to do is decorate your earring with a decorative rhinestone. Attach it in the center using PVA glue.
Step 12: Make a second earring

Repeat the previous steps to make another quilling earring in the same way.
Supply:
- paper quilling strips;
- findings for earrings (2 jump rings, 2 fishhook earwires);
- decorative rhinestones.
Tools:
- quilling board;
- quilling tool;
- PVA glue;
- pliers.
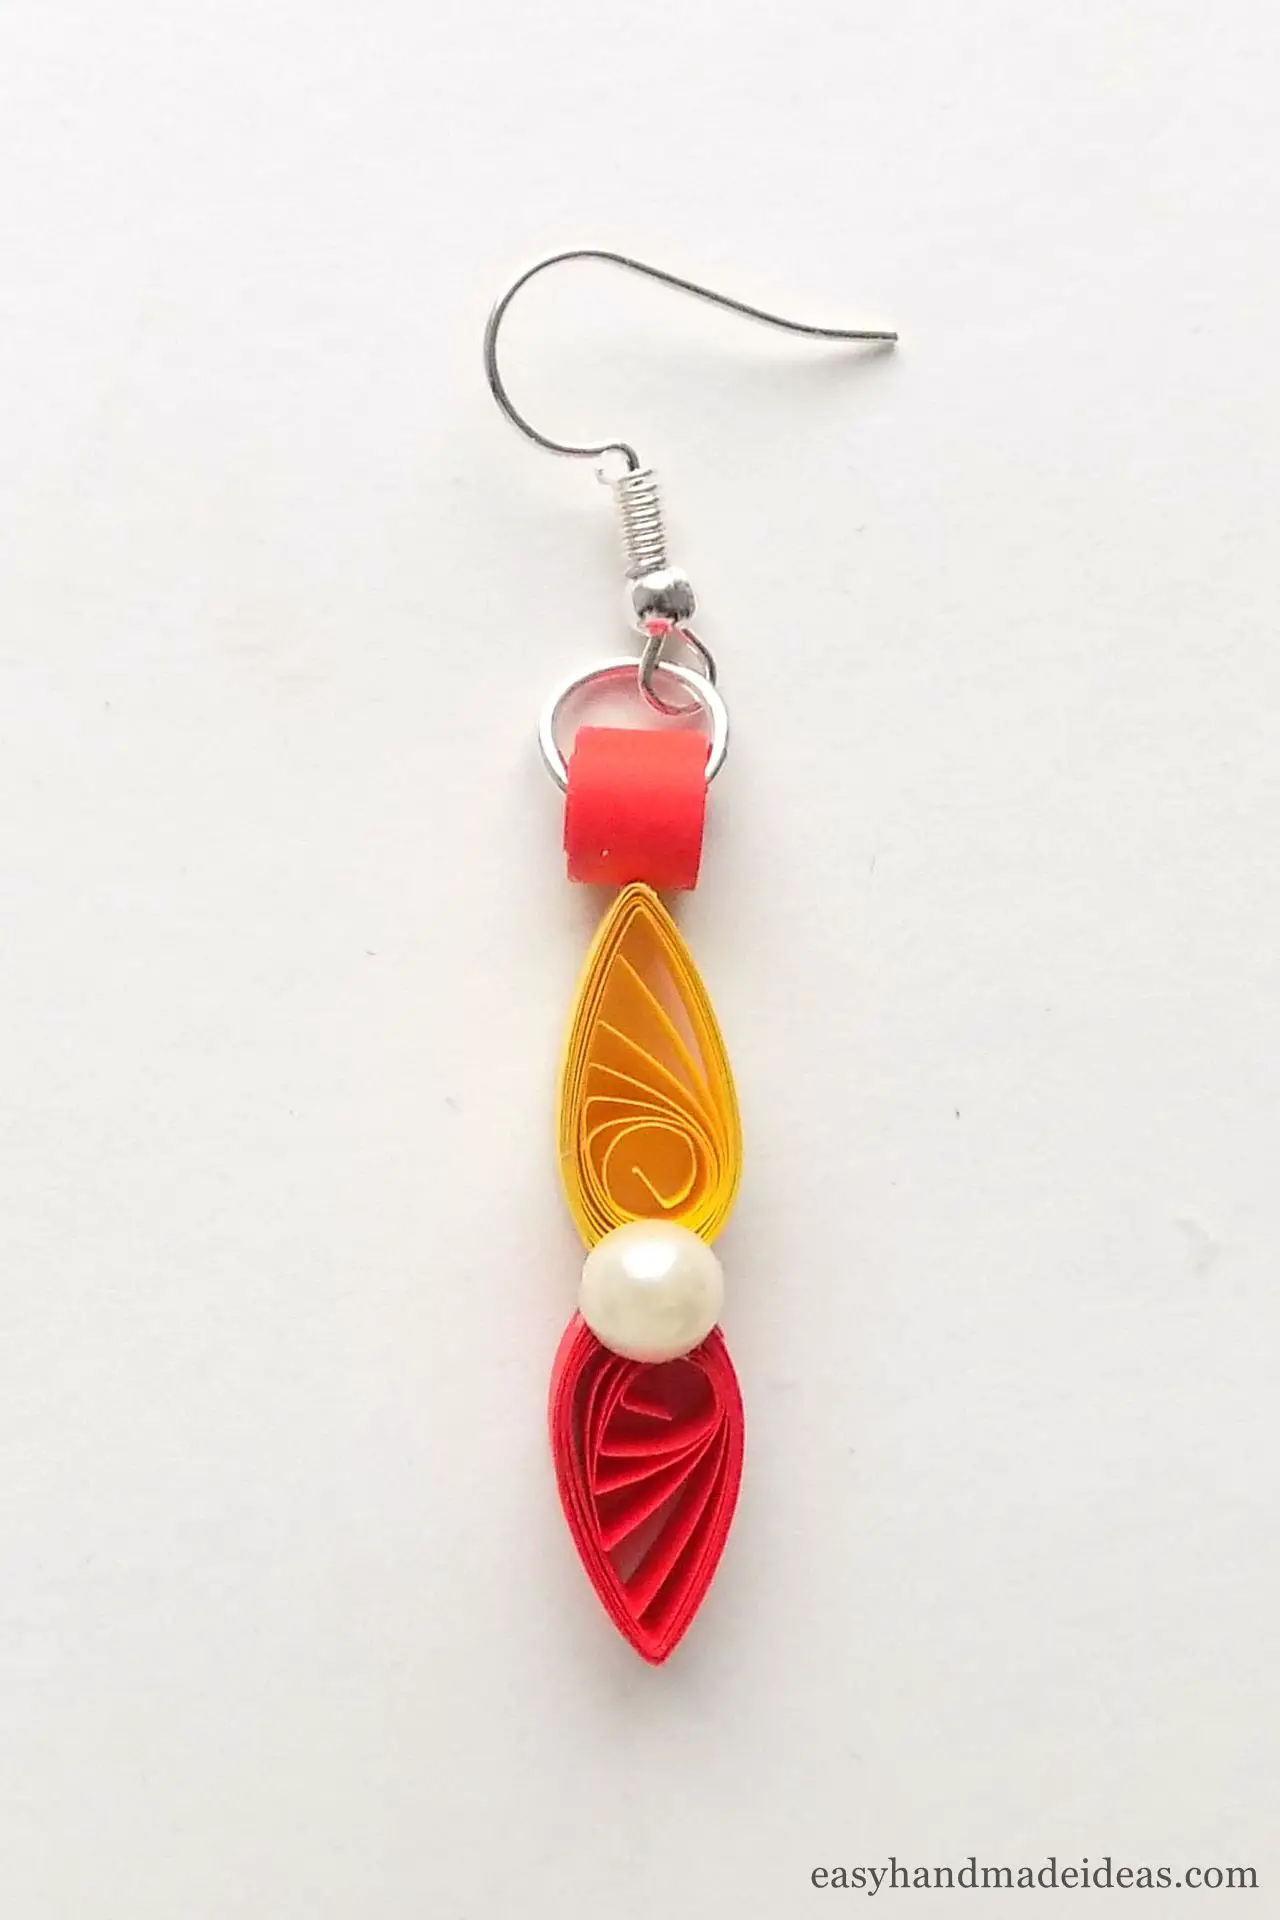
You can make such a decoration in any color scheme, matching it to your outfit.